Module 9 bạn sẽ:
- Triển khai khai RDS
- Cấu hình session collection và dùng RDS
- Thiết lập RemoteApp collection
Exercise 1: Implementing RDS
Exercise 1 bạn sẽ cài RDS, bạn sẽ tạo session collection và thay đổi collection settings. Bạn cũng sẽ cấu hình User Profile Disk using và kết nối Remote Desktop Session Host (RD Session Host) dùng Remote Desktop Web (RD Web) portal.
Bài lab gồn các bước
- Cài RDS.
- Tạo session collection.
- Cấu hình session collection properties.
- Kết nối session collection từ RD Web portal
Bài Lab sử dụng máy Dc1 (domain controller), Pc2.ctl.local (Member server)
Task 1: Cài RDS
- Tại máy pc02 vào Server Manager, tại Server Manager, chọn 2 Add Roles and Features.
- Cửa sổ Before you begin, ấn Next.
- Cửa sổ Select installation type, chọn option Remote Desktop Services installation, ấn Next.

4. Cửa sổ Select deployment type, chọn option Standard deployment ấn Next.
5. Cửa sổ Select deployment scenario, chọn option Session-based desktop deployment, ấn Next.

6. Cửa sổ Review role services, ấn Next.
7. Cửa sổ Specify RD Connection Broker server, chọn pc02.ctl.local, ấn add sang tay phải, ấn Next.
8. Cửa sổ Specify RD Web Access server, chọn pc02.ctl.local, ấn add sang tay phải, ấn Next.
9. Cửa sổ Specify RD Session Host servers, chọn pc02.ctl.local, ấn add sang tay phải, ấn Next
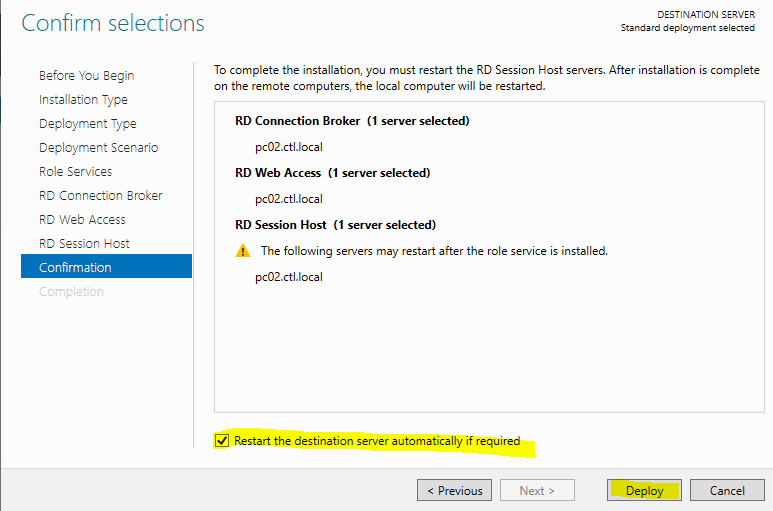
10. Cửa sổ Confirm selections, check vào Restart destination Server…, ấn Deploy
11. Chờ quá trinh cài hoàn tất (Trong quá trình cài sẽ tự khởi động lại và tiếp tục cài--> hơi lâu) ấn Close
Task 2: Tạo Session Collection
Lưu ý: RDS trên Windows Server hỗ trợ 2 loại Session Collections là RD Session Collection, và RemoteApp Session Collection. Tuy nhiên theo mặc định bạn không thể chạy 2loại session collection trên cùng RD Session Host. Trong bài lab này bạn sẽ cấu hình RD Session Host collection trước, kiểm tra kết quả. Sau đó tạo RemoteApp Session collection.
Trước khi thực hiện Task2, tại máy Dc1 vào Run gõ lệnh DSA.MSC, tạo 2 user admin1 và admin2, tạo Security Group IT, cho admin1 và admin2 là thành viên Group IT
- Tại máy PC02, vào Server Manager, Bên trái chọn Remote Desktop Service và chọn Collections.
- Cửa sổ COLLECTIONS bên phải,chọn TASKS, và chọn Create Session Collection.
- Cửa sổ Before you begin ấn Next.
- Cửa sổ Name the collection, trong phần Name nhập vào IT, ấn Next.
- Cửa sổ Specify RD Session Host servers, chọn Pc02.ctl.local ấn Add sang tay phải và ấn Next.
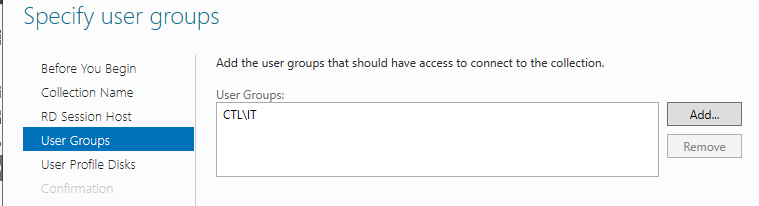
- Cửa sổ Specify user groups, chọn CTL\Domain Users, ấn Remove và ấn Add.
- Trong phần Enter the object names to select, nhập vào group IT, ấn Check Names, và OK, ấn next.
- Cửa sổ Specify user profile disks, bỏ checkbox Enable user profile disks ấn Next.
- Ấn Next và Create. (chờ hoàn tất), ấn Close.
Task 3: Cấu hình Session Collection Properties
Cấu hình device redirection settings:
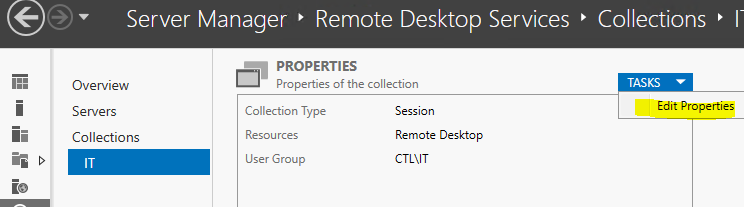
- Tại PC02, chọn IT collection vừa tạo, cửa sổ PROPERTIES, chọn TASKS, và chọn Edit Properties.
2. Cửa sổ Session Collection, bên trái chọn Client Settings, kiểm tra Audio and video playback và Audio recording đã được chọn.
3. Bên trái Chọn User Profile Disks, kiểm tra User Profiles Disks đã bỏ chọn, ấn OK
4. Tại máy PC02 vào PowerShell (runas Administrator) thực hiện lệnh sau để kiểm tra
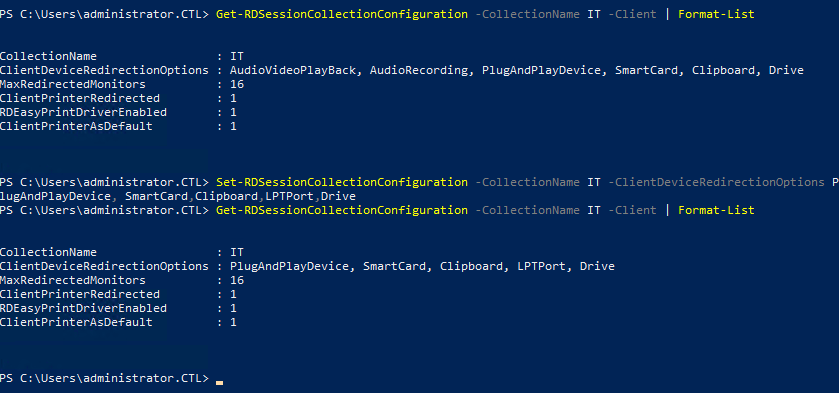
Get-RDSessionCollectionConfiguration –CollectionName IT –Client | Format-List
quan sát thấy có AudioVideoPlayBack, AudioRecording, PlugAndPlayDevice, SmartCard, Clipboard, Drive
5. Tại Powershell tiếp tục thực hiện lệnh sau
Set-RDSessionCollectionConfiguration –CollectionName IT –ClientDeviceRedirectionOptions PlugAndPlayDevice, SmartCard,Clipboard,LPTPort,Drive
6. Thực hiện lại lệnh:
Get-RDSessionCollectionConfiguration –CollectionName IT –Client | Format-List
quan sát thấy chỉ có PlugAndPlayDevice, SmartCard, Clipboard, LPTPort, Drive
Cấu hình User Profile Disks for IT collection:
- Tại máy Dc1 vào run gõ lệnh cmd, và Enter.
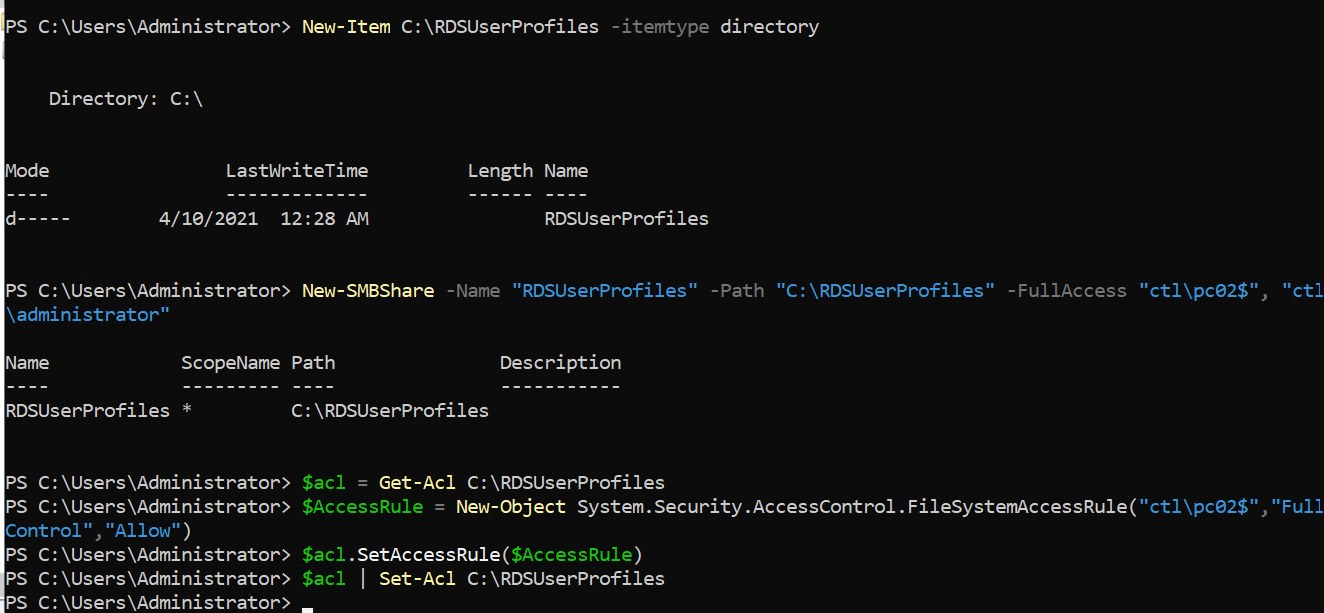
- Tại cửa sổ cmd gõ lệnh Powershell và lần lượt thực hiện các lệnh sau để tạo folder C:\RDSUserProfiles trên máy DC1 và share full quyền cho PC02 và administrator.
- New-Item C:\RDSUserProfiles -itemtype directory
- New-SMBShare –Name “RDSUserProfiles” –Path “C:\RDSUserProfiles” –FullAccess “CTL\pc02$”, “CTL\administrator”
- $acl = Get-Acl C:\RDSUserProfiles
- $AccessRule = New-Object System.Security.AccessControl.FileSystemAccessRule(“CTL\pc02$”,”FullControl”,”Allow”)
- $acl.SetAccessRule($AccessRule)
- $acl | Set-Acl C:\RDSUserProfiles
3. trở lại máy PC02, chọn IT collection, cửa sổ PROPERTIES, chọn TASKS, và chọn Edit Properties.
4. Cửa sổ Session Collection, menu trái chọn User Profile Disks, check chọn Enable user profile disks.
5. Trong phần Location nhập vào \\DC1\RDSUserProfiles. trong phần Maximum size (in GB), nhập vào 10, ấn OK

Task 4: Thực hiện Session Collection Dùng RD Web portal
- Tại máy host, vào Microsoft Edge https://pc02.ctl.local/rdweb cửa sổ Your connection isn’t private ấn Advanced và chọn Continue to pc02.ctl.local (unsafe)
- Cửa sổ RD Web Access, trong phần Domain\user nhập vào ctl\admin1 và passord ấn Sign in.
- Cửa sổ RD Web Access, trong phần Current folder: /, chọn IT, download file .RDP về ấn thực thi file .RDP.
- Cửa sổ Remote Desktop Connection, ấn Connect, thực hiện connect vào Pc2 thành công, sign out pc2.
- Đóng cửa sổ Microsoft Edge.

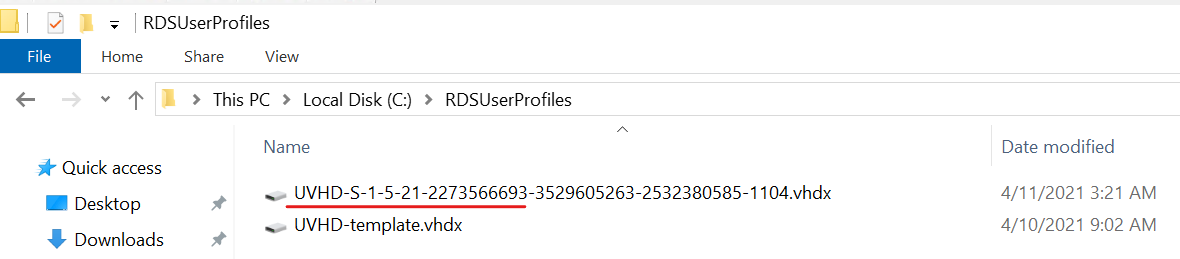
Task 5. Kiểm tra User Profile Disk
- Trở lại máy DC1 vào folder C:\RDSUserProfiles quan sát thất có file .vhdx với tên file có dạng SID (S-1-5-21)
Exercise 2: Thiết lập RemoteApp collection
Task 1: Tạo và Cấu Hình RemoteApp Collection
- Tại máy PC02, vào Server Manager, Bên trái chọn Remote Desktop Service và chọn IT.
- Trong phần REMOTEAPP PROGRAMS bên phải,chọn TASKS, và chọn Publish RemoteApp Programs.

3. Cửa sổ Select RemoteApp programs, check chọn Paint và WordPad ấn Next.
4. Cửa sổ Confirmation, ấn Publish. Chờ hoàn tất, ấn Close.
5. Quan sát trong phần REMOTEAPP PROGRAMS đã có Paint và WordPad.

Task 2: Run RemoteApp from RD Web portal
- Tại máy host, vào Microsoft Edge https://pc02.ctl.local/rdweb cửa sổ Your connection isn’t private ấn Advanced và chọn Continue to pc02.ctl.local (unsafe)
- Cửa sổ RD Web Access, trong phần Domain\user nhập vào ctl\admin1 và passord ấn Sign in.
- Cửa sổ RD Web Access, trong phần Current folder: /, chọn Wordpad, download file .RDP về ấn thực thi file .RDP, ấn Connect
- Remote vào Wordpad trên PC02 thành công.
- Tương tự thực hiện remote vào Paint.

Hoàn tất bài Lab