Bạn là Security Administrator hay Compliance Administrator chịu trách nhiệm Data Loss Prevention (DLP) policy giúp bảo vệ thông tin nhạy cảm và ngăn chặn sự cố ý tiết lộ thông tin
Bài lab hướng dẫn bạn dùng Security & Compliance Center tạo Data Loss Prevention policy bảo vệ dữ liệu quan trọng, DLP policy sẽ thông báo cho user xem họ có muốn chia sẽ dữ liệu này hay không?

Task 1 – Tạo DLP Policy Với Custom Settings
- Tại trình duyệt truy cập trang https://compliance.microsoft.com. bằng quyền têncủabạn@customdomain
- Màn hình Microsoft Purview, Menu trái chọn Data loss prevention, và chọn Policy, ấn + Create a policy
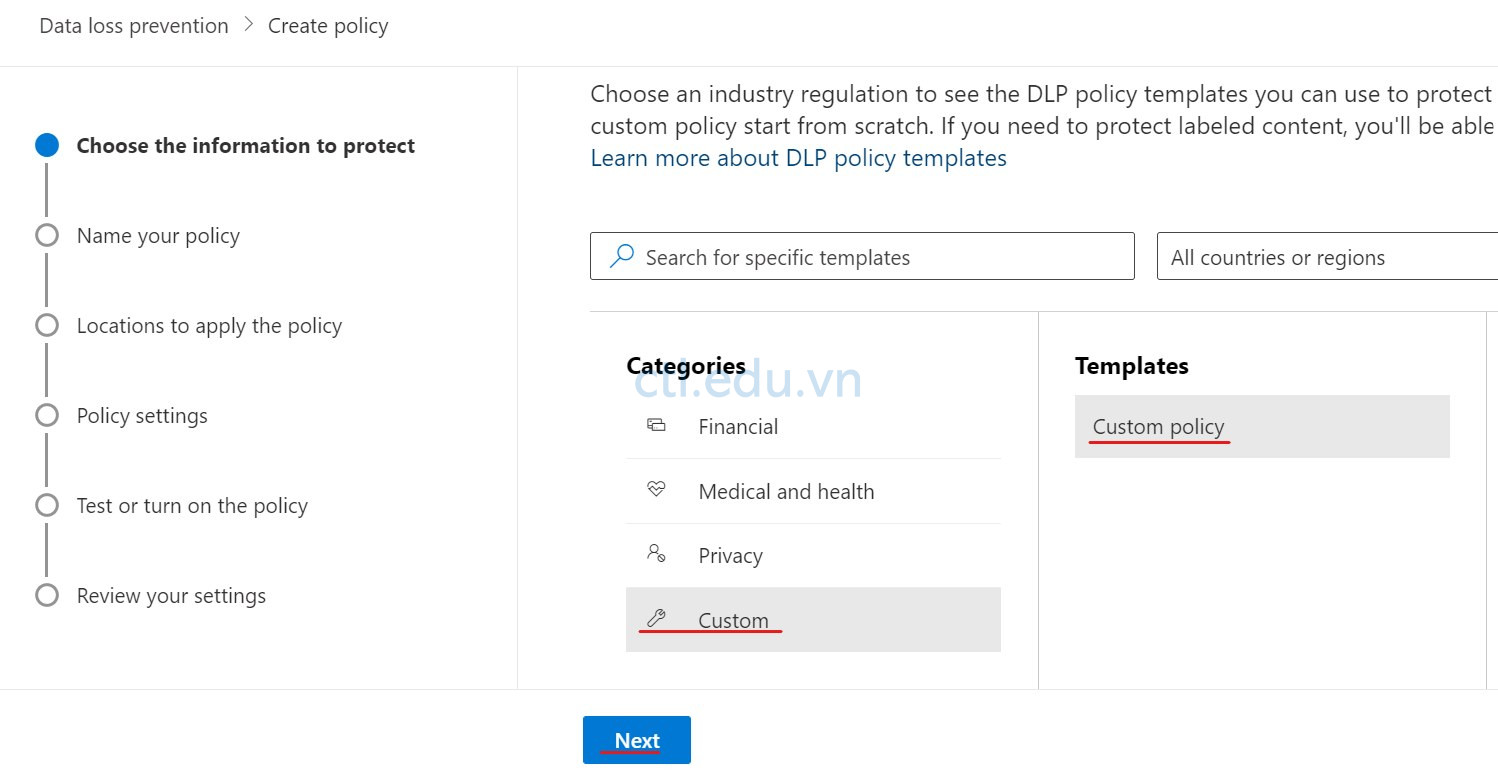
- Cửa sổ Start with a template or create a custom policy, chọn Custom và chọn Custom policy ấn Next.
4. Cửa sổ Name your policy, trong phần Name nhập vào IP Address DLP Policy và trong phần Description nhập vào Protect IP addresses from being shared ấn Next.
5. Cửa sổ Assign admin units (preview), ấn Next
6. Cửa sổ Choose locations to apply the policy, chọn On cho Exchange email, SharePoint sites, OneDrive accounts, Teams chats and channel messages ấn Next.
7. Cửa sổ Define Policy settings, chọn option Create or customize advanced DLP rules ấn Next.
8. Cửa sổ Customize advanced DLP rules, ấn +Create rule.
9. Cửa sổ Create rule page, nhập các thông tin sau:
- Name: IP Address rule
- Description: Email contains 2 IP address
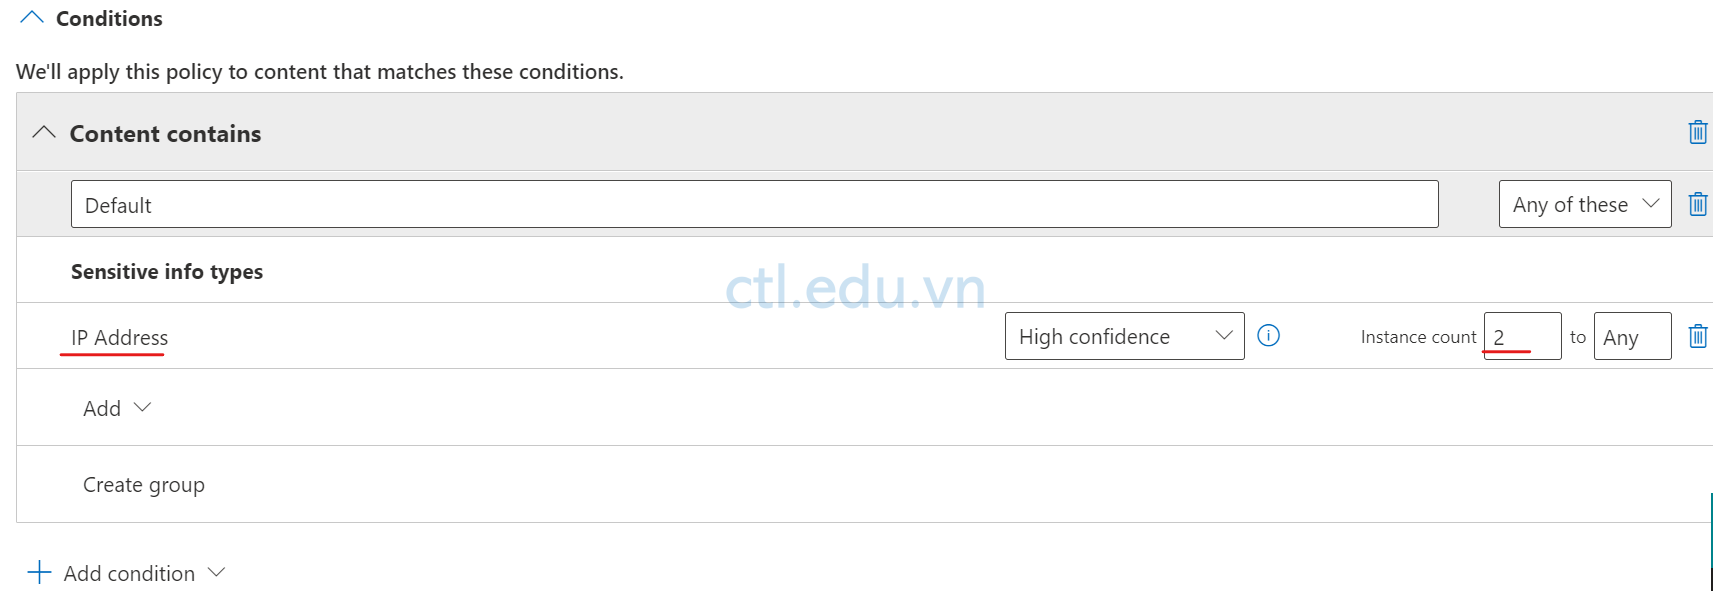
- Trong phấn Conditions, chọn +Add condtion, chọn Content contains và nhập các thông tin sau:
- Tại field Content contains chọn Add và chọn Sensitive info types
- Cửa sổ Sensitive info types, tìm và chọn IP Address ấn Add.
- trong phần Instance count nhập vào 2
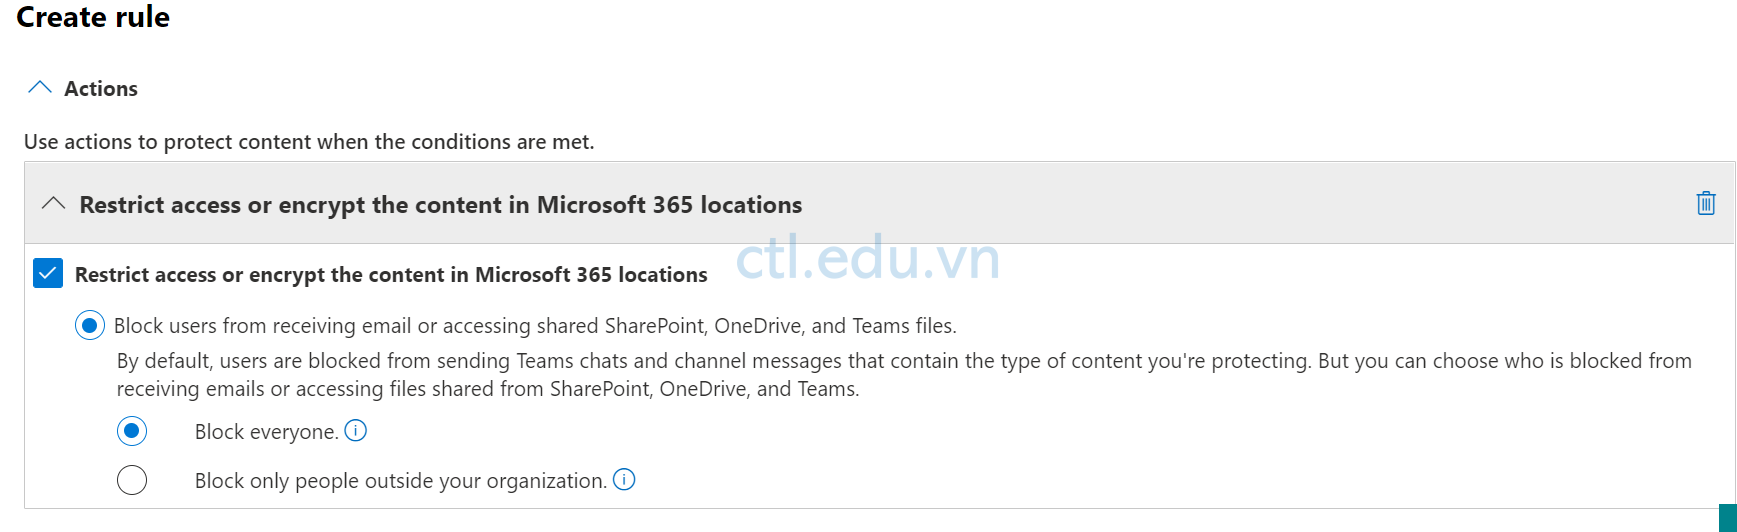
- Trong phần Actions section, chọn + Add an action. và cho Restrict access or encrypt the content in Microsoft 365 locations
- Chọn option Block Everyone.
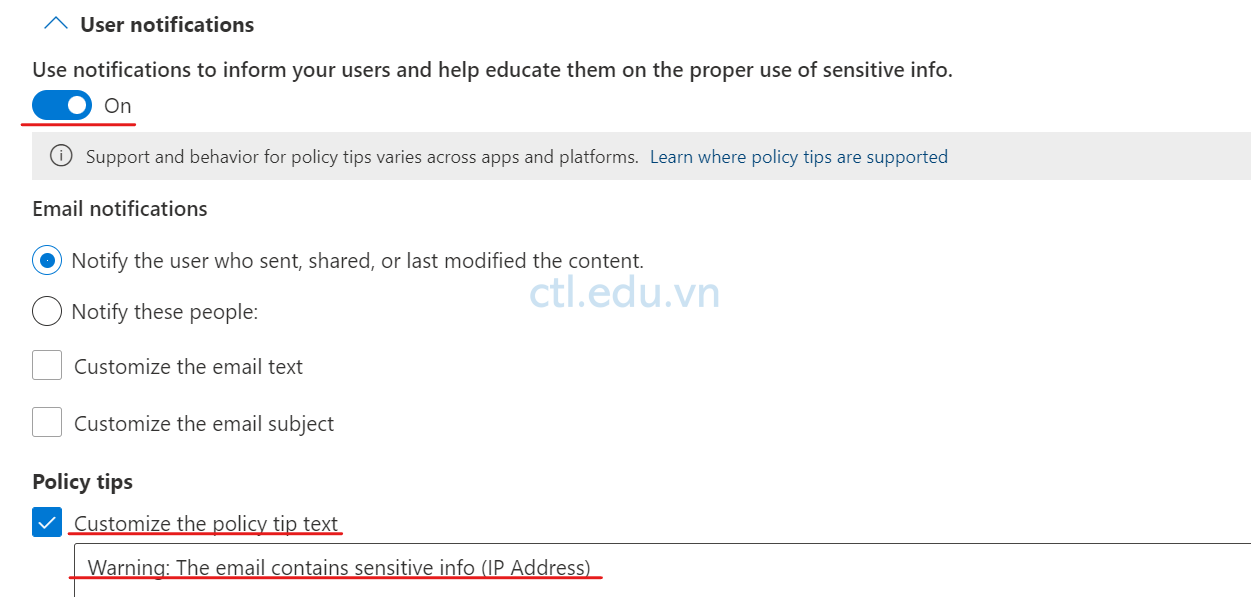
- Trong phần User notifications, Chọn On phần Use notifications to inform your users and help educate them on the proper use of sensitive info.
- Check vào Customize the policy tip text và nhập vào Warning: The email contains sensitive info (IP Address),
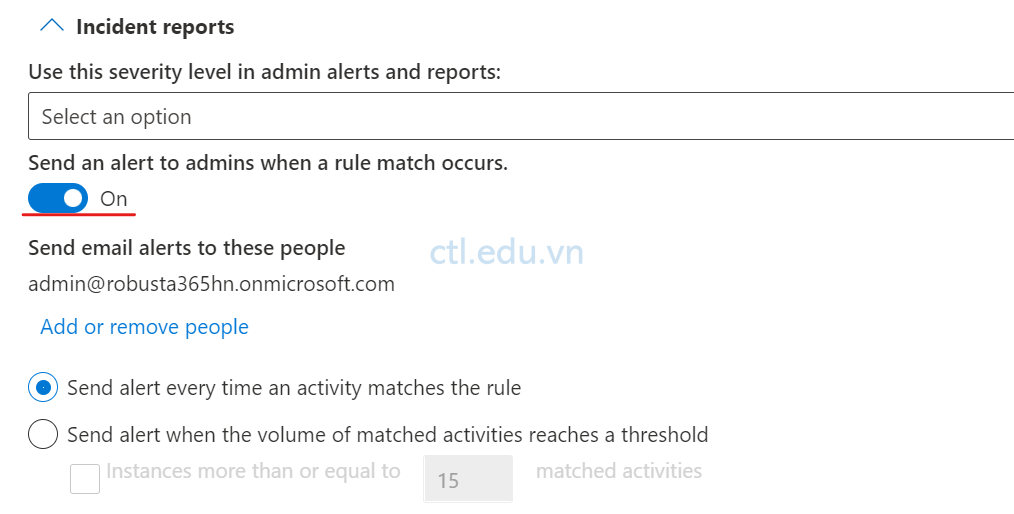
- Trong phần Incident reports, chọn ON phần Sent an alert to admins when a rule match occurs.
- Ấn Save
10. Màn hình Customize advanced DLP rules, ấn Next.
111. Màn hình Test or turn on the policy, chọn Turn it on right away và ấn Next.
12. Màn hình Review your policy and create it, ấn Submit.
Task 2 – Kiểm Tra DLP Policy for Sensitive Emails
Task này bạn sẽ gửi 2 email cho user5, một mail có nội dung chứa 1 địa chỉ Ip, và một email có nội dung chứa 2 IP, User5 chỉ nhận được 1 mail do ảnh hưởng của DLP Policy
- Trở lại https://outlook.office365.com của user têncủabạn@customdomain
- Tại Outlook, chọn +New message, tạo email mới gửi cho user5@customdomain có nội dung: I will configure this IP address: 192.168.0.1.
- Tiếp tục ấn +New message, tạo email mới gửi cho user5@customdomain có nội dung: Test IP address 192.168.0.1 and then IP address 172.16.0.1.
- Sau khi gửi mail xong bạn sẽ nhận được 2 email từ OutLook gửi. một mail thông báo email của bạn vi phạm chính sách, một mail thông báo Message Blocked.
- Tại trình duyệt khác truy cập vào trang https://outlook.office365.com bằng user user5@customdomain, User5 chỉ nhận được email đầu tiên do bạn gửi, email thứ 2 đã bị Block.
Hoàn tất bài lab.