Lab Microsoft Azure Module 3 hướng dẫn bạn sử dụng Shared Access Signature để cấp quyền tạm thời truy cập vào storage account mà không cần đăng nhập vào Azure. Bài Lab cũng hướng dẫn bạn dùng portal, Power Shell và CLI để tạo Azure Storage. Tạo và sử dụng Blob Storage và File Share.
Exercise 1. Tạo Storage Accounts
1. Tại Azure portal, menu trái All services, trong phần search nhập và chọn Storage Accounts.
2. Màn hình Storage Accounts ấn Add
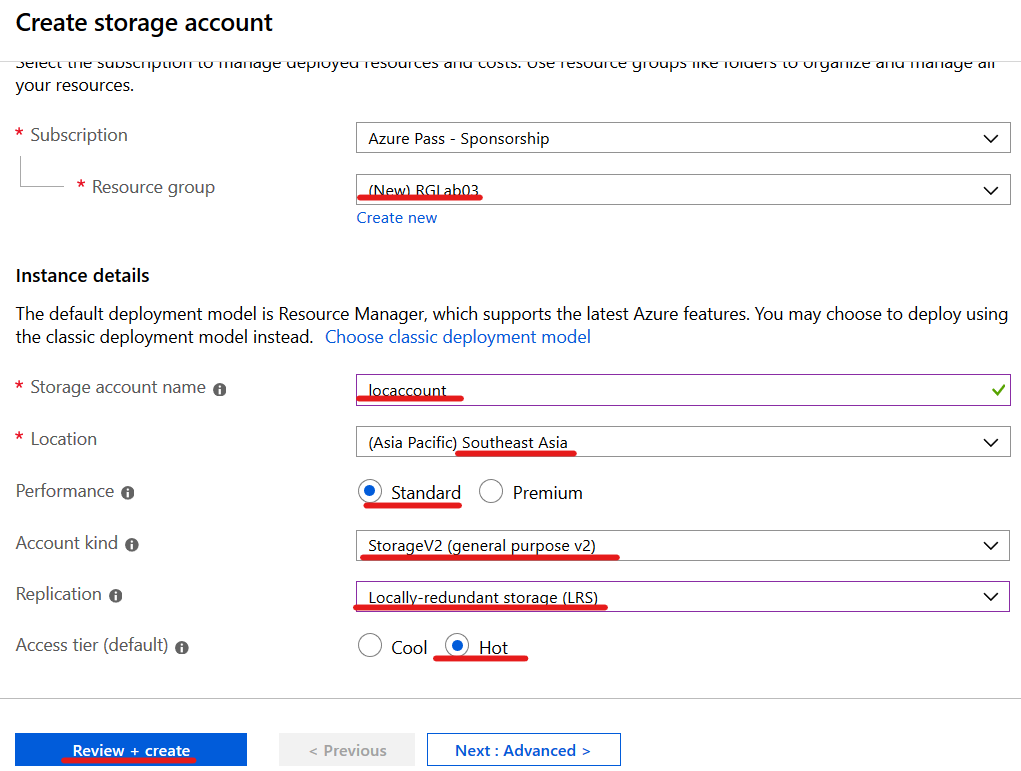
3. Màn hình Create Storage Account nhập các thông tin sau:
- Subscription: chọn subscription của bạn.
- Resource group: ấn Create new, nhập vào RGLab03 ấn Ok
- Storage account name: locaccount (từ 3 – 24 ký tự, chỉ dùng chữ thường và số)
- Location: chọn Southeast Asia,
- Performance: Standard
- Account kind: StorageV2 (general-purpose v2)
- Replication: Locally redundant storage (LRS)
- Access tier: Hot
4. Ấn Review + Create và Create
1. Tại portal click vào cloud shell, Màn hình trái cloud shell chọn PowerShell
2. Thực hiện lệnh Get-AzLocation | select Location để xem tên của các location
3. Gán biến: $location = “southeastasia”
4. Gán biến: $resourceGroup = “RGLab03_2”
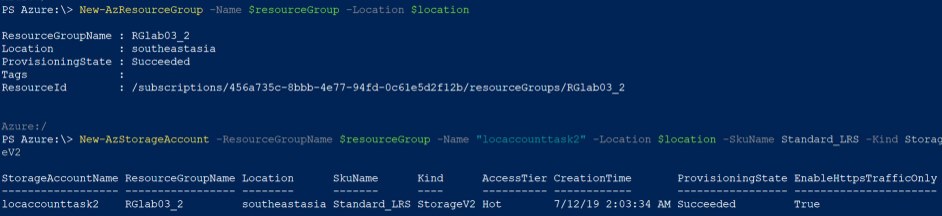
5. Tạo Resource Group dùng lệnh:
New-AzResourceGroup -Name $resourceGroup -Location $location
6. Tạo Account Storage dùng lệnh:
New-AzStorageAccount – ResourceGroupName $resourceGroup -Name “locaccounttask2” -Location $location -SkuName Standard_LRS -Kind StorageV2
1. Tại máy local vào Start chọn PowerShell (x86)
2. Tại PowerShell thực hiện lệnh Az login, đăng nhập vào email và password bạn đăng ký azure
3. Thực hiện lệnh az account list-locations –query “[].{Region:name}” –out table xem tên tên Region (location).
4. Thực hiện lệnh az group create –name RGlab03_3 –location southeastasia tạo Resource Group RGlab03_3
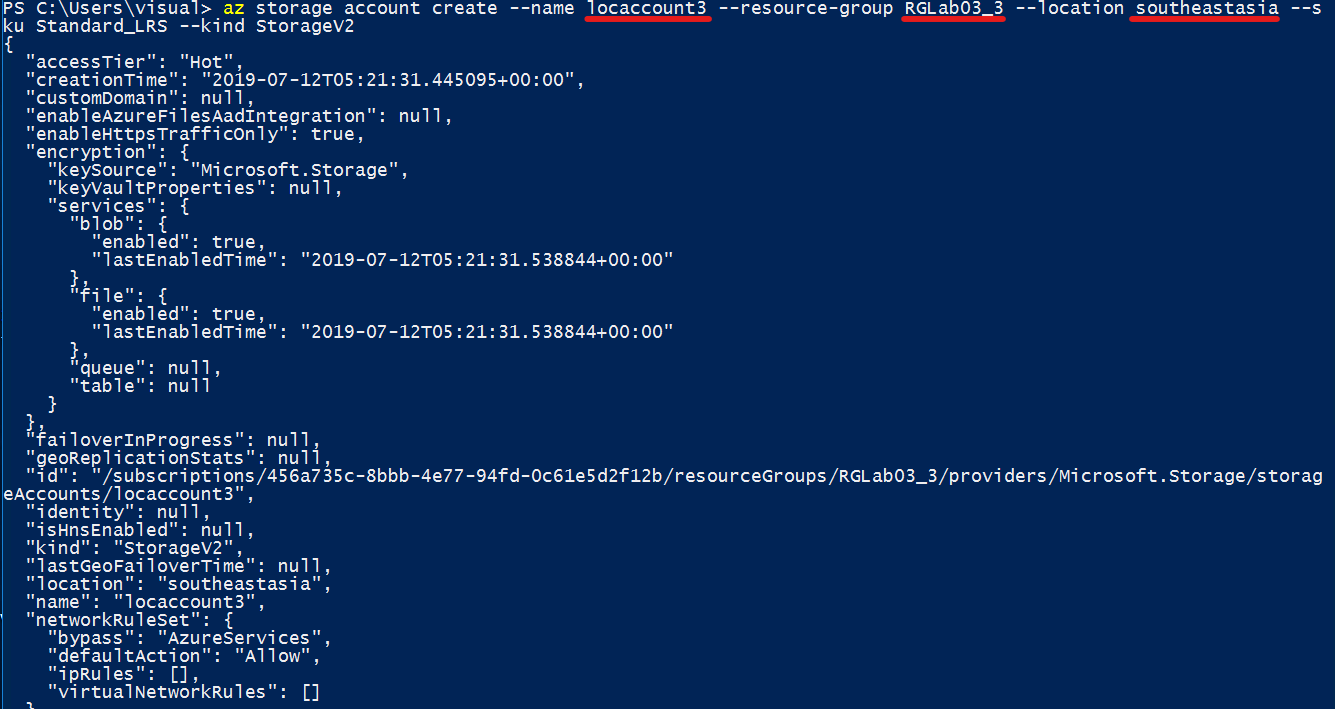
5. Thực hiện lệnh sau để tạo Account Storage:
az storage account create –name locaccount3 –resource-group RGLab03_3 — location southeastasia –sku Standard_LRS –kind StorageV2
6. Trở lại Azure Portal, menu trái chọn Storage accounts, kiểm tra các Storage account đã tạo.
Exercise 2. Storage Explorer
1. Truy cập https://azure.microsoft.com/en-us/features/storage-explorer/ chọn Download Storage Explorer Free
2. Thực thi file vừa download, thực hiện cài Storage Explorer.
1. Tại Storage Explorer, chọn Manage Accounts (icon thứ 2 góc trên bên trái).
2. Kiểm tra xem bạn đã đăng nhập chưa, nếu chưa hay sign in vào email và password bạn đã đăng ký Azure.
3. Sau khi đăng nhập thành công, chọn Topggle Explorer (icon thứ 1 góc trên bên trái), sẽ thấy Account email của bạn và các Storage accounts bạn đã tạo.
4. Trở lại Manage Accounts (icon thứ 2 góc trên bên trái), chọn account bạn vừa đăng nhập ấn remove.
1. Tại Azure portal, menu trái chọn storage accounts, và chọn một storage account bạn đã tạo ở Exercise1.
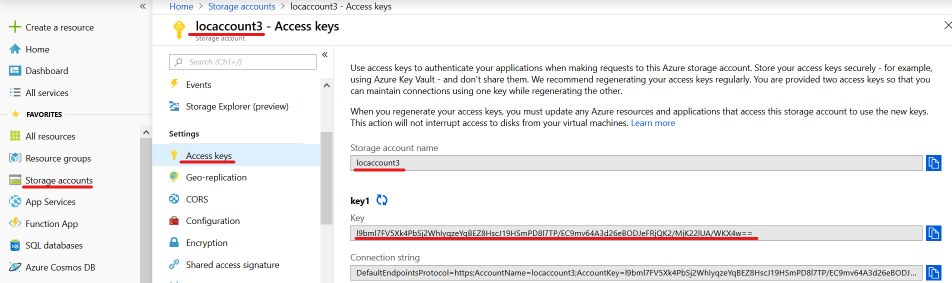
2. Menu trái chọn Access keys để Storage Explorer kết nối đến Storage, bạn cần phải có giá trị của Storage account name và Key1.
3. Trở lại Storage Explorer, chọn Manage Accounts (icon thứ 2 góc trên bên trái), và chọn Add an account.
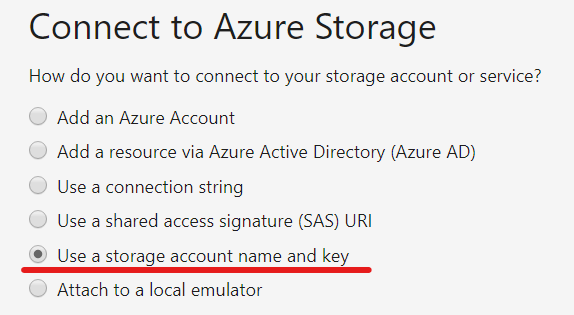
4. Màn hình Connect to Azure Storage, chọn option Use a storage account name and key, Ấn Next.
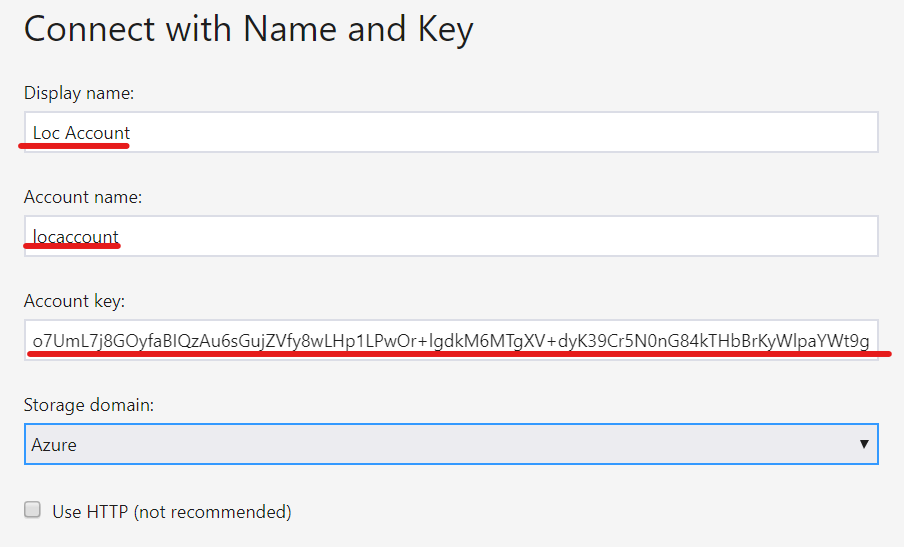
5. Màn hình Connect with Name and Key nhập các thông tin sau:
- Display name: nhập vào tên hiển thị (tên account của bạn)
- Account name: paste Storage account name bạn đã xem ở bước 2.
- Account key: paste key1 bạn đã xem ở bước 2
- Storage domain: chọn Azure
- ấn next
(Nếu thấy xuất hiện lỗi hay bỏ qua lỗi này)
6. Chọn Topggle Explorer (icon thứ 1 góc trên bên trái), sẽ thấy storage account bạn vừa kết nối. (có thể ấn Refresh để thấy kết quả)
Exercise 3. Blob Storage
1. Tại Azure portal, menu trái chọn storage account, chọn storage account mà bạn đã tạo.
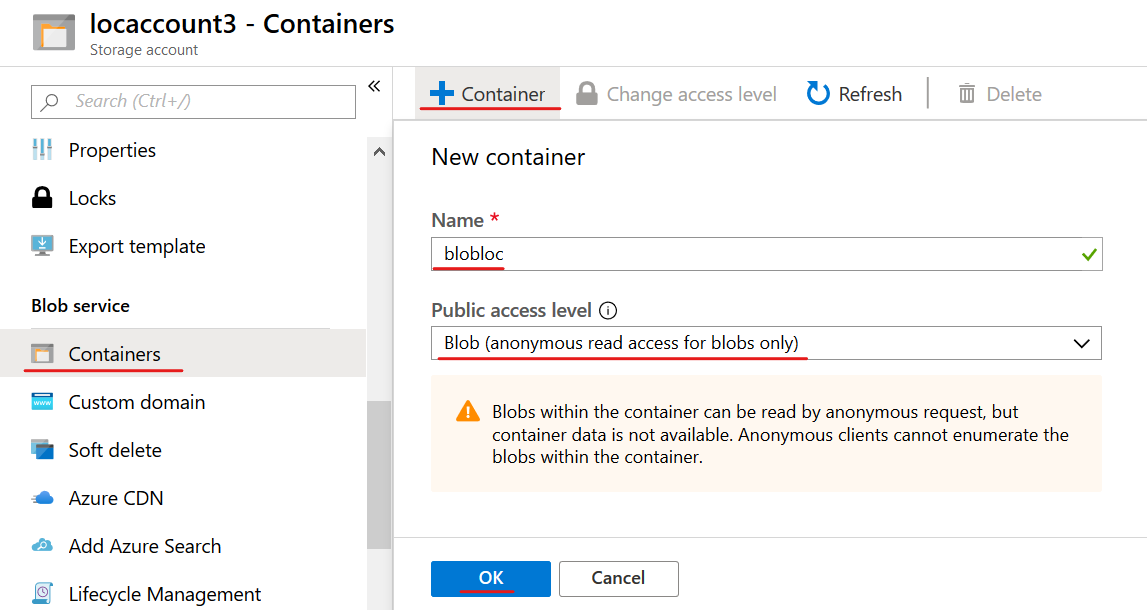
2. Menu trái chọn Container và ấn + Container.
3. Trong phần Name: nhập vào tên container (chỉ dùng chữ thường , số và dấu trừ (-))
4. Trong phần public access level: chọn Blob, ấn OK
1. Chọn Blob vừa tạo, ấn Upload.
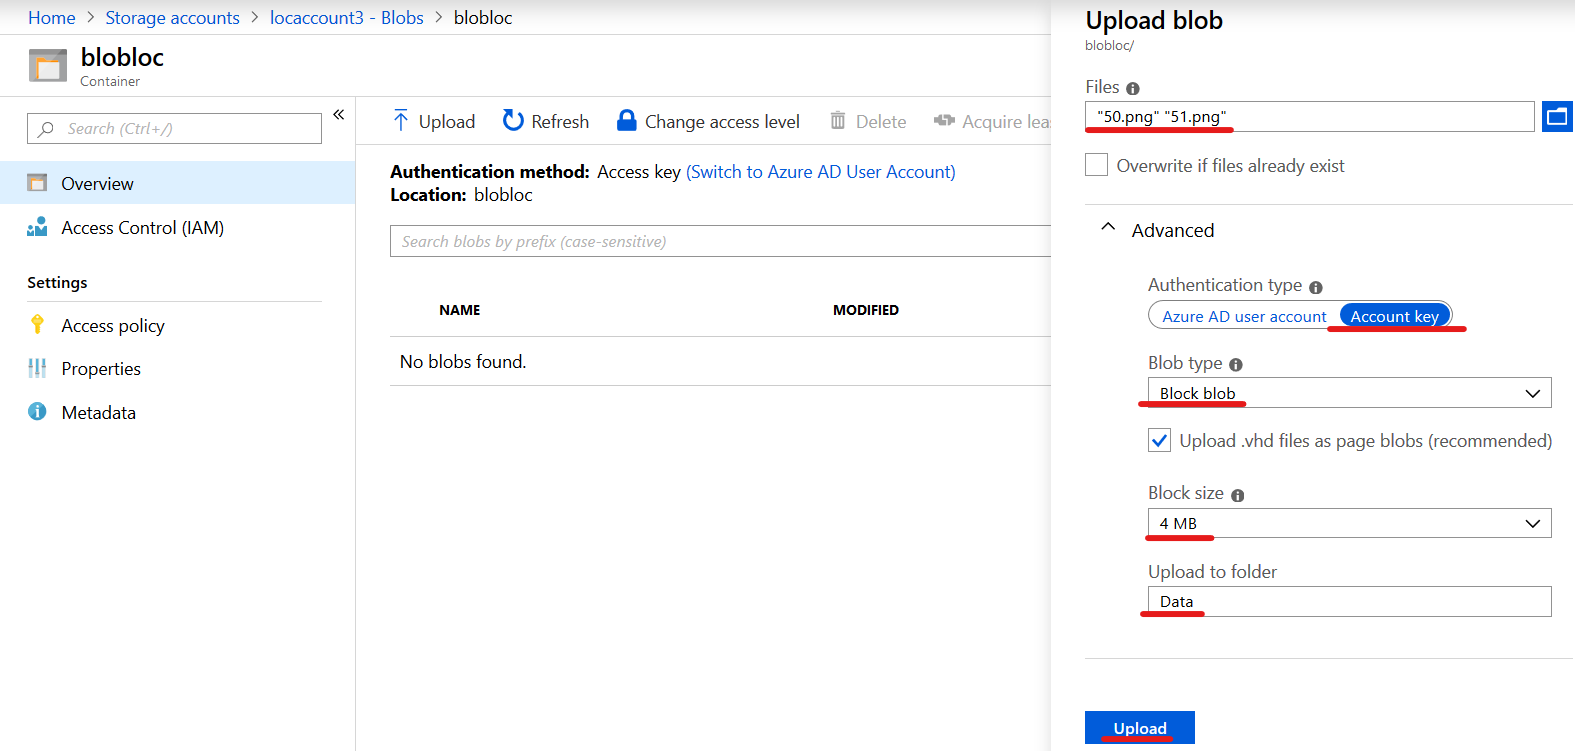
2. Màn hình Upload Blob, chọn Advanced,
- Authentication type: chọn Account Key,
- Blob type: chọn Block Blob,
- Block size: 4MB,
- Upload to folder: Data,
- Trong phần File ấn Browse, chọn file cần upload, ấn Upload
3. Xem dữ liệu vừa Upload
1. Tại Azure Portal, Chọn Blob bạn vừa upload.
2. Phải chuột lên file cần download chọn download.
Exercise 4. File Shares
1. Tại Azure Portal, menu trái chọn storage accounts, chọn một account của bạn đã tạo.
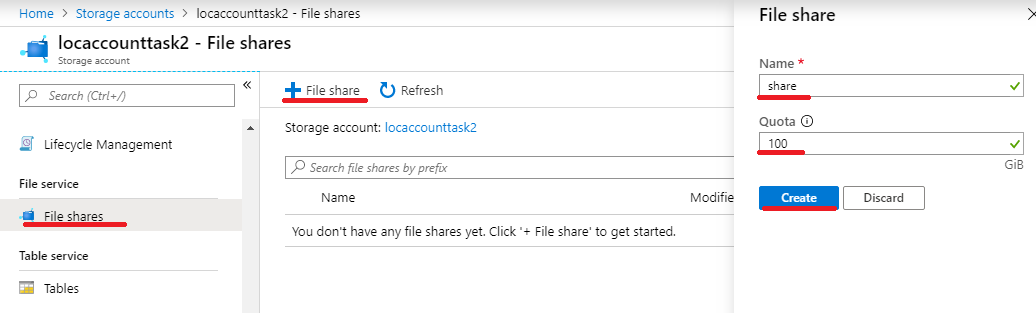
2. Menu trái chọn file shares, ấn File Share.
3. Cửa sổ File share, trong phần name nhập vào share (tên share chỉ sử dụng chữ thường, số và dấu trừ), Quota: nhập vào 100GiB ấn Create
4. Chọn Share vừa tạo chọn upload, chọn các file của bạn cần upload
1. Tại File Share, chọn Create Snapshot
2. Sau đó chọn View Snapshots kiểm tra snapshot đã được tạo.
3. Trở về File share, xóa vài file mà bạn đã upload.
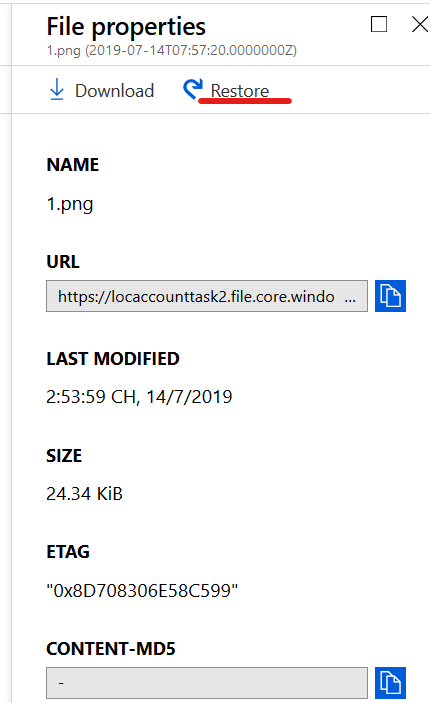
4. Trở loại View Snapshots, chọn file cần phục hồi ấn Restore.
5. Trở về File share, kiểm tra file đã được phục hồi.
1. Tại Azure Portal, menu trái chọn storage accounts, chọn một account của bạn đã tạo.
2. Menu trái chọn Access Keys, copy giá trị của Storage account name và key 1
3. Vào PowerShell thực hiện lệnh sau và thay thế <storage-account-name> và <storage-account-key> bằng Storage account name và key 1 bạn đã xem ở bước 2
- $storageContext = New-AzStorageContext <storage-account-name> <storage-account-key>
- $share = New-AzStorageShare share123 -Context $storageContext (lưu ý share123 chỉ dùng chữ thường, số và dấu trừ)
4. Màn hình storage accounts, menu trái chọn File shares, Kiểm tra thấy files share share123 đã được tạo.
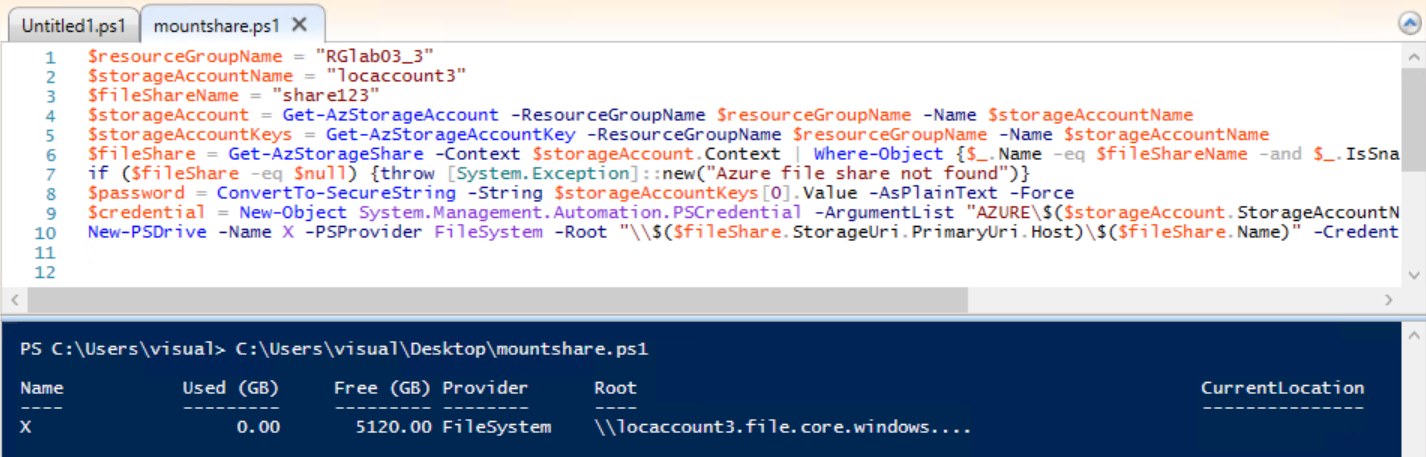
1. Tạo file mountshare.ps1 có nội dung sau và lưu ý thay các giá trị <your- resource-group-name> bằng resource group name , <your-storage-account- name> bằng storage account name, <your-file-share-name> bằng file share name. (file có trong folder Allfiles)
- $resourceGroupName = “your-resource-group-name”
- $storageAccountName = “your-storage-account-name“
- $fileShareName = “your-file-share-name“
- $storageAccount = Get-AzStorageAccount -ResourceGroupName $resourceGroupName -Name $storageAccountName
- $storageAccountKeys = Get-AzStorageAccountKey -ResourceGroupName $resourceGroupName -Name $storageAccountName
- $fileShare = Get-AzStorageShare -Context $storageAccount.Context | Where- Object { $_.Name -eq $fileShareName -and $_.IsSnapshot -eq $false }
- if ($fileShare -eq $null) { throw [System.Exception] : : new(“Azure file share not found”) }
- $password = ConvertTo-SecureString -String $storageAccountKeys[0].Value – AsPlainText -Force
- $credential = New-Object System.Management.Automation.PSCredential – ArgumentList “AZURE$($storageAccount.StorageAccountName)”, $password
- New-PSDrive -Name X -PSProvider FileSystem -Root ” $($fileShare.CloudFileShare.StorageUri.PrimaryUri.Host)$($fileShare.Name)” – Credential $credential -Persist
2. Tại PowerShell ISE thực hiện lệnh sau và đăng nhập vào email và password bạn đăng ký Azure
Login-AzAccount
3. Sau đó thực hiện file mountshare.ps1 bạn tạo ở bước 1
4. Kiểm tra xem đã có ổ đĩa X:
5. Dismount đĩa X: dùng lệnh
Remove-PSDrive -Name X
Exercise 5. Shared Access Signatures (SAS dùng Portal)
1. Tại Azure portal, menu trái chọn Storage accounts, và chọn một storage account của bạn (đã tạo blob)
2. Tại màn hình storage account, menu trái chọn Containers và chọn blob mà bạn đã tạo.
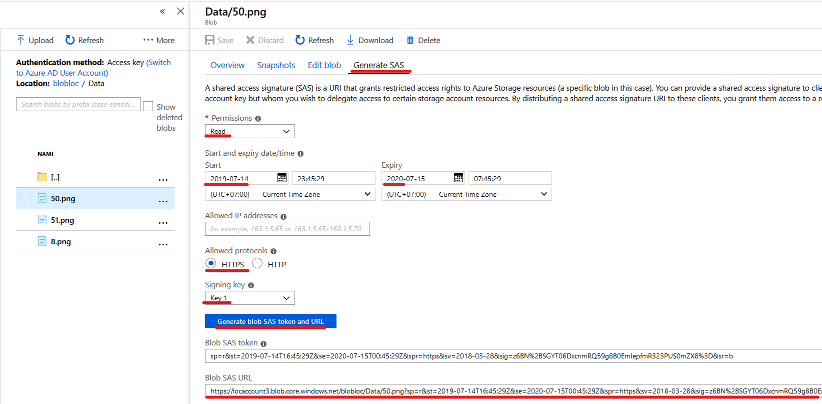
3. Chọn vào 1 file mà bạn muốn cấp quyền truy cập, chọn tab Generate SAS
4. Cấu hình shared access signature với các giá trị sau:
- Permissions: Read
- Start and expiry date/time: start: ngày hôm nay, expiry: 1 năm sau
- Allowed protocols: HTTPS
- Signing key: Key1
- Ấn Generate blob SAS token and URL
- Copy giá trị trong phần Blob SAS URL
5. Tại trình duyệt, mở tab mới paste URL vào, kiểm tra kết quả
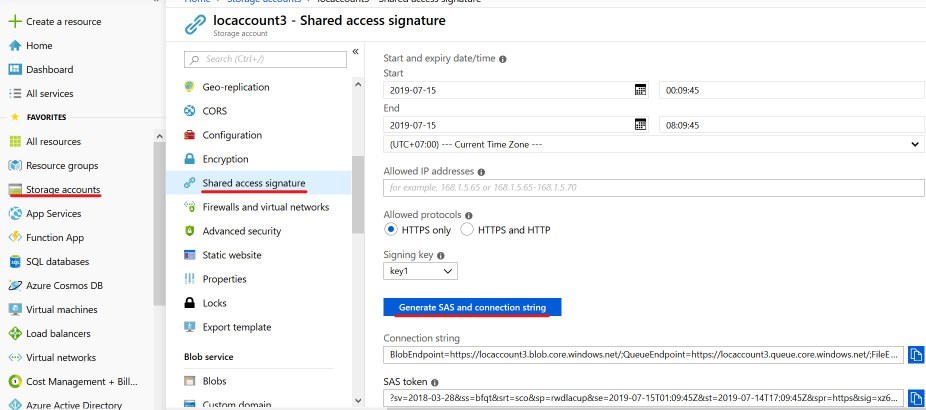
1. Tại Azure portal, menu trái chọn storage accounts, và chọn một storage account của bạn (đã tạo blob)
2. Menu trái chọn Shared access signature, xem các giá trị mặc định.
3. Trong phần Allowed resource types chọn Container
4. Ấn Generate SAS and connection string và xem các thông tin connection string, SAS token, và các URL
Exercise 6. SAS Dùng Storage Explorer
Shared Access Signature cho phép quản trị viên Azure cấp quyền tạm thời truy cập vào storage account mà không cần đăng nhập vào Azure. Trong bài lab này quản trị viên Azure sẽ cấp quyền cho user truy cập storage account trong một thời gian giới hạn với một số quyền nhất định
- Quản trị viên sẽ tạo SAS connection string trong khoản thời gian cụ thể và quyền mong muốn.
- Quản trị viên chia sẽ SAS connection string cho user
- User dùng Storage Explorer với SAS được cung cấp.
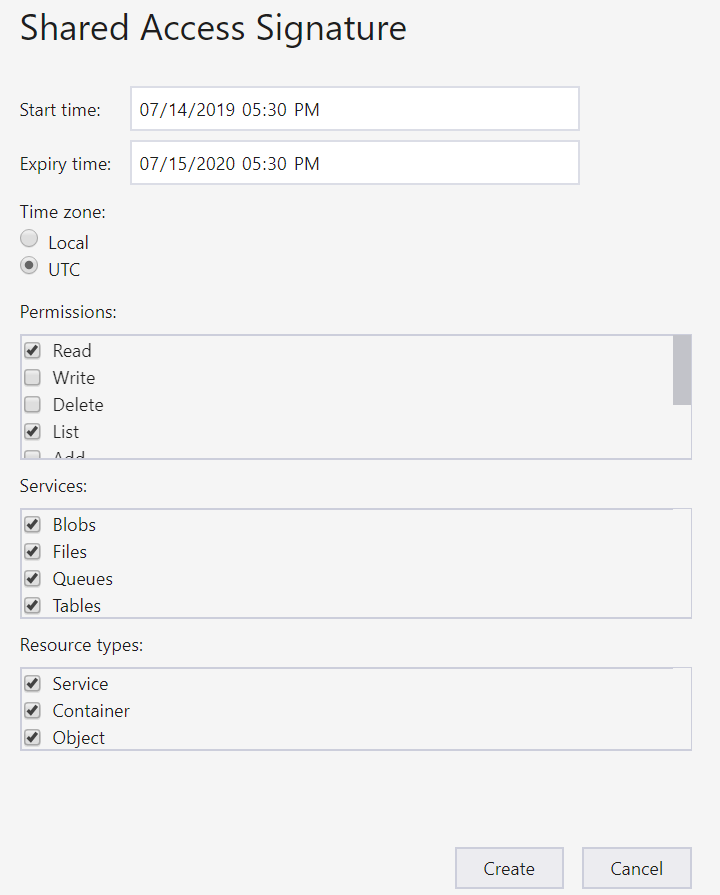
1. Vào Start chọn Storage Explorer, phải chuột vào storage account bạn muốn share, và chọn Get Shared Access Signature.
2. Chỉ định thời gia và quyền bạn muốn share ấn Create.
3. Copy giá trị Connection String lưu vào file text chia sẽ cho user ấn Close
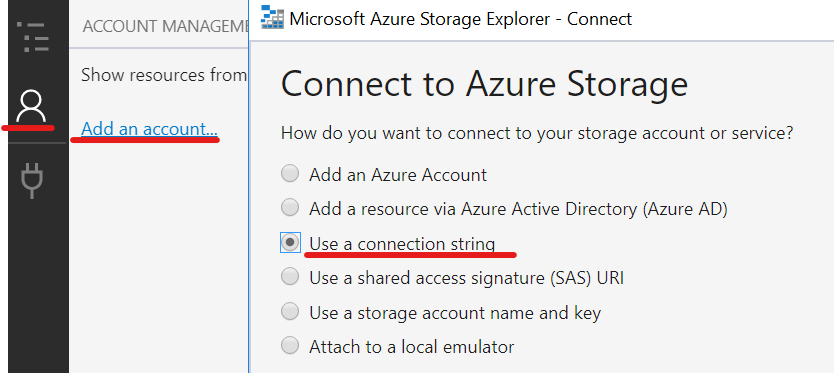
1. Tại Storage Explorer, chọn Manage Accounts (icon thứ 2 bên trái), chọn remove account hiện tại.
2. Ấn Add an Account, chọn Use a connection string và ấn Next
3. Màn hình Attach with Connection String, trong phần Connection string paste giá trị Connection String bạn đã copy ở task 1, ấn Next và Connect. (nếu xuất hiện lỗi, bỏ qua lỗi này)
4. Kiểm tra user đã truy cập vào storage.
5. Xóa tất cả các Resource Group đã tạo trong bài Lab.
Mr CTL