Azure File Sync là một dịch vụ cho phép bạn sync files từ on-premises Windows Server lên Azure file shares. Bài Lab Microsoft azure module 12 giới thiệu cho bạn các khái niệm và tính năng của Azure File Sync.
Bài lab dùng Azure File Sync để sync File Server tại on-premises với Azure File
Bài lab gồm các phần sau:
- Triển khai Azure VM dùng Azure Resource Manager template
- Chuẩn bị hạ tầng cho Azure File Sync
- Thực hiện và kiểm tra Azure File Sync
Exercise 0: Triển khai Azure VM dùng Azure Resource Manager template
1. Tại Azure Portal, menu trái chọn Create a Resource, tìm và chọn Template deployment.
2. Màn hình Template deployment (deploy using custom templates), ấn Create.
3. Màn hình Custom deployment, chọn Build your own template in the editor.
4. Màn hình Edit template chọn load file, và chọn file azuredeploy.json, (file này có trong folder Allfiles lab12,) ấn save.
5. Trở về màn hình Custom deployment, ấn Edit parameters, và chọn file azuredeploy.parameters.json, (file này có trong folder Allfiles lab12,) ấn save.
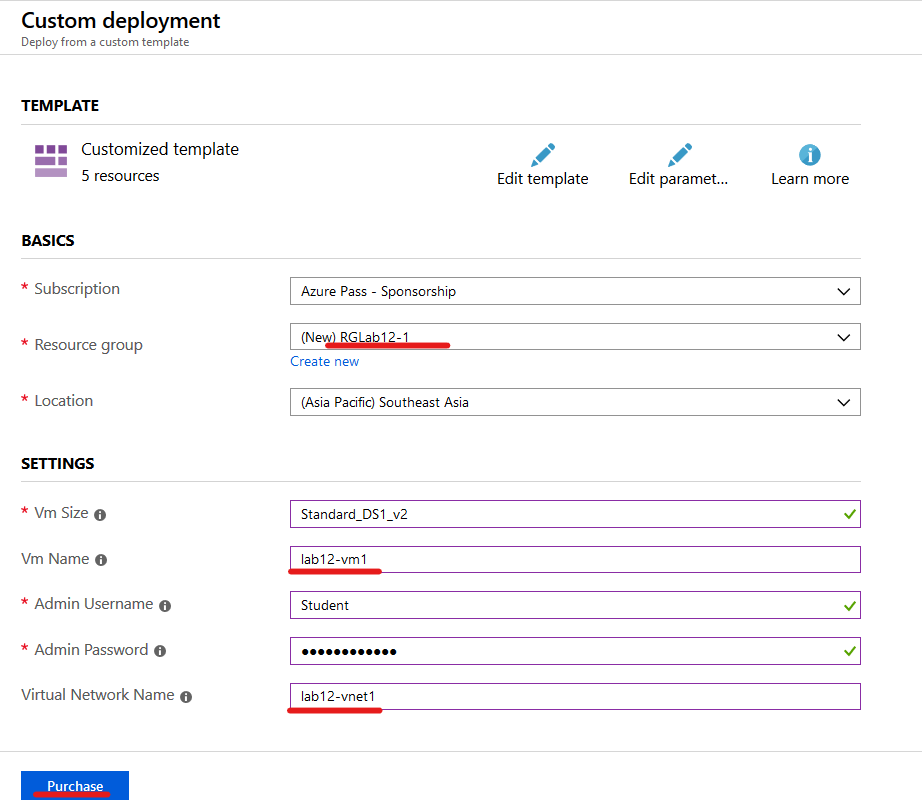
6. Trở lại màn hình Custom deployment, kiểm tra và thêm các thông tin sau:
- Subscription: Chọn Subscription của bạn
- Resource group: ấn Create new, nhập vào RGLab12-1 ấn OK
- Location: Southeast Asia
- Vm Size: Standard_E2bds_v5
- Vm Name: Lab12-vm1
- Admin Username: Student
- Admin Password: Pa55w.rd1234
- Virtual Network Name: Lab12-vnet1
- Ấn Create + Review
- Ấn Create
Exercise 1: Chuẩn bị hạ tầng cho Azure File Sync
1. Tại Azure portal, menu trái chọn storage accounts, và ấn + Add
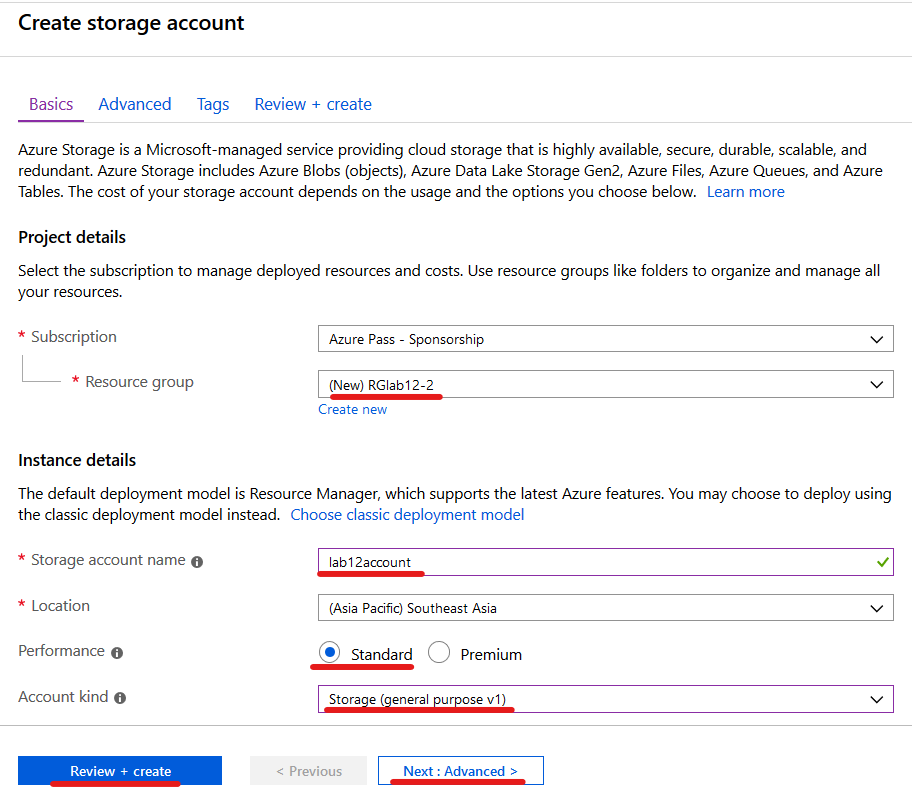
2. Màn hình create storage account, nhập các thông in sau:
- Subscription: chọn Subscription của bạn
- Resource group: ấn create new, nhập vào RGLab12-2 ấn Ok
- Storage account name: lab12account (tên duy nhất, chỉ dùng chữ thường và số)
- Location: Southeast Asia
- Performance: Standard
- Account kind: Storage (general purpose v2)
- Replication: Locally-redundant storage (LRS)
- Ấn Next : networking
- chọn option Public Endpoint (All networks)
- Ấn next : Advanced
- Secure transfer required: Disabled
- Các option khác: mặc định
- Ấn Review + Create, và Create
3. Tại Azure portal, menu trái chọn storage accounts, và chọn lab12account vừa tạo
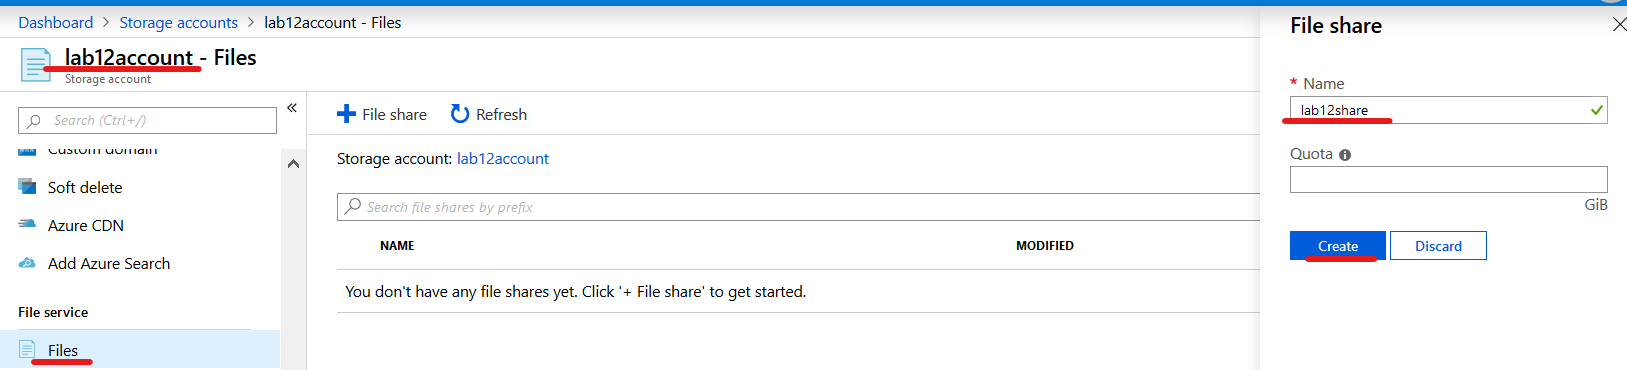
4. Màn hình lab12account, menu trái chọn File Shares, và ấn + File Share
5. Màn hình File Share, trong phần Name: nhập vào lab12share (chỉ dùng chữ thường và số), Quota: để trống, ấn Create.
1. Tại Azure portal, menu trái chọn Virtual Machines, remote vào máy lab12-vm1 với user: Student, và password: Pa55w.rd1234
2. Tại máy lab12-vm1 vào run gõ lệnh diskmgmt.msc, Disk2 chọn option là GPT, format disk 2 có Drive letter: S, là NTFS, và Volume label: Data
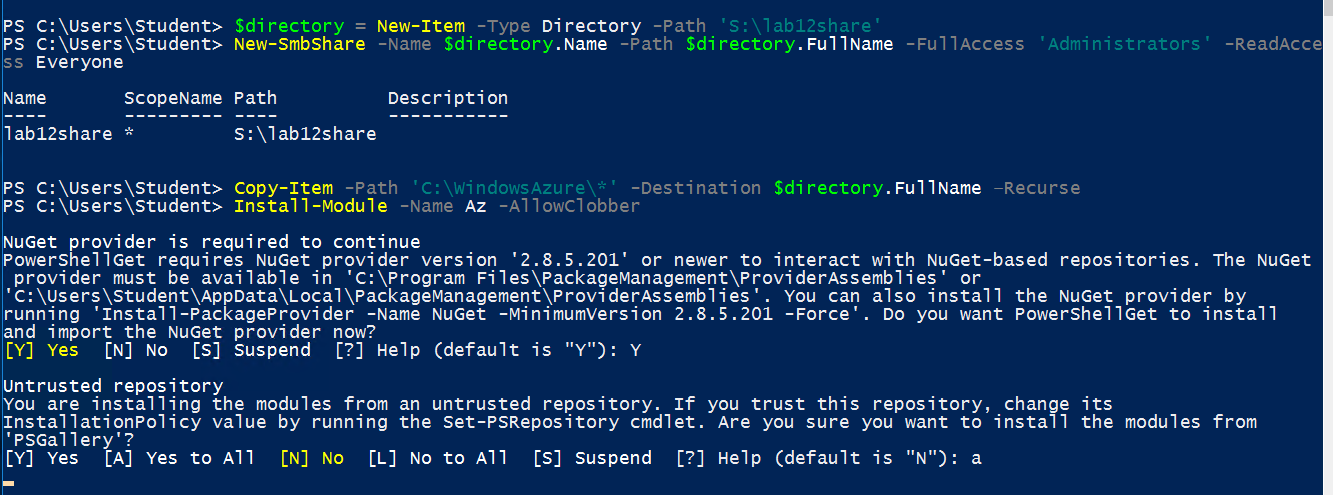
3. Tại máy lab12-vm1, vào PowerShell thực hiện lệnh sau
- $directory = New-Item -Type Directory -Path ‘S:\lab12share’ (tạo folder lab12share trên đĩa S:)
- New-SmbShare -Name $directory.Name -Path $directory.FullName – FullAccess ‘Administrators’ -ReadAccess Everyone (share folder lab12share cho administrator full quyền, và everyone có quyền read)
- Copy-Item -Path ‘C:\WindowsAzure*’ -Destination $directory.FullName –Recurse (copy dữ liệu từ c:\windowsAzure sang s:\lab12share, có một số file không copy được có thể bỏ qua)
- Install-Module -Name Az -AllowClobber (cài Az module hơi lâu) Note: Nếu đang dùng windows 2016 bạn cần cài Powershell 7.3.3 trước khi thực thi lệnh này.
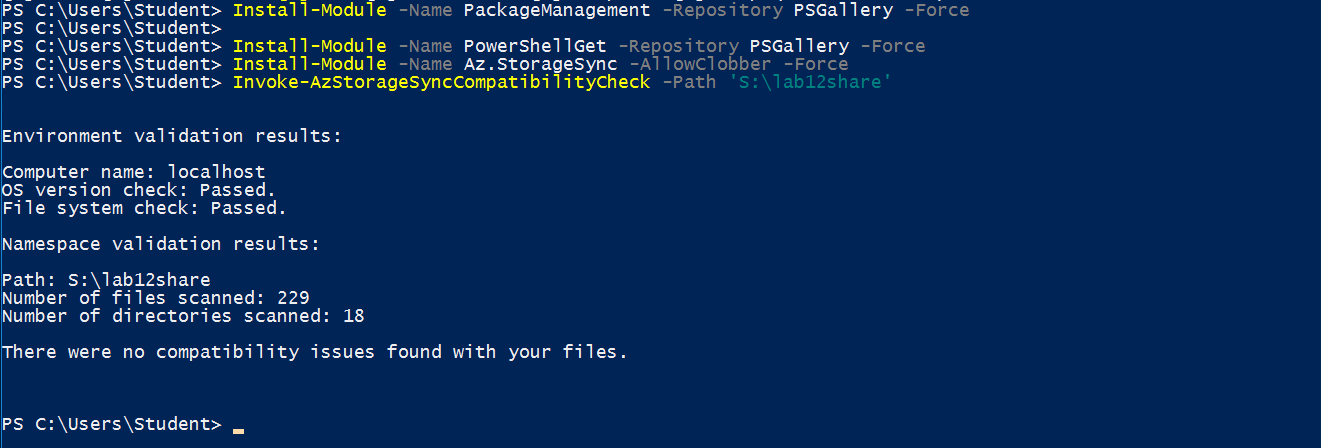
1. Cũng tại PowerShell thực hiện 2 lệnh sau để cài Package Management và PowerShellGet:
- Install-Module -Name PackageManagement -Repository PSGallery -Force
- Install-Module -Name PowerShellGet -Repository PSGallery -Force
2. Đóng và mở lại PowerShell thực hiện tiếp lệnh sau để cài Azure File Sync PowerShell module:
- Install-Module -Name Az.StorageSync -AllowClobber -Force
- Invoke-AzStorageSyncCompatibilityCheck -Path ‘S:\lab12share’
Exercise 2: Triển Khai Azure File Sync
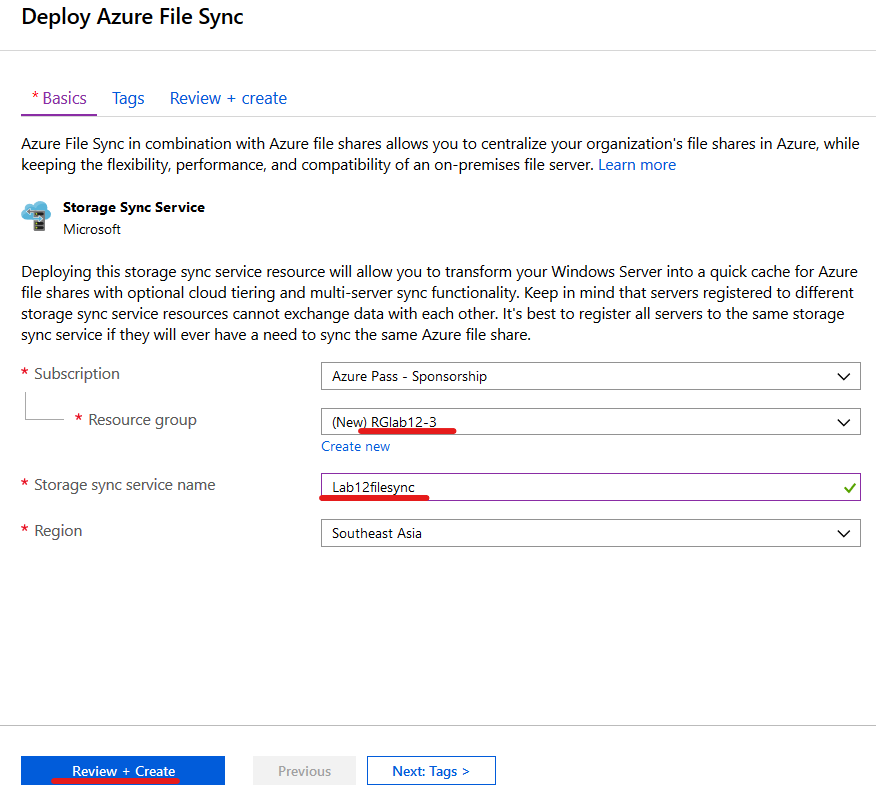
1. Tại Azure Portal, menu trái chọn Create a Resource, tìm và chọn Azure File Sync, ấn Create
2. Màn hình Deploy Azure File Sync, nhập các thông tin sau:
- Subscription: chọn subscription của bạn
- Resource group: chọn Create new, nhập vào RGLab12-3, ấn Ok
- Storage sync services Name: Lab12filesync
- Location: Southeast Asia
- Ấn Create + Review, và ấn Create
1. Tại máy Lab12-vm1, mở trình duyệt truy cập trang https:// go.microsoft.com/fwlink/?linkid=858257 trong phần Azure File Sync Agent ấn download file StorageSyncAgent_WS2019.msi.
2. Thực thi file StorageSyncAgent_WS2019.msi với các giá trị mặc định.
3. Sau khi cài xong, sẽ xuất hiện màn hình Azure File Sync – Server Registration.
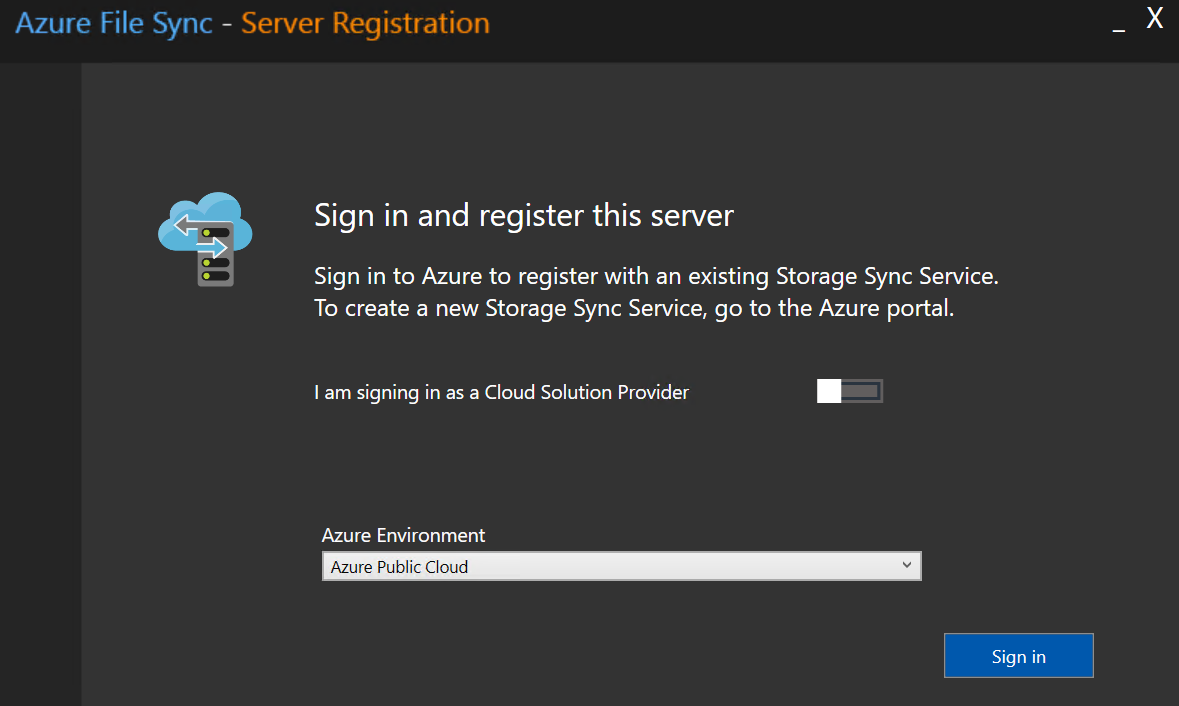
1. Tại hiện màn hình Azure File Sync – Server Registration, ấn Sign in, đăng nhập vào bằng email bạn dùng đăng ký Azure.
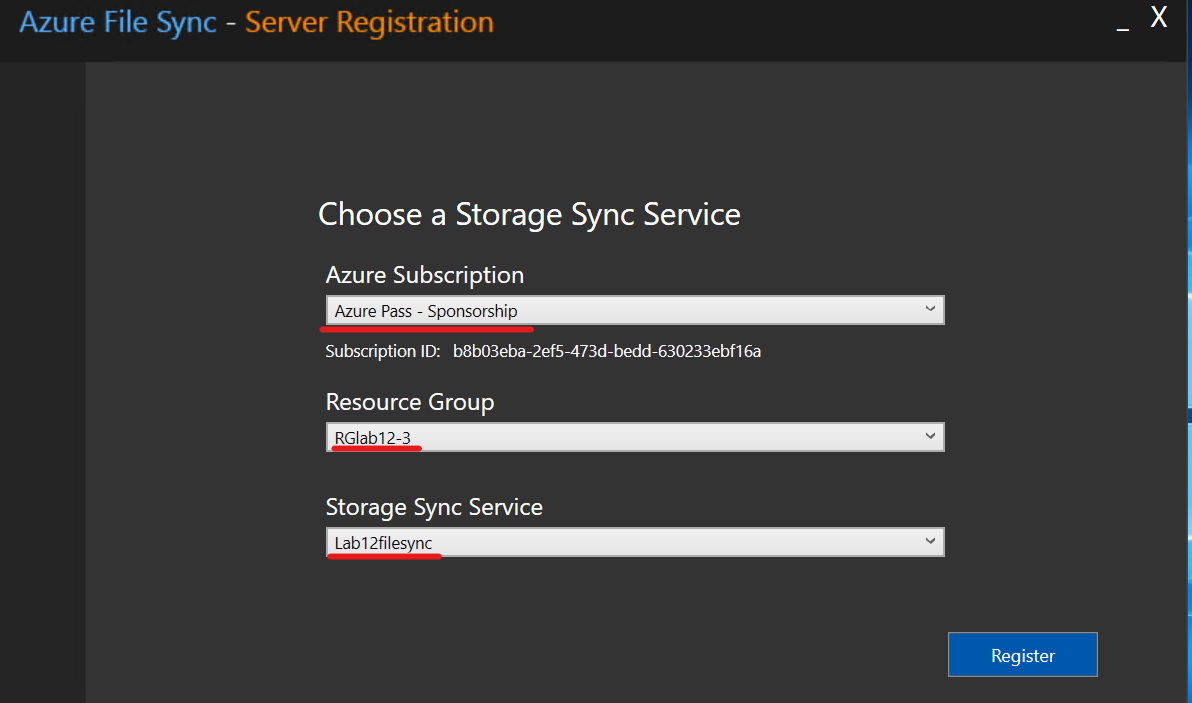
2. Màn hình Choose a Storage Sync Service, chọn các thông tin sau:
- Azure Subscription: chọn subscription của bạn
- Resource group: RGLab12-3
- Storage Sync Service: Lab12filesync
- Ấn Register, ấn Ok
- Trở lại Azure portal, menu trái chọn Storage Sync Services, và chọn lab12filesync bạn đã tạo ở task 1
- Màn hình lab12filesync, menu trái chọn Sync group, ấn + Sync group
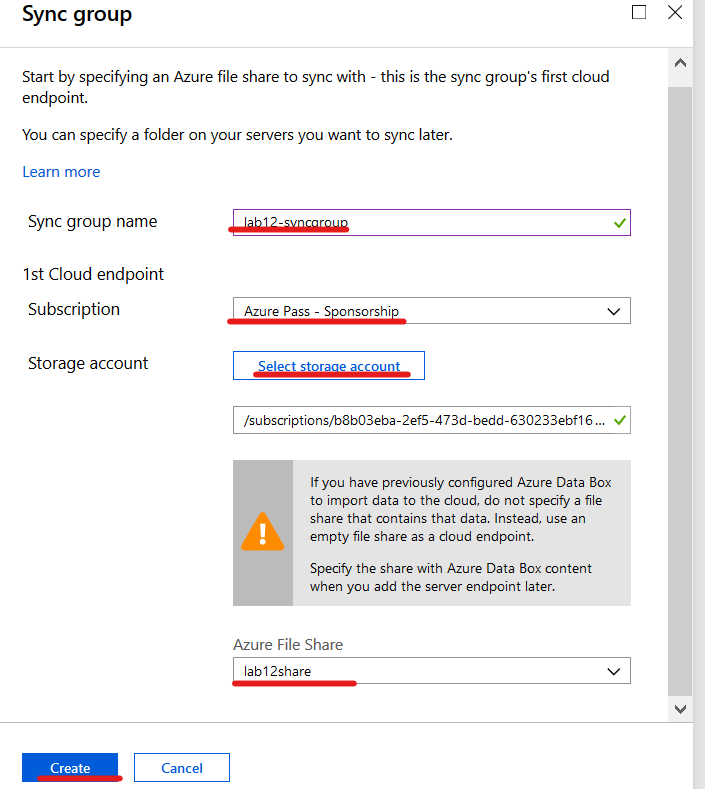
- Màn hình Sync group chọn các thông tin sau:
- Sync group name:lab12-syncgroup1
- Azure Subscription: chọn subscription của bạn
- Storage account: ấn Select Storage account chọn lab12-account
- Azure File Share: lab12share
- Ấn Create
1. Màn hình Lab12filesync – Sync groups, chọn lab12-syncgroup1 vừa tạo.
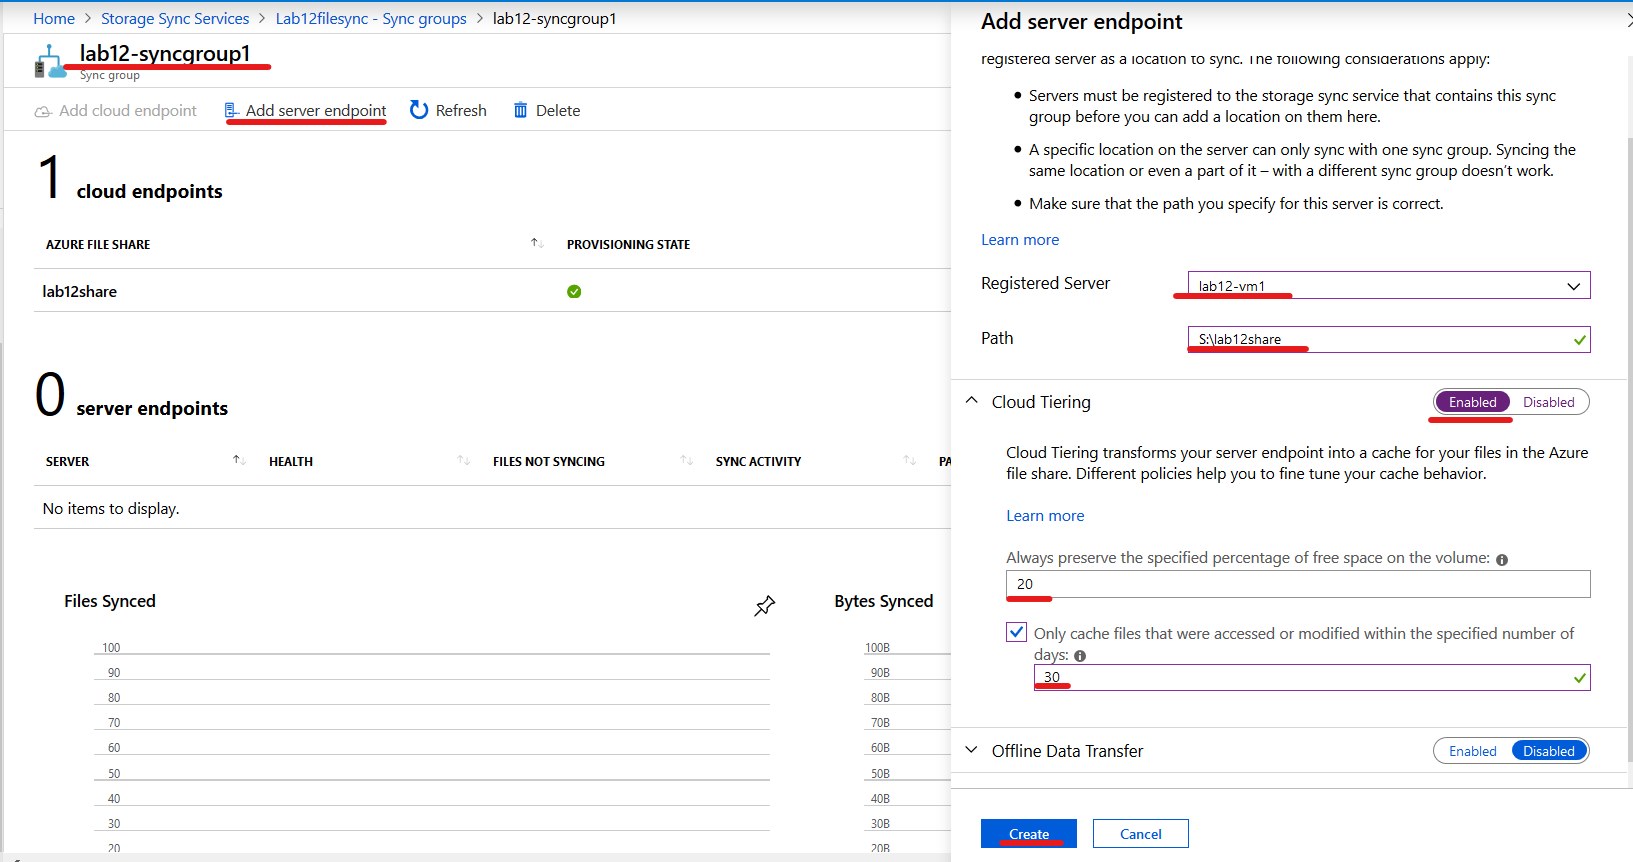
2. Màn hình lab12-syncgroup1, ấn Add server endpoint, và nhập các thông tin sau:
- Registered server: Lab12-vm1
- Path: S:lab12share
- Cloud Tiering: Enabled
- Always preserve the specified percentage of free space on the volume: 20
- Only cache files that were accessed or modified within the specified number of days: 30
- Offline Data Transfer: Disabled
- Ấn Create
1. Cũng tại màn hình lab12-syncgroup1, trong phần server endpoint, lab12- vm1 có cột Health đang có trạng thái là Pending, chờ vài phút cho đến khi chuyển thành checkmark màu xanh
2. Tại Azure portal, menu trái chọn Storage Accounts, chọn lab12account,
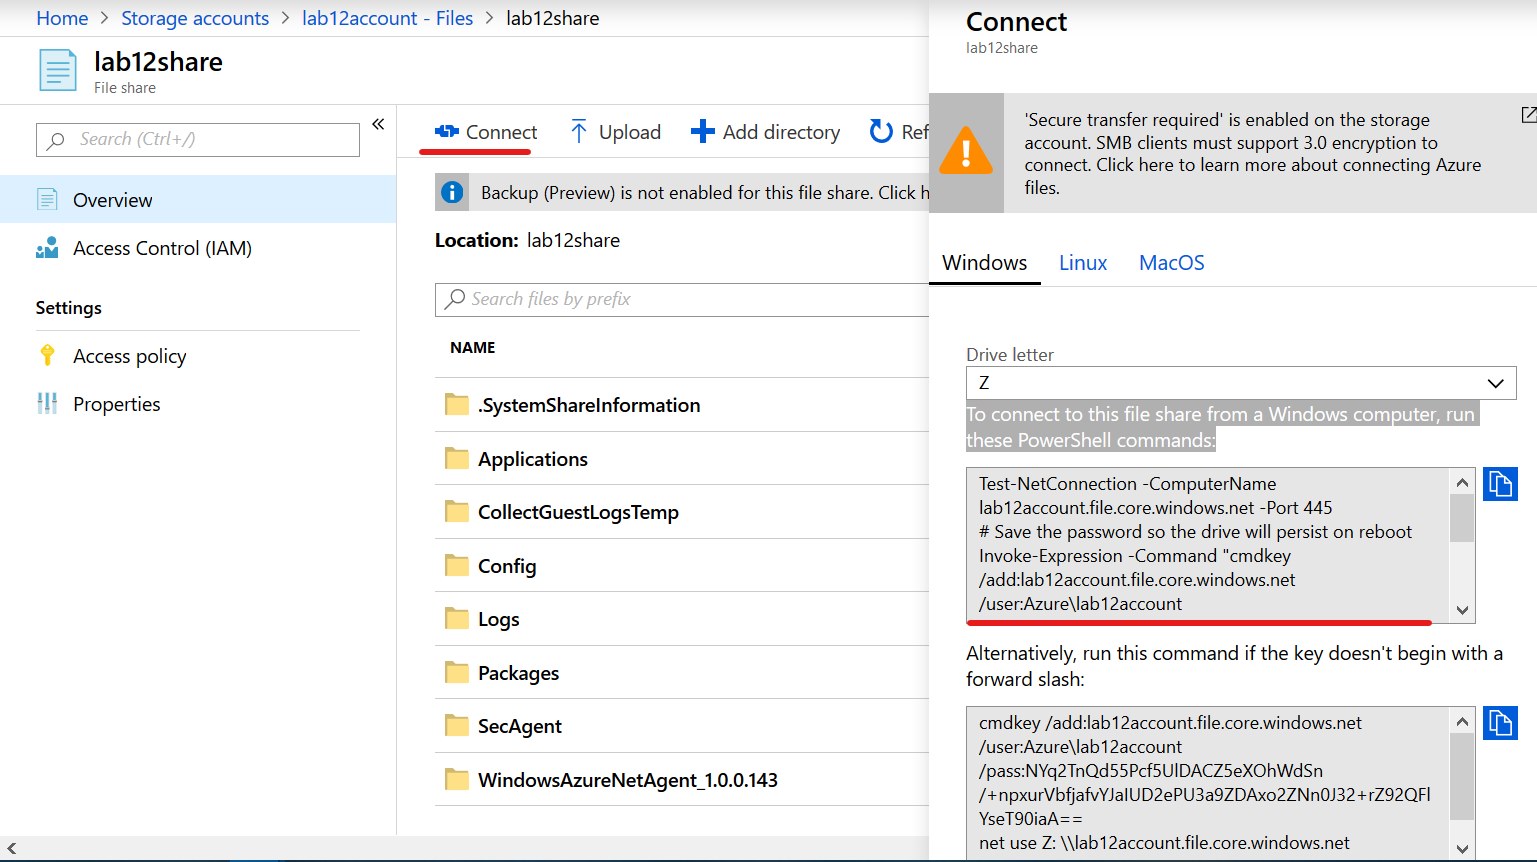
3. Màn hình lab12account, menu trái chọn file Shares, và chọn lab12share, thấy các file đã được sync, ấn Connect
4. Màn hình connect, copy nội dung trong phần To connect to this file share from a Windows computer, run these PowerShell commands
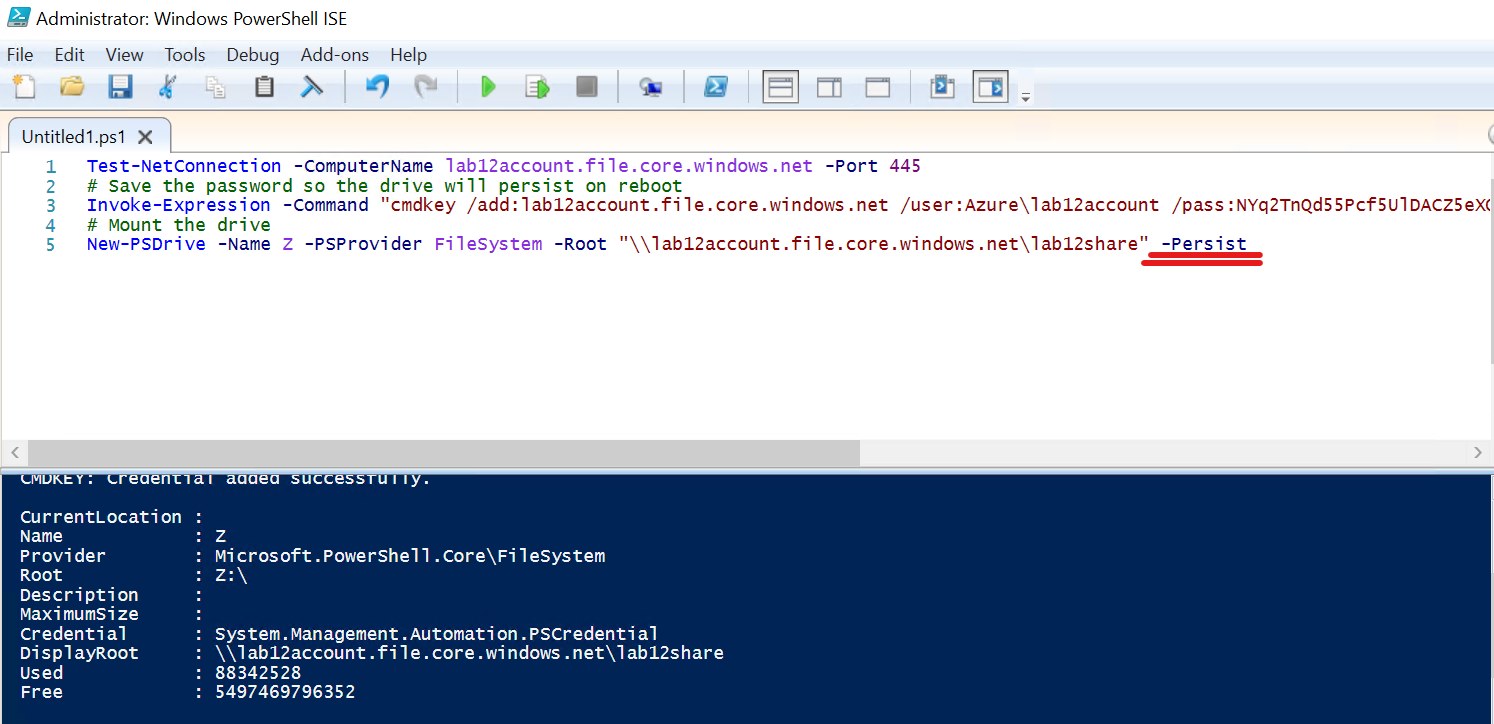
5. Vào máy Lab12-vm1, vào Start chọn Powershell ISE, paste script vừa copy vào
6. Thêm -Persist phía sau lệnh New-PSDrive cmdlet.
7. Thực thi script, kiểm tra trên máy lab12-vm1 đã có ổ đĩa Z:
8. So sánh nội dung ổ đĩa Z: với S:lab12share
9. Xóa các Resource Group bạn đã tạo trong bài lab này
Mr CTL