Lab Microsoft 365 Module 1 hướng dẫn bạn đăng ký tài khoản Office 365, thêm custom domain vào Office 365, Tạo User Account và gán License. Quản lý User và Group dùng portal và Power Shell
Exercise 1 – Initialize your Microsoft 365 Tenant
Task 1: Đăng Ký Tài Khoản Office 365
- Vào Trình duyệt truy cập vào trang https://products.office.com/en-us/business/office-365-enterprise-e5-business-software, để đăng ký dùng thử Office 365 Enterprise E5 business
- Chọn Free trial
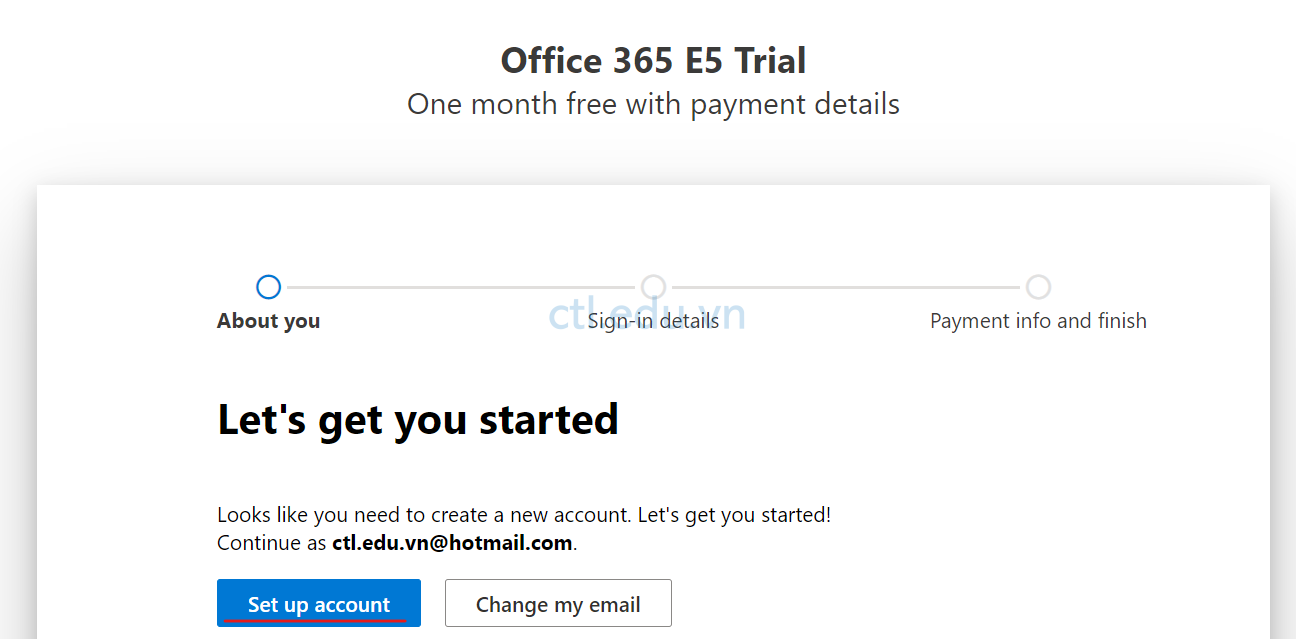
- Nhập hotmail hay outlook mail của bạn ấn next. Và ấn Set up Account
4. Trong phần Tell us about yourself, nhập đầy đủ thông tin First name, Last name, Business phone number (số điện thoại của bạn), Company size (25-49 people), Country or Region ( nhớ chọn Việt Nam) ấn next.
5. Chọn Text me, nhập số mobile phone của bạn, (nhớ chọn Country code là +84) ấn send virification code, nhận và nhập code từ Microsoft gửi đến mobile phone cho bạn, ấn Verify
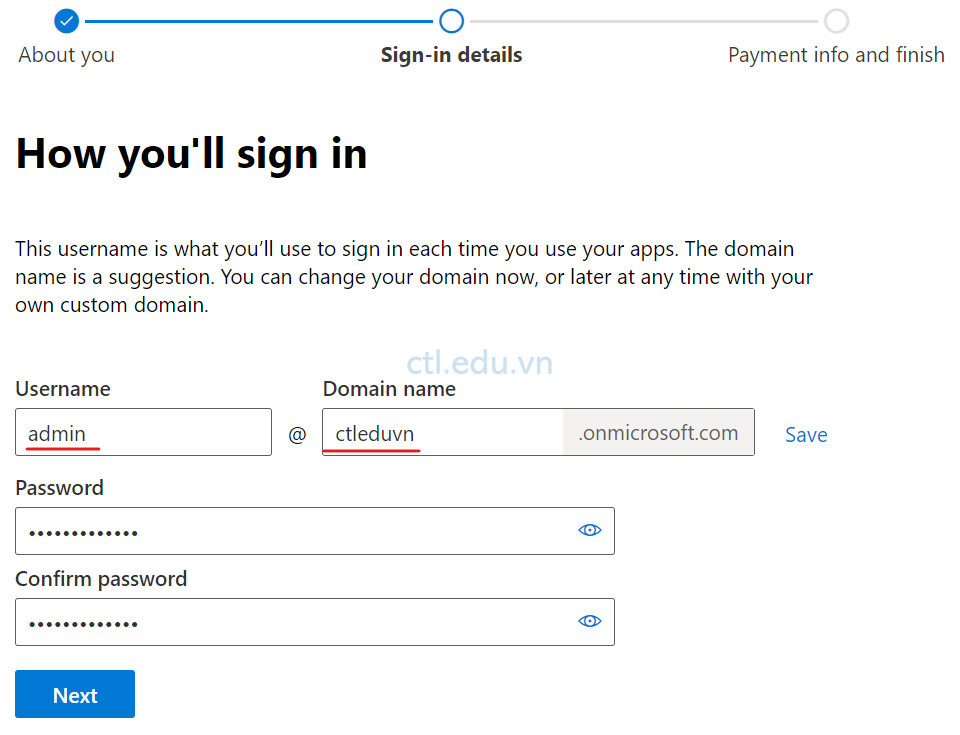
6. Trong phần How you’ll sign in, nhập vào domain của công ty bạn, tên domain có dạng têncôngty.onmicrosoft.com, Tạo user và password quản trị Office 365 (ghi nhớ lại username và password của user này dùng để quản trị Office 365, ví dụ admin@têncôngty.onmicrosoft.com), ấn Next
7. Trong phần Quantity and payment, cho biết bạn sẽ phải trả 38usd/user/month, nhưng với Office 365 E5 Trial bạn sẽ không mất phí (0 usd cho tháng đầu tiên), ấn Add payment method để nhập thông tin thẻ Visa.

8. Cửa sổ Add payment method, nhập đầy đủ thông tin của thẻ Visa (nên dùng thẻ Visa debit)
- Card number : 16 số trên thẻ
- Security code : 3 số
- Expiration month – Expiration year: Tháng và Năm hết hạn thẻ
- First name – Last name : Tên và Họ Của Bạn
- Name on card : Tên in trên thẻ của Bạn
- Address line 1: địa chỉ
- City: Thành phố
- Country or Region: Việt Nam
- Ấn Save
(bạn sẽ bị trừ 23.000vnd – 30.000vnd, sau đó Micrsoft sẽ trả lại cho bạn)
9. Cửa sổ Review and confirm, nhập mã số thuế của bạn trong phần Enter your TIN registration number ấn Save và ấn Start Trial
(Lưu ý: sau khi dùng thử hết 30 ngày, tài khoản của bạn sẽ bị tính phí 38usd/user/month, Nếu bạn không tiếp tục sử dụng bạn nên cancel tài khoản này)

10. Ghi nhớ lại user admin quản trị Office 365 E5 vừa đăng ký xong, ấn Go to The Admin Center

11. Màn hình Install Microsoft 365, ấn Continue.
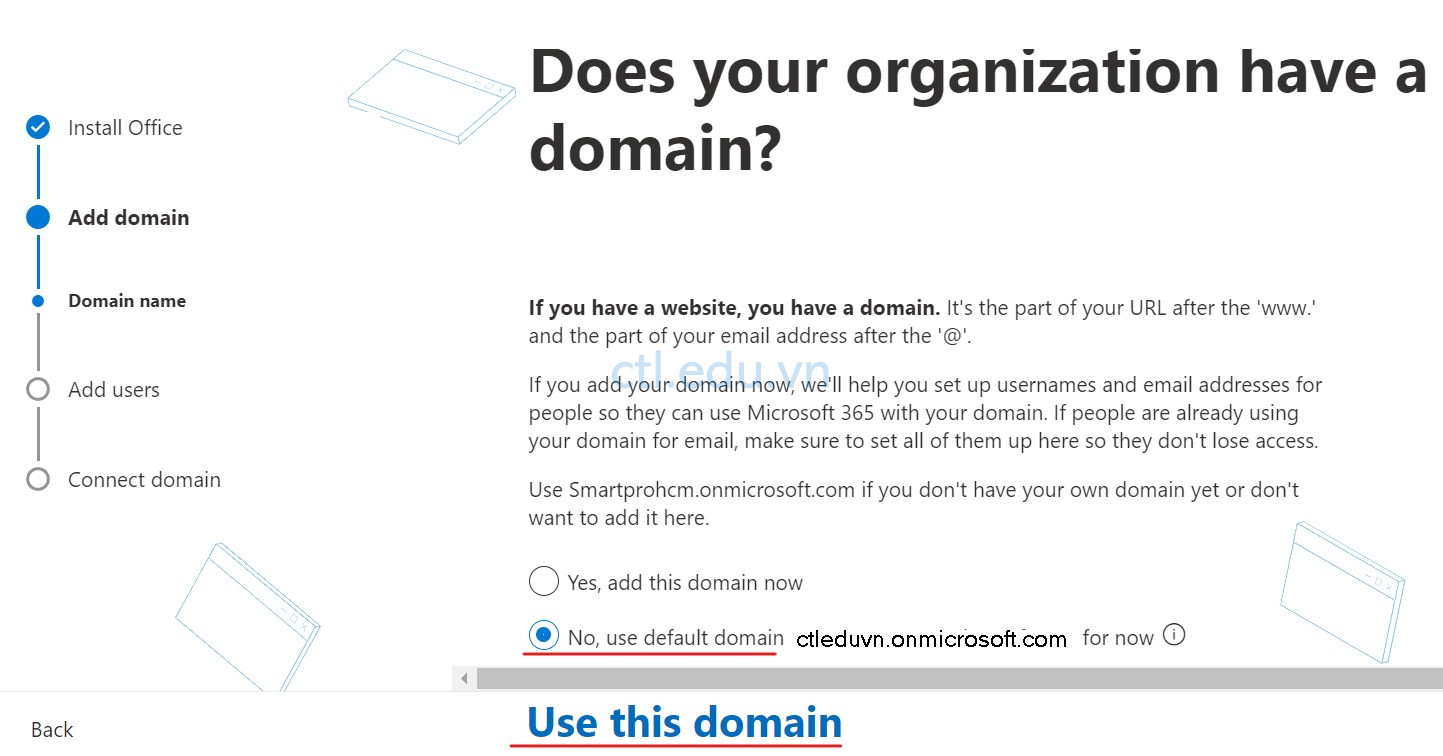
12. Màn hình Does your organization have a domain? chọn option No, use default domain .., ấn Use this domain (Bạn sẽ thêm custom domain trong task sau)
13. Màn hình Add users and assign licenses, ấn Do this later và ấn Continue
14. Ấn Go to admin center, hoàn tất việc tạo tài khoản Office 365 dùng thử 30 ngày
Task 2: Thêm Custom domain vào Office 365
- Tại màn hình Microsoft 365 admin center, menu trái chọn Show All, và chọn Settings\Domains
- Màn hình Domains ấn Add Domain

3. Màn hình Add a Domain, trong phần Domain name: nhập vào tên domain public của bạn (Domain bạn đã đăng ký từ nhà cung cấp ISP), ấn Use This Domain.
4. Màn hình Verify you own your domain, chọn option Add a TXT record to the domain’s DNS Records, ấn Continue.
5. Màn hình Add a record to verify ownership, ghi lại giá trị của TXT record mà Office 365 cung cấp.

6. Vào trang quản trị DNS tên miền của bạn, tạo thêm record TXT với các giá trị đã ghi lại ở bước 4.
7. Trở về màn hình Verify you own this domain, ấn Verify (thời gian cập nhật DNS từ 5 -15 phút tùy nhà cung cấp)

8. Màn hình How do you want to connect your domain?, chọn More options, chọn option Set up my online services for me, ấn Continue

9. Màn hình Choose your online services ấn Continue
10. Màn hình Add the records for your website, ấn Continue.
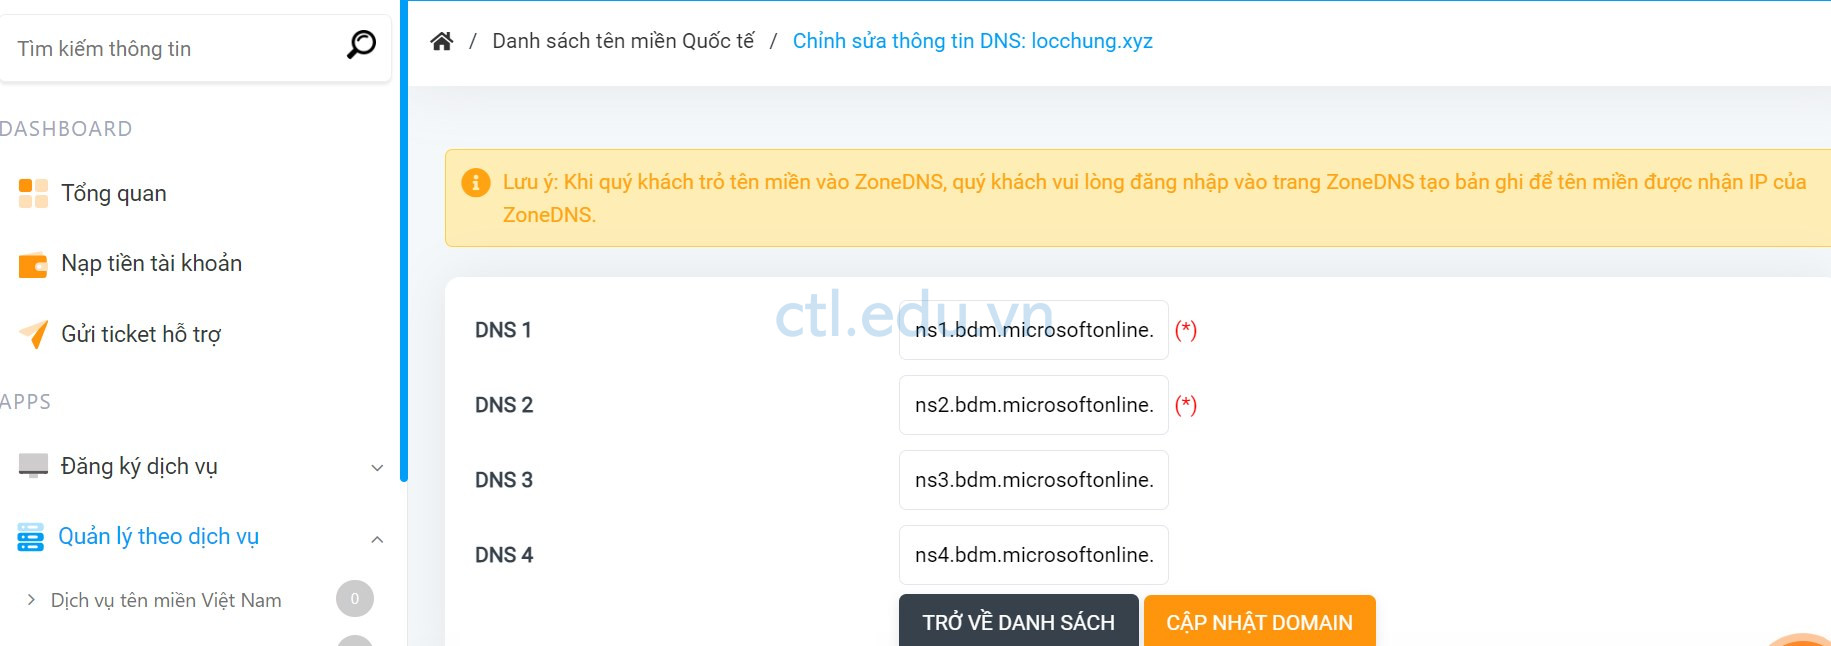
11. Màn hình Update your name servers, ghi lại các Name Server (NS)
12. Trở lại trang quản trị DNS tên miền của bạn, chuyển Nameserver về các giá trị đã ghi lại ở bước 11.
13. Trở lại màn hình Update your name servers, ấn Continue (thời gian cập nhật DNS từ 5 -15 phút tùy nhà cung cấp)
14. Màn hình Domain setup is complete, ấn Done
15. Hoàn tất, truy cập vào trang admin.microsoft.com

Task 3: Cấu Hình Password Policy
1. Vào Microsoft Edge, truy cập vào https://admin.microsoft.com/
2. Đăng nhập bằng user admin@têncôngty.onmicrosoft.com
3. Tại màn hình Microsoft 365 admin center, menu trái chọn Settings, chọn Org Settings và chọn tabs Security & privacy.
4. Tại tabs Security & privacy chọn Password expiration policy.

5. Cửa sổ Password expiration policy, bỏ checkbox Set passwords to never expire
6. Trong phần Days before passwords expire nhập 45.
(Set thời gian phù hợp, tùy theo chính sách của công ty bạn)
7. Ấn Save

8. Nếu không sử dụng chính sách Password expiration policy, check vào Set passwords to never expire ấn Save
Task 4. Thiết Lập Organization Profile
- Tại màn hình Microsoft 365 admin center, menu trái chọn Settings, tiếp tục chọn Org Settings và chọn tabs Organization Profile.
- Tại tabs Organization Profile chọn Organization Information:
- Nhập thông tin đầy đủ của doanh nghiệp ấn Save.
3. Tại tabs Organization Profile, chọn Release preferences, chọn một trong các option ấn save changes:
- Standard release for everyone: nhận bảng cập nhật khi Microsoft phát hành mới
- Targeted release for everyone: mọi người nhận bảng cập nhật sớm cho doanh nghiệp
- Targeted release for selected users: Chọn user để xem trước các bản cập nhật sớm để có thể chuẩn bị cho tổ chức.
4. Tại tabs Organization Profile, Chọn custom themes:
- Upload logo của của công ty
- Link khi click vào logo
- chọn màu cho theme của user.
- …
- Ấn Save.
5. Màn hình Organization Profile, Chọn Help desk information:
- Nhập tên, số điện thoại, email của Help Desk
- ấn Save

Task 5 Cài Đặt Công Cụ Microsoft Azure Active Directory
- Tại máy window 10 hay windows server 2019, Vào start gõ powershell, phải chuột vào windows powershell chọn run as administrator.
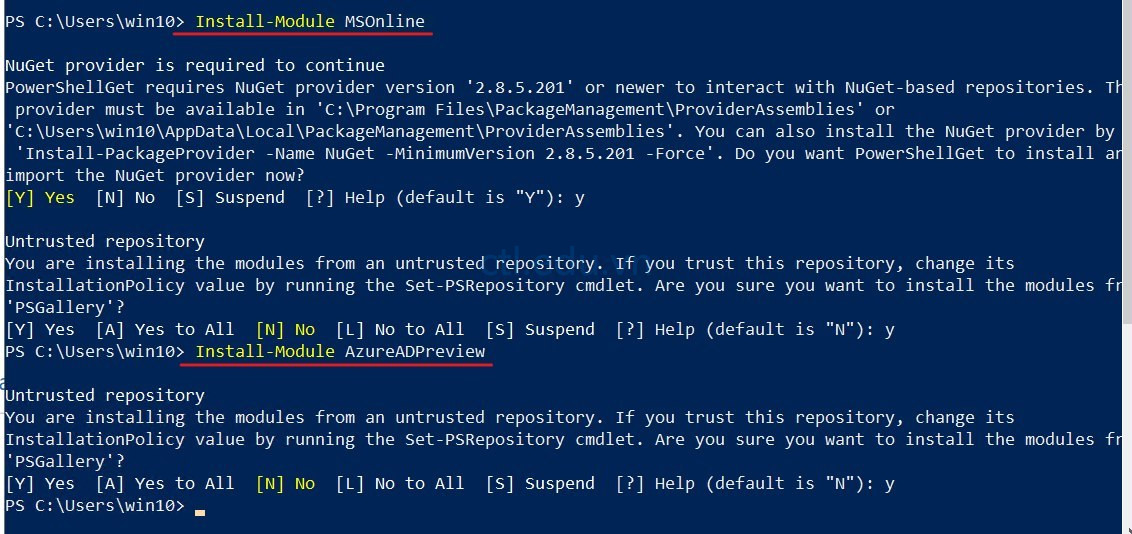
- Tại Windows PowerShell thực hiện lệnh sau và Ấn Y 2 lần khi có yêu cầu:
- Install-Module MSOnline
- [Net.ServicePointManager]::SecurityProtocol = [Net.SecurityProtocolType]::Tls12 (chỉ thực hiện lệnh này nếu Install-Module MSOnline bị lỗi)
- Install-Module AzureAD
3. Hoàn tất cài Microsoft Azure Active Directory Module for Windows PowerShell.
Task 6. Enable External Access Cho Microsoft Teams
Để Microsoft teams có thể cộng tác với các user bên ngoài tổ chức, bạn cần Enable chức năng External Access cho Microsoft teams. Do tính năng này phải mất vài giờ để cập nhật, nên trong bài lab này chúng ta cần Enable chức năng External Access cho Microsoft teams trước để không mất thời gian chờ khi thực hiện bài lab liên quan đến Microsoft teams sau này.
- Tại màn hình Microsoft 365 admin center, menu trái chọn Show All và chọn Teams.
- Tại màn hình Microsoft Teams admin center, nếu xuất hiện cửa sổ Welcome to the Teams admin center ấn Skip tour.
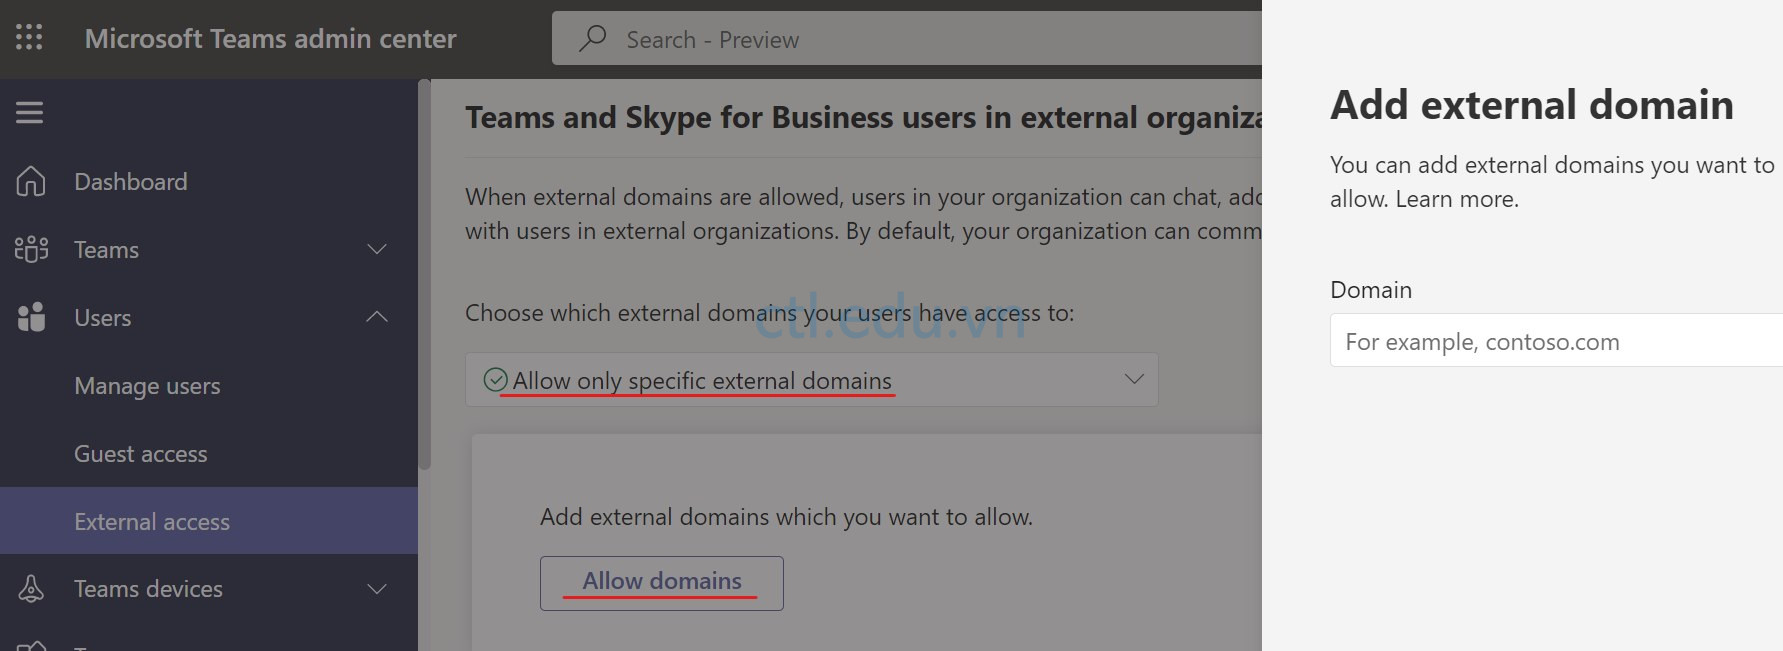
- Màn hình Microsoft Teams admin center, menu trái chọn User và chọn External access.
- Tại màn hình External access, trong phần Choose which external domains your users have access to chọn Allow only specific external domains.
- Ấn + Allow domain, cửa sổ Add external domain nhập vào custom domain của bạn mình (domain mà bạn muốn cộng tác), ấn Done.
- Thực hiện lại bước 5 để add thêm custom domain của bạn khác.
- Trong phần Teams accounts not managed by an organization chọn On
- Trong phần Skype users chọn On
Task 7 – Enable IRM Cho SharePoint Online
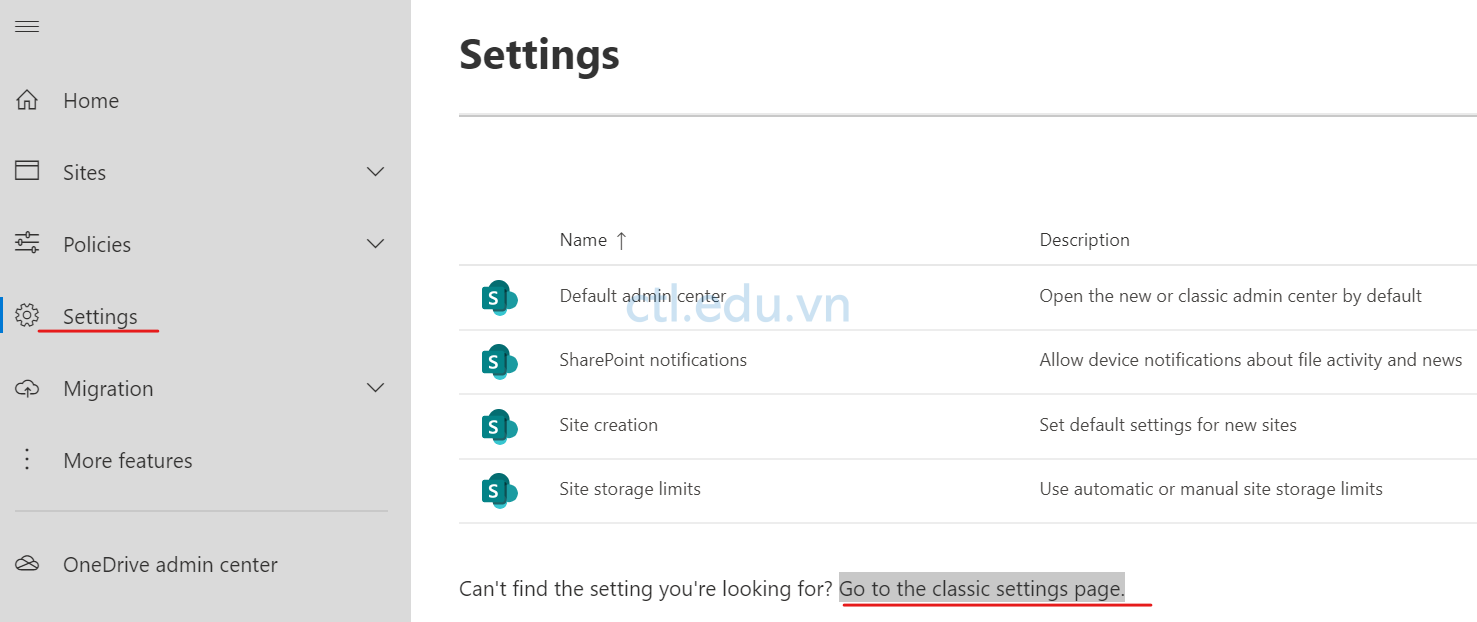
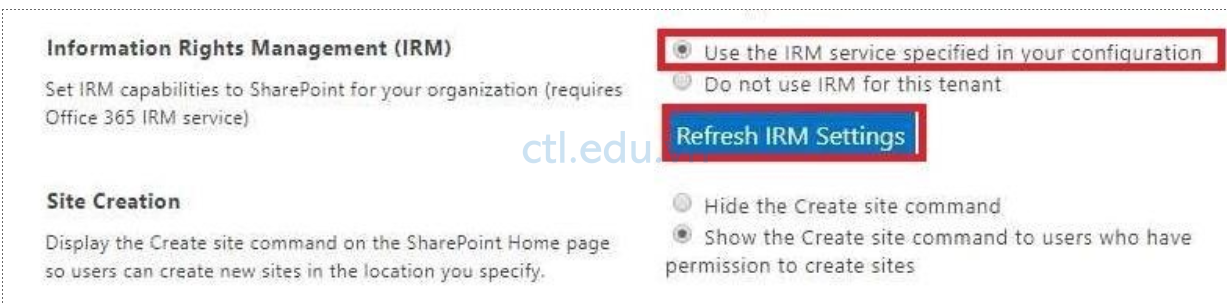
4. Kéo thanh trượt xuống đến phần Information Rights Management (IRM), chọn option Use the IRM service specified in your configuration,
ấn Refresh IRM Settings, và ấn OK.
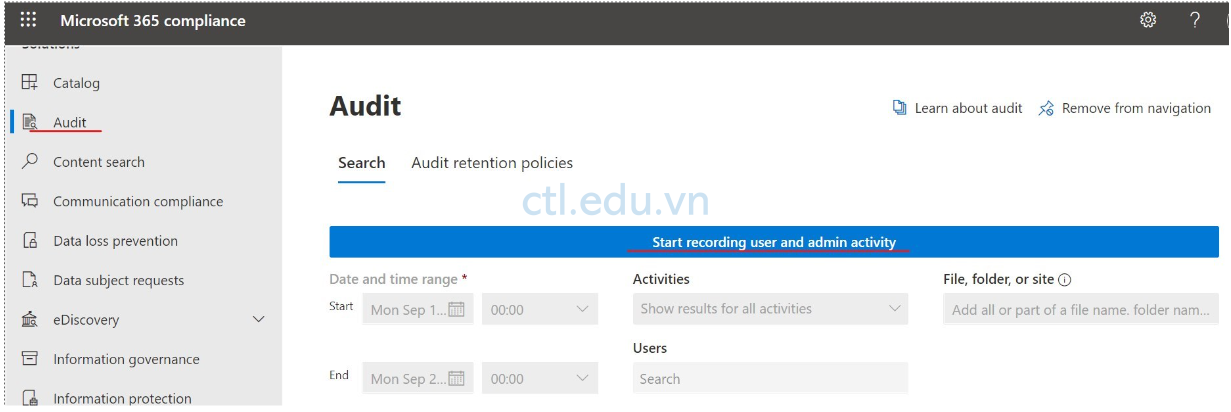
Task 8 – Turn on Audit Logging
Bạn sẽ tạo Alert Policies trong các lab sau. Tuy nhiên, trước khi triển khai alerts policies, bạn cần phải turn on Audit Logging ngay bây giờ, vì nó sẽ mất đến vài giờ mới turn on xong.
- Tại Microsoft 365 admin center, chọn Show all, và chọn Compliance
- Tại màn hình Microsoft Purview, menu trái chọn Audit, tại tab New Search, chọn Start recording user and admin activity, và ấn Yes. (chờ vài phút)
(Sau khi hoàn tất, nút Search và Clear All vẫn bị mờ, phải mất đến vài giờ mới sử dụng được)
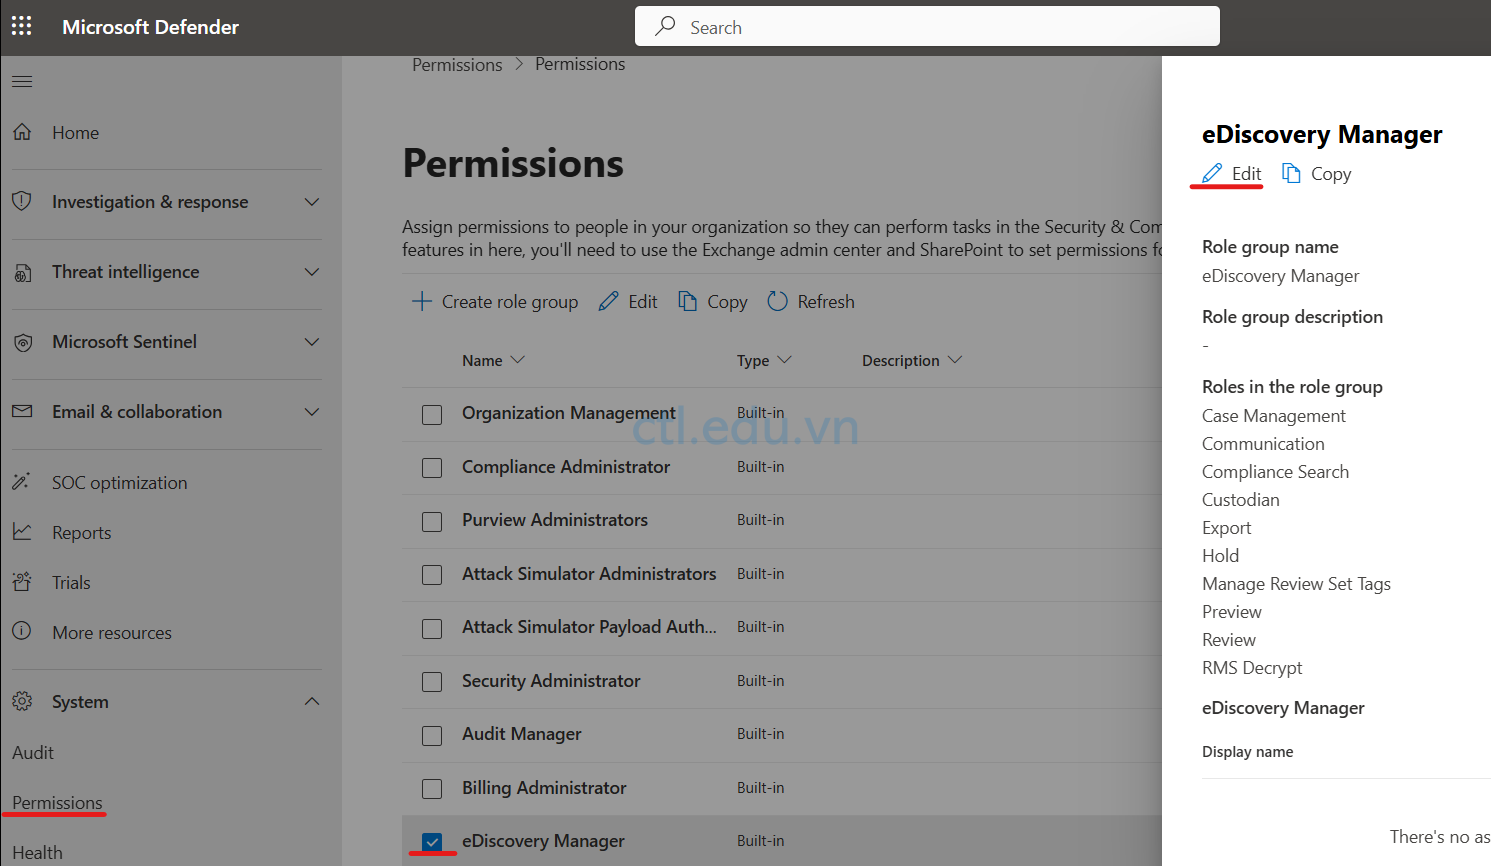
Task 9 – Cấp Quyền Cho User Sử Dùng Content Searches
- Vào Microsoft Edge, truy cập vào https://security.microsoft.com bằng user têncủabạn@customdomian
- Màn hình Microsoft Defender, menu trái chọn System\Permissions.
- Màn hình Permissions, trong phần Email & Collaboration Roles chọn Roles.
- Màn hình Permissions > Permissions check vào check box eDiscovery Manager.
- Xuất hiện cửa sổ eDiscovery Manager ấn Edit.
Exercise 2 – Manage Users and Groups
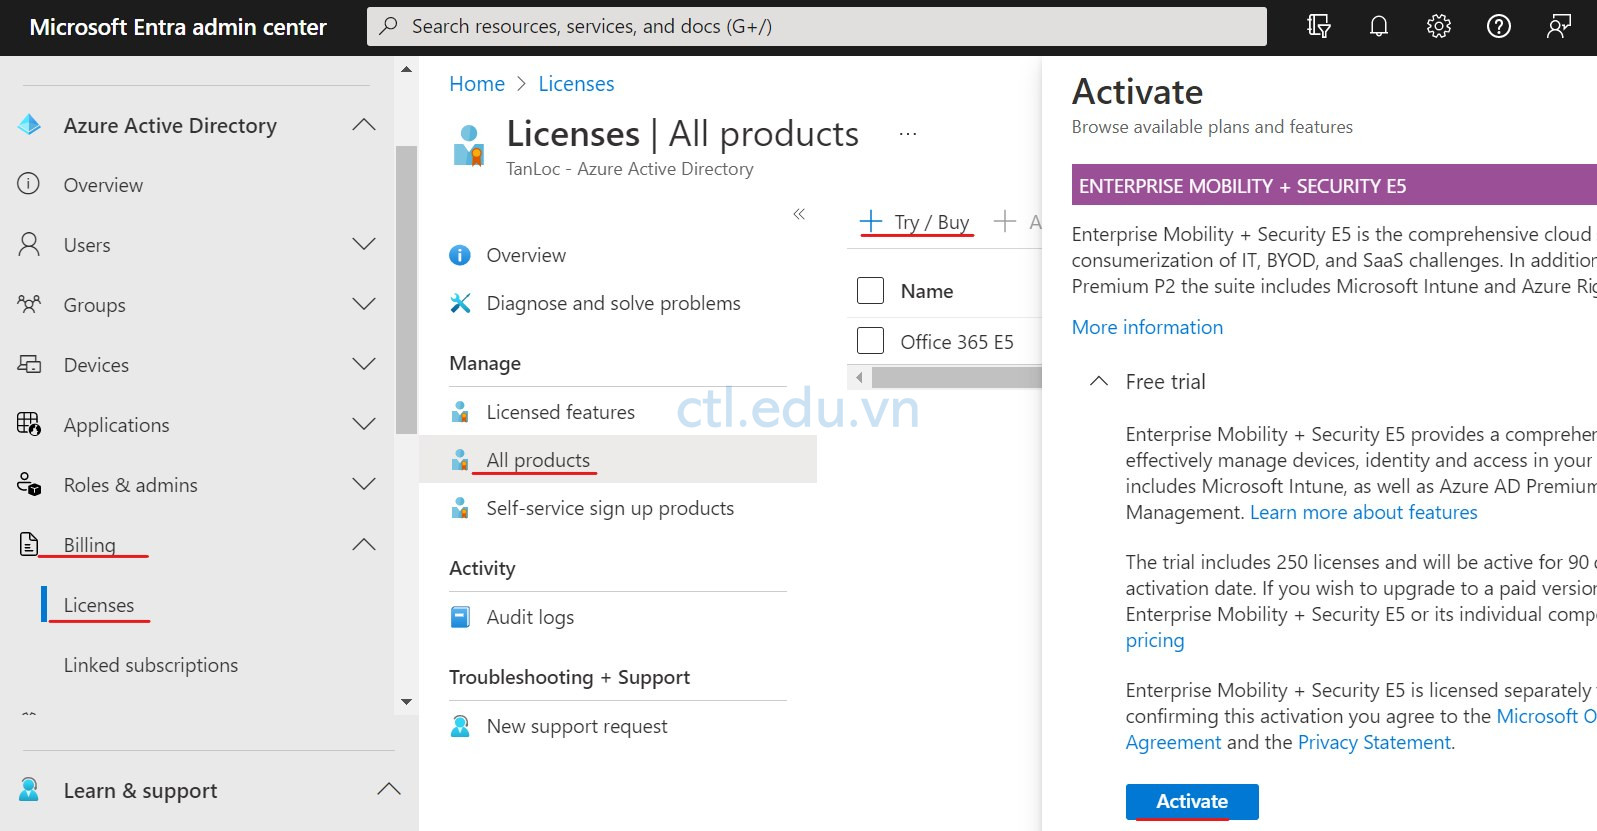
Task 1. Active Free Trial Enterprise Mobility + Security E5 Licenses
- Vào trình duyệt, truy cập vào trang http://admin.microsoft.com, bằng user admin@têncôngty.onmicrosoft.com
- Màn hình Microsoft 365 admin center, menu trái chọn Identity
- Màn hình Microsoft Entra Admin Center, menu trái chọn Billing/Licenses
- Màn hình Overview, menu trái chọn Licenses, chọn All products, ấn Try/Buy.
- Màn hình Active, chọn Free trail trong phần Enterprise Mobility + Security E5, và chọn Activate.
Task 2: Tạo Microsoft 365 User Account và License
- Trở lạm màn hình Microsoft 365 admin center, menu trái chọn Users, và chọn Active Users.
- Màn hình Active Users, ấn Add a User

3. Cửa sổ Set up the basics, nhập vào First Name, Last Name, Displayname, username: têncủabạn@customdomain, bỏ chọn các checkbox, nhập password, ấn next
4. Màn hình Assign product licenses, chọn
- Select location: Việt Nam
- Chọn option: Assign user a product license
- check vào Office 365 E5 và Enterprise Mobility + Security E5
- ấn Next

5. Màn hình Optional settings, chọn option Admin center Access và check vào Global Admin, ấn Next và ấn Finish Adding.
6. Tương tự bạn tạo thêm 4 user là user (no Admin center Access)):
- user1@customdomain
- user2@customdomain
- user3@customdomain
- user4@customdomain

Task 3. Tạo và Quản Lý Groups
A. Tạo Microsoft 365 Group
- Vào Microsoft Edge, truy cập vào https://admin.microsoft.com bằng user têncủabạn@customdomian tạo ở bước 3 task 2
- Tại màn hình Microsoft 365 admin center, menu trái chọn Teams & Groups\Active teams and groups, tại tab Microsoft 365 ấn Add a Group

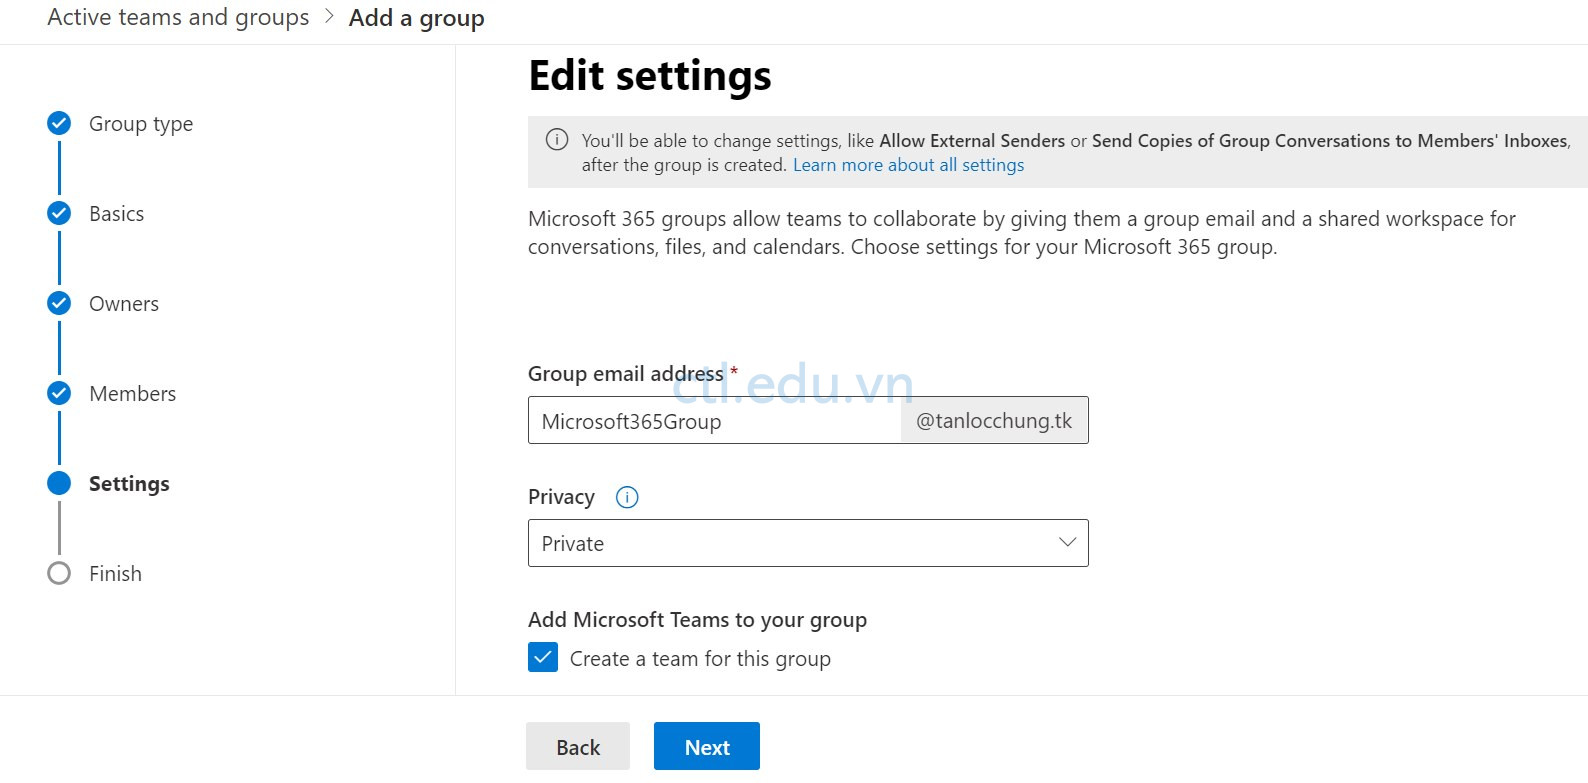
3. Màn hình Choose a group type chọn option Microsoft 365, ấn next:
- Name: Microsoft365_Group ấn next
- Ấn Assign owners chọn têncủabạn@customdomain. ấn next
- Ấn Add members, check chọn user1@customdomain, ấn Add, ấn next.
- Group email address: Microsoft365_Group@customdomain
- Privacy: chọn Private
- Check chọn Create team for this Group
- Ấn Create Group, và ấn Close
B. Tạo Distribution Group
- Tại màn hình Microsoft 365 admin center, menu trái chọn Teams & Groups\Active teams and groups, tại tab Distribution List ấn Add a Group
- Màn hình Choose a group type chọn option Distribution, ấn next:
- Name: Distribution_Group ấn next
- Group email address: Distribution_Group@customdomain
- Check vào Allow people outside…Ấn Create Group, và ấn Close

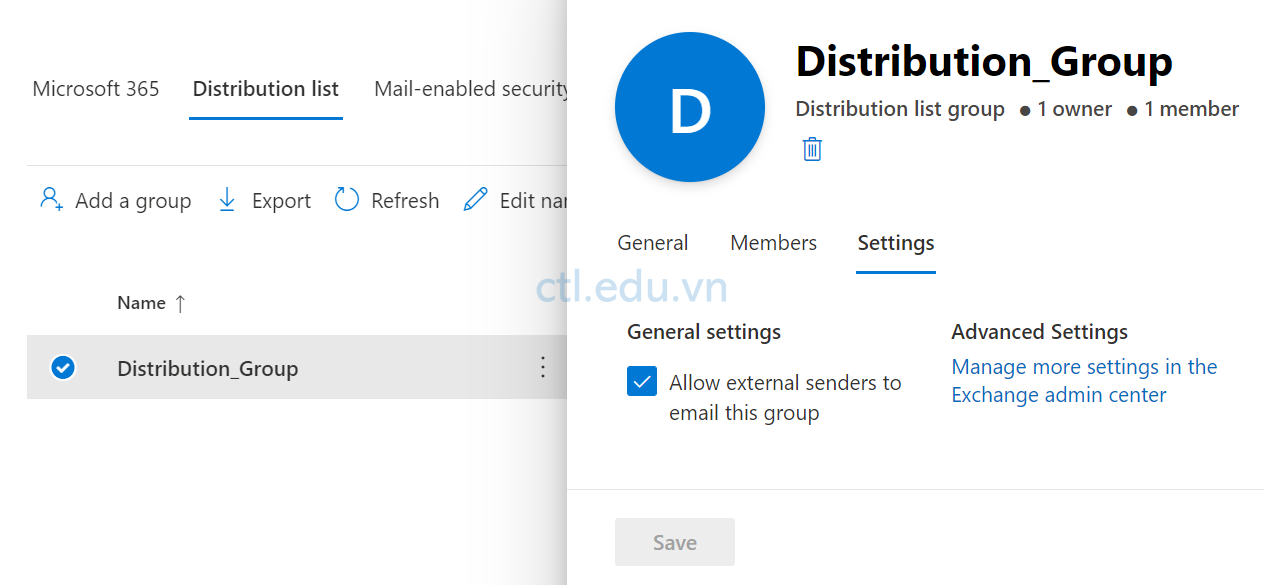
4. Màn hình Groups, chọn Distribution_Group vừa tạo.
5. Màn hình Distribution_Group chọn tab Members, chọn View all and manage members
6. Ấn Add members, check chọn user2@customdomain, ấn Save, ấn Close và Close.
7. Màn hình Distribution_Group, chọn tab Settings, tìm hiểu các checkbox
C. Tạo Mail-Enabled Security Group
- Tại màn hình Microsoft 365 admin center, menu trái chọn Teams & Groups\Active teams and groups, tại tab Mail-enabled Security ấn Add a Group
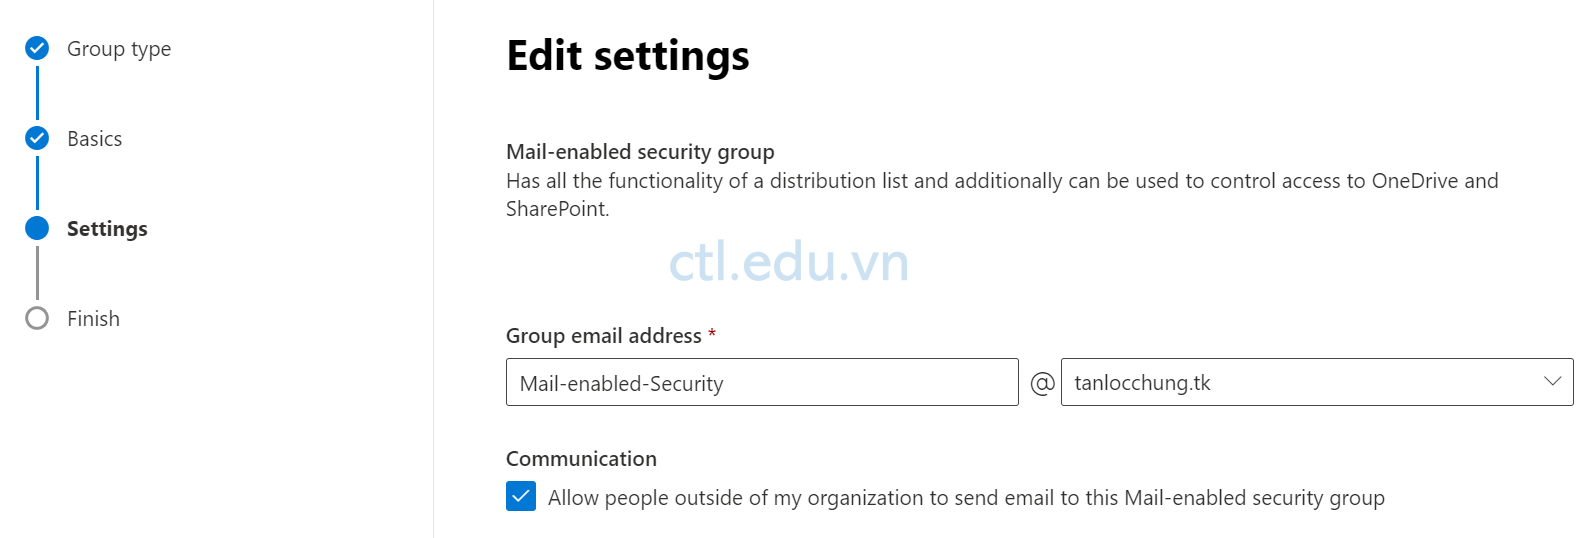
- Màn hình Choose a group type chọn option Mail-enabled Security, ấn next:
- Name: Mail_enabled_Security_Group
- Group email address: Mail_enabled_Security_Group@customdomain
- Check vào Allow people outside… ấn next
- Ấn Create Group, và ấn Close
4. Màn hình Groups, chọn Mail_enabled_Security_Group vừa tạo (có thể chờ vào phút mới thấy Group).
5. Màn hình Mail_enabled_Security_Group chọn tab Members, chọn View all and manage members
6. Ấn Add members, check chọn user3@customdomain, ấn Add, ấn Close.
7. Màn hình Mail_enabled_Security_Group, chọn tab Settings, tìm hiểu các checkbox

D. Tạo Security Group
- Tại màn hình Microsoft 365 admin center, menu trái chọn Teams & Groups\Active teams and groups, tại tab Security ấn Add a Group
- Màn hình Choose a group type chọn option Security, ấn next:
- Name: Security_Group
- Ấn Create Group, và ấn Close

4. Màn hình Groups, chọn Security_Group vừa tạo.
5. Màn hình Security_Group chọn tab Members, chọn View all and manage members
6. Ấn Add members, check chọn user4@customdomain, ấn add, ấn Close.
7. Phân biệt sự khác nhau và giống nhau các group bạn đã tạo

Task 4. Quản Lý User và Group Dùng PowerShell
A. Tạo mới users và gán licenses dùng Windows PowerShell
- Vào start gõ powershell, phải chuột vào windows powershell chọn run as administrator.
- Tại Windows PowerShell thực hiện lệnh sau:
Connect-MsolService
3. Màn hình logon xuất hiện, Đăng nhập bằng user têncủabạn@Customdomain
4. Tại Windows PowerShell thực hiện lệnh sau để tạo user user5@customdomain, với custom domain là tên domain bạn đã add vào ở task 2: (thay tanlocchung.tk bằng custom domain của bạn)
New-MsolUser -UserPrincipalName user5@tanlocchung.tk -DisplayName “User User5” -FirstName “User5” -LastName “User” -Password Pa55w.rd -ForceChangePassword $false -UsageLocation “VN”
5. Tiếp tục dùng lệnh sau để tạo user6@customdomain (thay tanlocchung.tk bằng custom domain của bạn)
New-MsolUser -UserPrincipalName user6@tanlocchung.tk -DisplayName “User User6” -FirstName “User6” -LastName “User” -Password Pa55w.rd -ForceChangePassword $false -UsageLocation “VN”

6. Để xác định user nào chưa có licensed, thực hiện lệnh sau:
- Get-MsolUser -UnlicensedUsersOnly
7. Để xác định tên của licensed, thực hiện lệnh sau:
- Get-MsolAccountSku
8. Cấp license cho user user5@customdomain thực hiện lệnh:
Set-MsolUserLicense -UserPrincipalName user5@tanlocchung.tk -AddLicenses “robusta365hn:ENTERPRISEPREMIUM”, “robusta365hn:EMSPREMIUM”
9. Cấp license cho user user6@customdomain thực hiện lệnh:
Set-MsolUserLicense -UserPrincipalName user6@tanlocchung.tk -AddLicenses “robusta365hn:ENTERPRISEPREMIUM”, “robusta365hn:EMSPREMIUM”

B. Xóa và Phục Hồi User bằng PowerShell
1. Không cho user5 logon thực hiện lệnh:
- Set-MsolUser -UserPrincipalName user5@tanlocchung.tk -BlockCredential $true
2. Xóa user5 thực hiện lệnh sau:
- Remove-MsolUser -UserPrincipalName user5@tanlocchung.tk -Force
3. Xem user đã xóa thực hiện lệnh:
- Get-MsolUser -ReturnDeletedUsers
4. Kiểm tra user5 có trong deleted users. lưu ý user5 vẫn còn licensed.
5. Phục hồi user thực hiện lệnh:
- Restore-MsolUser -UserPrincipalName user5@tanlocchung.tk
6. Xem lại user trong deleted users thực hiện lệnh: (User user5 không còn trong deleted users)
- Get-MsolUser -ReturnDeletedUsers
7. Xem user đang active thực hiện lệnh:
- Get-MsolUser
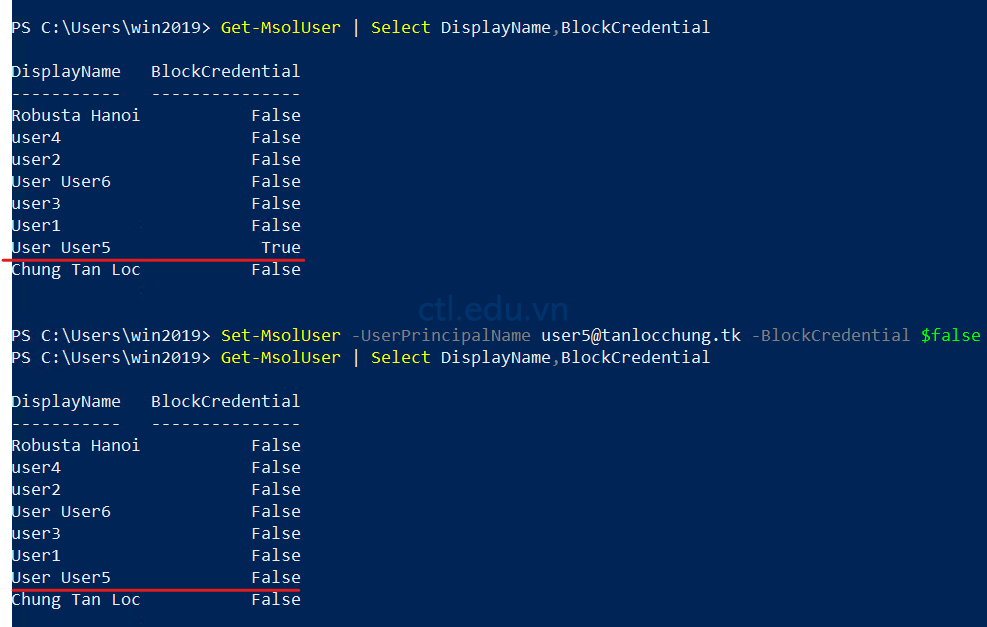
8. Xem user đang bị block (không thể logon)
- Get-MsolUser | Select DisplayName,BlockCredential
9. Cho phép user logon thực hiện lệnh
- Set-MsolUser -UserPrincipalName user5@tanlocchung.tk -BlockCredential $false
10. Đổi password của user5 dùng lệnh:
Set-MsolUserPassword -UserPrincipalName user5@tanlocchung.tk -NewPassword Pa55w.rd
C. Tạo Security Group bằng PowerShell
- Tại PowerShell thực hiện lệnh sau để tạo Group Marketing: (ghi nhớ ObjectID của Group này)
- New-MsolGroup -DisplayName “Marketing” -Description “Marketing department users”
2. Dùng lệnh sau để xem ObjectID của User5 và user6 (Ghi nhớ ObjectID của 2 usder này)
- Get-MsolUser | Select DisplayName,Objectid
3. Dùng lệnh sau để add user5 là thành viên Group Marketing (thay Group ObjectID bằng bằng ID bạn ghi nhớ ở bước 1, và User ObjectID bằng ID của User5 bạn ghi nhớ ở bước 2)
- Add-MsolGroupMember -GroupObjectId <Group ObjectID> -GroupMemberType User -GroupMemberObjectId <User ObjectID>
4. Tương tự add user6 là thành viên Group Marketing (thay Group ObjectID bằng bằng ID bạn ghi nhớ ở bước 1, và User ObjectID bằng ID của User6 bạn ghi nhớ ở bước 2)
- Add-MsolGroupMember -GroupObjectId <Group ObjectID> -GroupMemberType User -GroupMemberObjectId <User ObjectID>
5. Dùng lệnh sau để xem các thành viên của Group Marketing (thay Group ObjectID bằng bằng ID bạn ghi nhớ ở bước 1)
Get-MsolGroupMember -GroupObjectId <Group ObjectID>

D. Tạo Microsoft 365 Group bằng PowerShell
- Tại PowerShell thực hiện các lệnh sau để kết nối đến Exchange Online Powershell session:
- Install-Module ExchangeOnlineManagement (ấn Y khi có yêu cầu)
- Import-Module ExchangeOnlineManagement
- Đóng và mở lại PowerShell
- Connect-ExchangeOnline (Đăng nhập bằng user tên của bạn@customdomain)
2. Dùng lệnh sau để tạo Microsoft 365 Group
- New-UnifiedGroup -DisplayName “Engineering Department” -Alias Engineering
3. Dùng lệnh sau để xem lai Microsoft 365 group vừa tạo:
- Get-UnifiedGroup
4. Dùng lệnh sau để add user6, và têncủabạn là member của Group
- Add-UnifiedGroupLinks -Identity “engineering” -LinkType Members -Links user6,loc
5. Dùng lệnh sau để gán user têncủabạn là Owner của Group.
- Add-UnifiedGroupLinks -Identity “engineering” -LinkType Owners -Links loc
6. Dùng lệnh sau để xóa Group vừa tạo: (ấn Y khi có yêu cầu)
- Remove-UnifiedGroup -Identity “Engineering Department”

E. Phục Hồi Microsoft 365 Group Đã Xóa
- Tại PowerShell thực hiện lệnh sau để kết nối vào Azure Active Directory: (nhập vào user và password của têncủabạn@customdomain)
- Connect-AzureAD
2. Dùng lệnh sau để xem Microsoft 365 Group đã xóa: (ghi nhớ ObjectID của Office 365 group cần phục hồi)
- Get-AzureADMSDeletedGroup
3. Dùng lệnh sau để phục hồi lại Microsoft 365 Group đă xóa (thay ObjectID bằng ID bạn ghi nhớ ở bước 2)
- Restore-AzureADMSDeletedDirectoryObject -Id <objectId>
4. Dùng lệnh sau để xem lại Microsoft 365 Group đã được phục hồi
- Get-AzureADGroup
(Lưu ý bạn chỉ có thể Restore Microsoft 365 Group, còn các loại Group Khác không thể Restore)

Hoàn tất bài Lab
Mr CTL