SharePoint Libraries có các đặc điểm giống như SharePoint lists, chẳng hạn columns, views, và validation. Libraries cũng là một công cụ rất linh hoạt và mạnh mẽ trong SharePoint.
Document Library thường dùng để lưu trữ và chia sẽ các file tài liệu. Column Library dùng để lưu các thông tin bổ sung có thể được sử dụng để lọc và tìm kiếm. Document Library được coi là sự thay thế tuyệt vời cho hệ thống File Server truyền thống.
Bài lab hướng dẫn tạo Library và sử dụng Flow tạo Approval Workflow trong Sharepoint Online.
- Khi User tạo file mới trong Document Library, file này phải được kiểm duyệt bởi người quản lý của user tạo file. Khi file Approve hay Reject user đều nhận được mail thông báo từ người quản lý.
- Bài lab thực hiện qua các bước sau:
- B1. Set manager cho user.
- B2. Cấu hình Require content approval for submitted items.
- B3. Tạo Approval Workflow.
- B4. Kiểm Tra Flow.
B1. Set Manager Cho User.
- Tại trình duyệt truy cập trang https://admin.microsoft.com bằng têncủabạn@customdomain
- Màn hình Microsoft 365 Admin Center, menu trái chọn Show All, chọn Azure Active Directory.
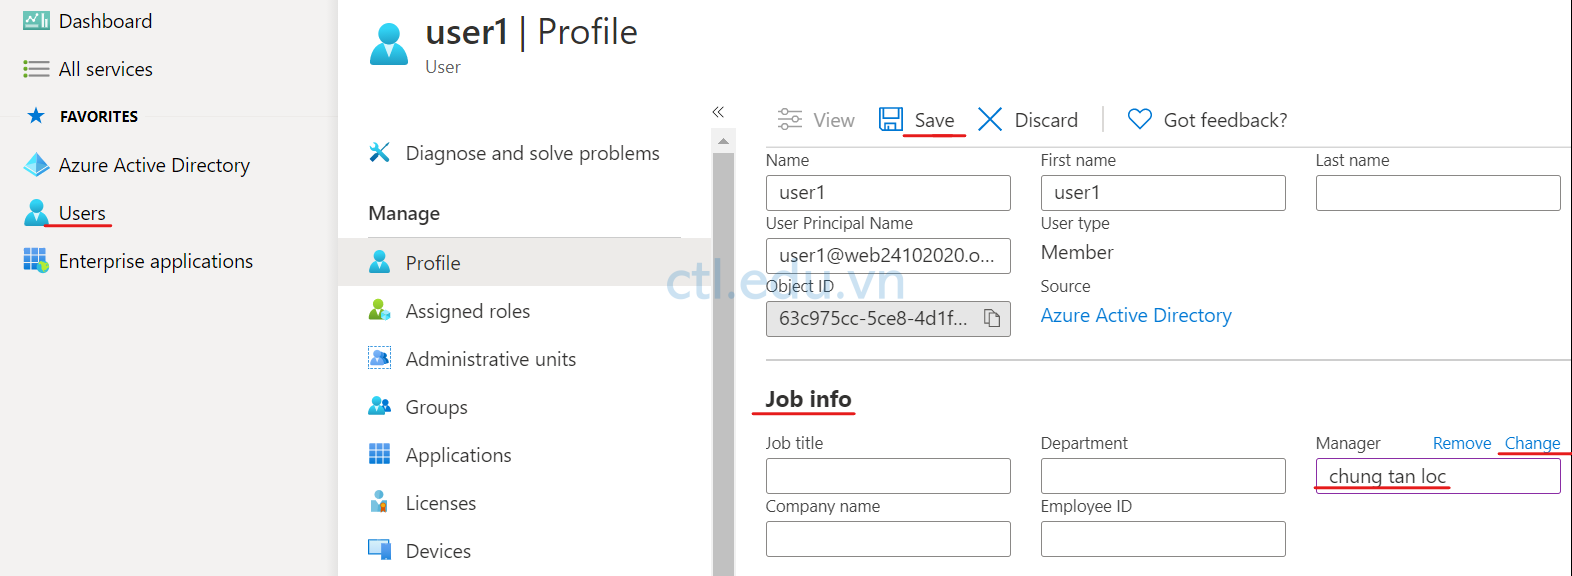
- Màn hình Azure Active Directory Admin Center, menu trái chọn Users, chọn User1, ấn Edit.
- Tại phần Job info, trong phần Manager ấn change chọn têncủabạn@customdomain
- Ấn Save.
B2. Cấu Hình Require Content Approval for Submitted Items.
- Tại trình duyệt truy cập trang https://YourTenant.sharepoint.com/sites/Têncủabạn (thay yourtenant bằng tên công ty của bạn)
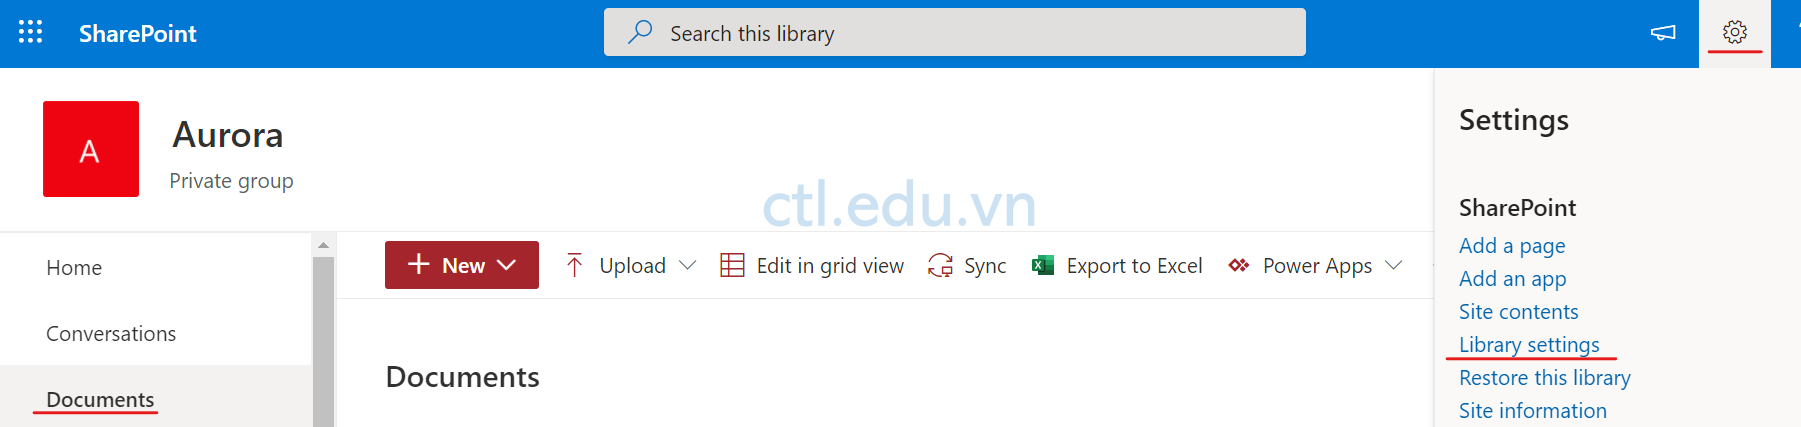
- Tại site Têncủabạn, menu trái chọn Documents, ở gốc trên bên phải chọn Settings (icon hình bánh răng), chọn Library Settings.
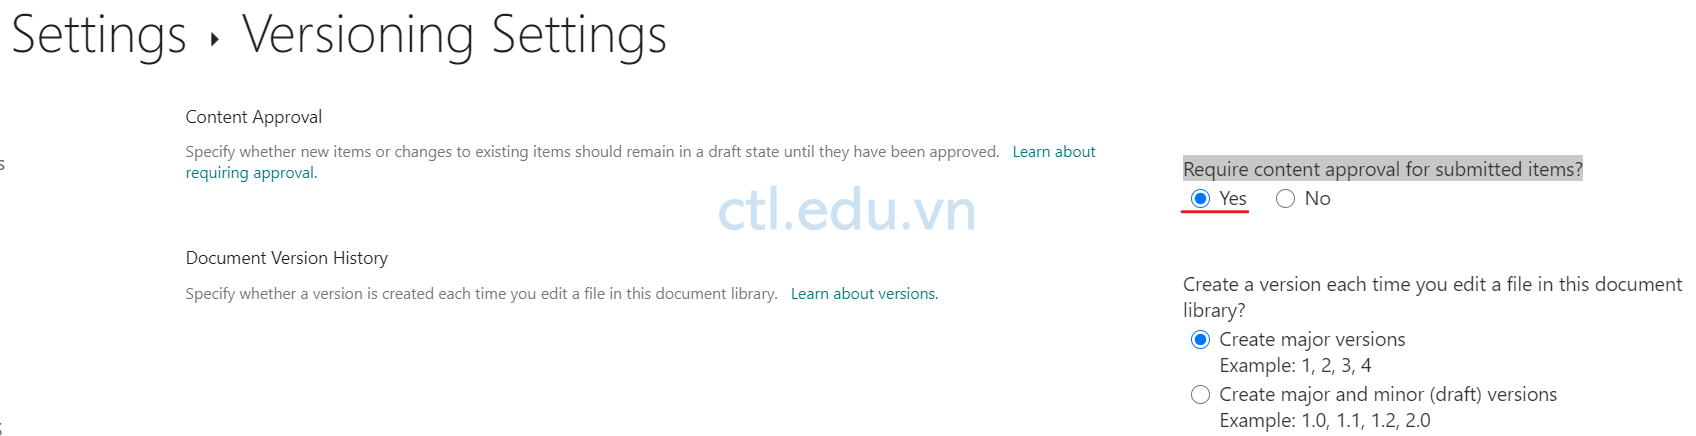
3. Màn hình Documents Settings, chọn Versioning settings.
4. Trong phần Require content approval for submitted items? chọn Option Yes ấn OK.
B3. Tạo Approval Workflow
- Trở lại site Tên của Bạn, menu trái chọn Documents, trên thanh công cụ chọn Automate, chọn Power Automate, chọn See Your Flows
- Màn hình Power Automate, menu trái chọn My Flows, chọn + New Flow, chọn Automated Cloud Flow.
- Flow name nhập vào Approve File, trong phần Choose your flow’s trigger nhập vào Sharepoint, chọn option When a file is created (properties only), Ấn Create.

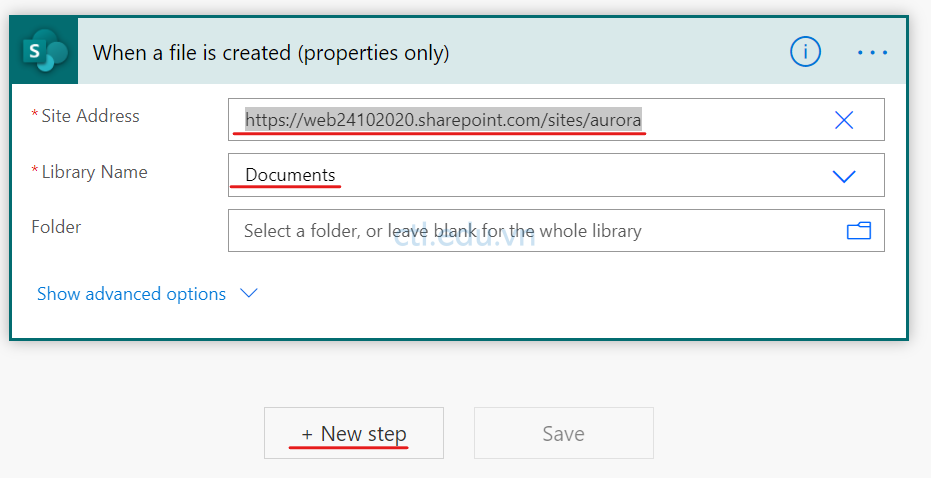
4. Trong phần When a file is created (properties only) khai báo các thông tin sau:
- Site Address: https://YourTenant.sharepoint.com/sites/Têncủabạn
- Library Name: Documents
5. Ấn New Step
6. Trong phần Choose an action, tìm và chọn Sharepoint.
7. Tìm và chọn Get file metadata.
8. Trong phần Get file metadata chọn các thông tin sau:
- Site Address: https://YourTenant.sharepoint.com/sites/Têncủabạn
- File Identifier: tìm và chọn Identifier
9. Ấn New Step

10. Trong phần Choose an action, tìm và chọn Office 365 User.
11. Tìm và chọn Get Manager (V2).
12. Trong phần Get Manager (V2) chọn thông tin sau:
- User (UPN): tìm và chọn Created By Email
13. Ấn New Step

14. Trong phần Choose an action, tìm và chọn Approvals.
15. Tìm và chọn Start and wait for an approval.
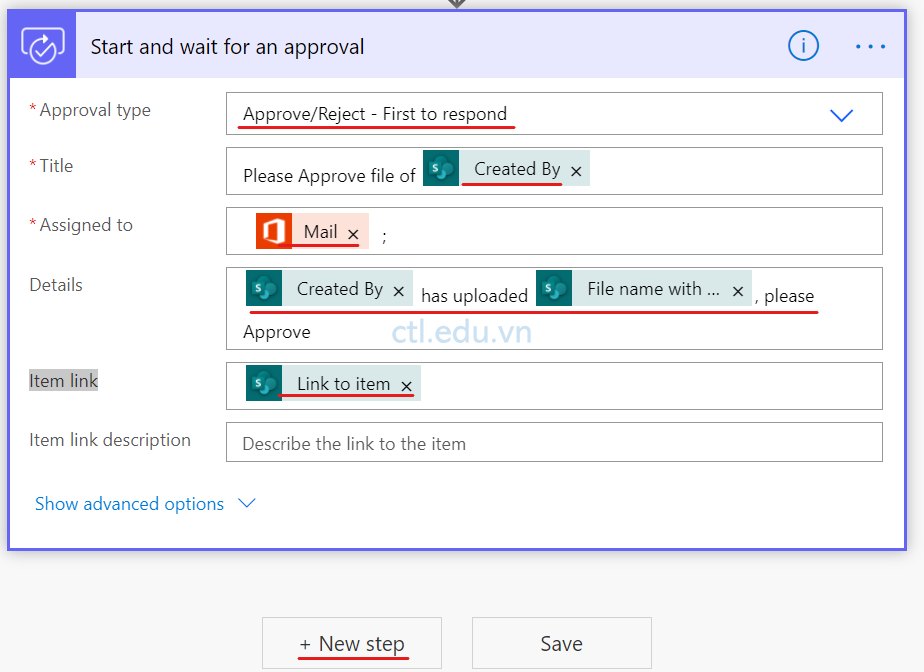
16. Trong phần Start and wait for an approval chọn các thông tin sau:
- Approval type: chọn Approve/Reject – First to respond
- Title: Nhập vào Please Approve file of, tìm và chọn Created by DisplayName
- Assigned to: tìm và chọn Mail
- Details: chọn Created by DisplayName, nhập tiếp has uploaded, tìm và chọn File name with extension.
- Item link: tìm và chọn link to Item
17. Ấn New Step.
18. Trong phần Choose an action, tìm và chọn Control.
19. Tìm và chọn Condition.
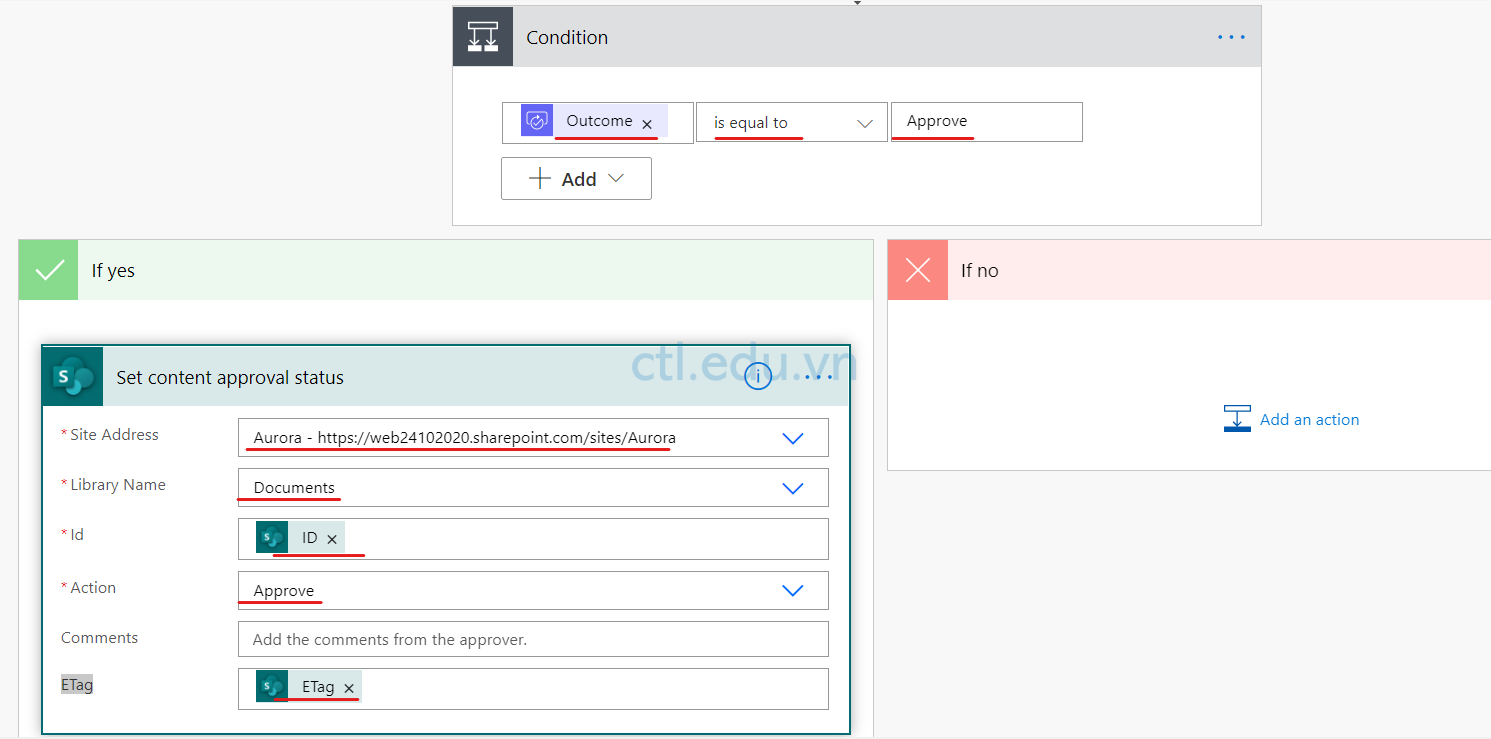
20. Trong phần Condition: tìm và chọn Outcome, chọn is equal to, nhập vào Approve
21. Trong phần If Yes ấn Add an Action, trong phần Choose an action tìm và chọn Sharepoint, tìm và chọn Set content approval status
22. Trong phần Set content approval status thiết lập các thông tin sau:
- Site Address: https://YourTenant.sharepoint.com/sites/Têncủabạn
- Library Name: Documents
- Id: chọn ID (lưu ý chọn ID trong phần When a file is created (properties only))
- Action: chọn Approve
- ETag: chọn ETag
23. Trong phần If Yes tiếp tục ấn Add an Action, trong phần Choose an action tìm và chọn Office 365 Outlook, tìm và chọn Send an Email (v2)
24. Trong phần Send an Email (v2) nhập các thông tin sau:
- To: chọn Created by email
- Subject: chọn File name with extension chọn Outcome
- Body: chọn File name with extension chọn Outcome by chọn Email

25. Trong phần If No ấn Add an Action, trong phần Choose an action tìm và chọn Sharepoint, tìm và chọn Set content approval status
26. Trong phần Set content approval status thiết lập các thông tin sau:
- Site Address: https://YourTenant.sharepoint.com/sites/Têncủabạn
- Library Name: Documents
- Id: chọn ID (lưu ý chọn ID trong phần When a file is created (properties only))
- Action: chọn Reject
- ETag: chọn ETag

27. Trong phần If No tiếp tục ấn Add an Action, trong phần Choose an action tìm và chọn Office 365 Outlook, tìm và chọn Send an Email (v2)
28. Trong phần Send an Email (v2) nhập các thông tin sau:
- To: chọn Created by email
- Subject: chọn File name with extension chọn Outcome
- Body: chọn File name with extension chọn Outcome by chọn Email

29. Kiểm tra lại các bước trong Flow, Ấn Save

B4. Kiểm Tra Flow
- Mở trình duyệt khác truy cập trang https://YourTenant.sharepoint.com/sites/Têncủabạn bằng quyền của user1 (thay YourTenant bằng Tenant của bạn)
- Tại site Tên của bạn, menu trái chọn Document, ấn upload file, chọn file bất kỳ để upload.
- Mở trình duyệt khác, truy cập trang https://outlook.office365.com bằng user têncủabạn@customdomain
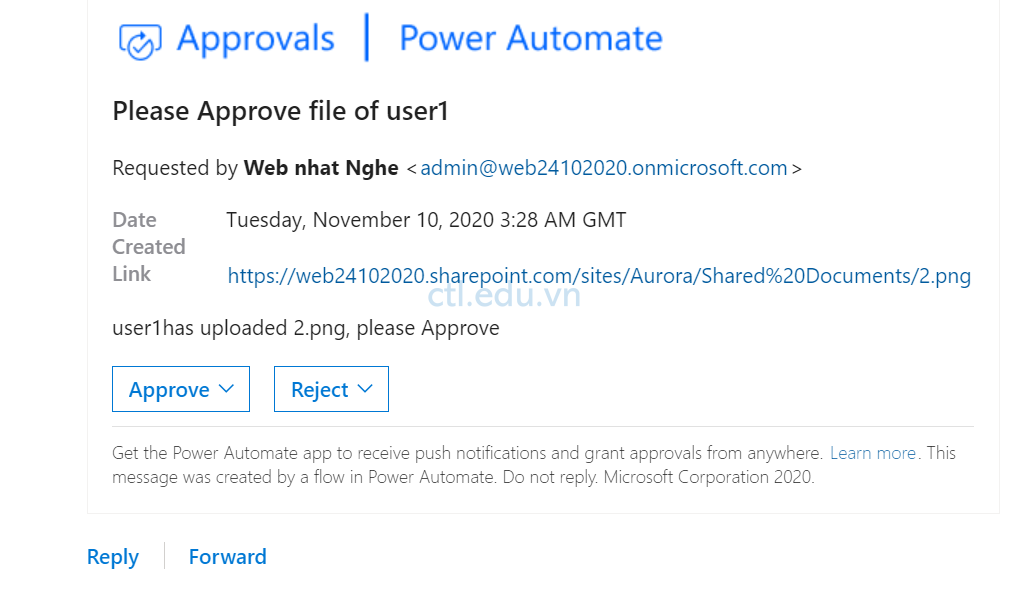
- Kiểm tra nhận được email yêu cầu Approve từ User1, bạn ấn Approve hay Reject để kiểm tra.
- Tiếp tục check mail của User1, sẽ nhận được Email thông báo file đã được Approve hay reject bởi tên của bạn@customdomain.
- Trở lại site site Tên Của bạn, menu trái chọn Document, quan sát thấy file đã được Approve hay reject.
7. Hãy upload file bằng user khác, và kiểm tra Flow nhiều lần để kiểm tra tính ổn định của Flow.
Hoàn tất bài lab.
Mr-CTL