Lượng dữ liệu mà các tổ chức phải quản lý và lưu trữ bảo quản là rất lớn. Trung bình, các công ty có mức tăng trưởng về dữ liệu là 50% mỗi năm và có thể tăng gấp đôi sau mỗi 18 tháng. Việc quản trị dữ liệu (Data Governance) trong suốt vòng đời của nó, từ khi thu thập đến khi sử dụng và sau đó là loại bỏ là một thách thức.
Data Governance là mọi thứ doanh nghiệp làm để đảm bảo dữ liệu an toàn, riêng tư, chính xác, và khả dụng. Mọi tổ chức đều cần quản trị dữ liệu. Khi các doanh nghiệp đang tiến hành chuyển đổi số, dữ liệu nhanh chóng trở thành tài sản có giá trị nhất mà họ sở hữu. Các tổ chức dùng Data Governance để quản lý dữ liệu, từ việc lưu trữ, bảo quản, xóa bỏ khi dữ liệu hết hạn.

Cấu Hình Office 365 Message Encryption.
Bài lab hướng dẫn dùng Azure Rights Management Services (RMS) để mã hóa nội dung mail.
Task 1 – Enable Azure Rights Management Cho Exchange Online
1. Tại máy Windows 10, vào Windows PowerShell, thực hiện lệnh sau để cài Microsoft Azure Active Directory Module for Windows PowerShell: (ấn Y khi có yêu cầu)
Install-Module MSOnline
2. Thực hiện tiếp lệnh sau để kết nối đến Azure Active Directory:
Connect-MsolService ( nhập vào user name và password của têncủabạn@customdomain)
3. Thực hiện lệnh sau để giảm security:
Set-ExecutionPolicy unrestricted (ấn Y khi có yêu cầu)
4. Thực hiện các lệnh sau để kết nối đến remote Exchange Online dùng remote PowerShell. Sử dụng username và password của têncủabạn@customdomain
- Install-Module ExchangeOnlineManagement
- Import-Module ExchangeOnlineManagement
- Connect-ExchangeOnline -UserPrincipalName têncủabạn@customdomain -ShowProgress $true -ConnectionUri https://outlook.office365.com/powershell-liveid/
5. Thực hiện lệnh sau để kiểm tra IRM (Information rights management) và xem kết quả
Test-IRMConfiguration -Sender têncủabạn@customdomain
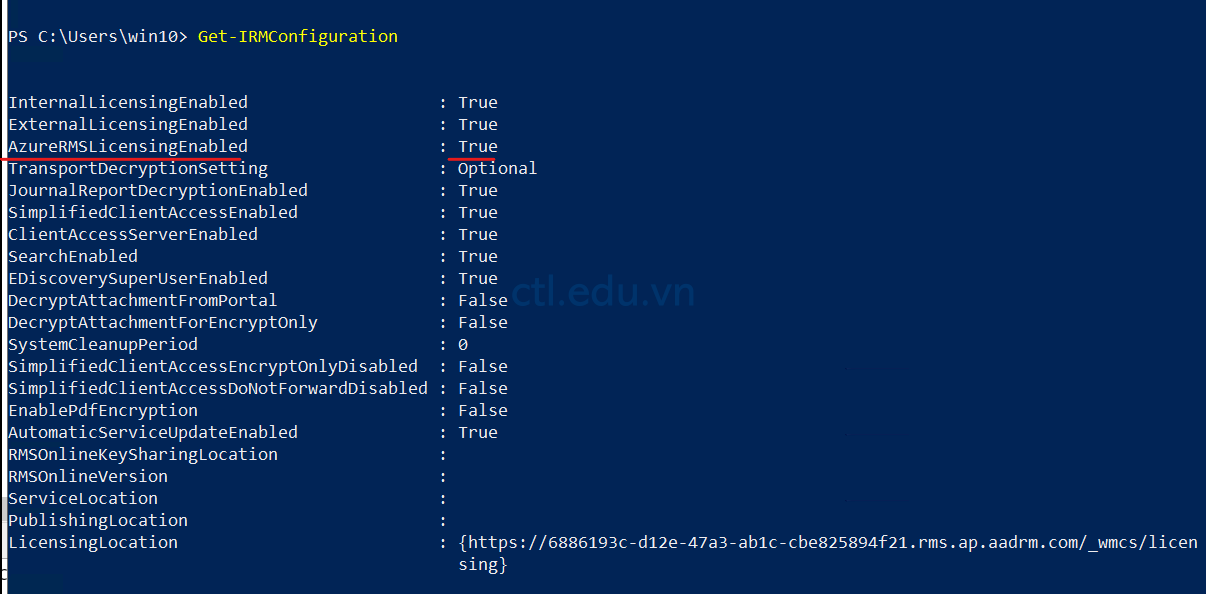
6. Sử dụng lệnh sau để xem cấu hình Information Rights của Exchange Online:
Get-IRMConfiguration
Kiểm tra Azure Rights Management Services đã được enabled, hãy quan sát tham số AzureRMSLicensingEnabled có giá trị là $true. Nếu AzureRMSLicensingEnabled có giá trị $false, thì thực hiện tiếp lệnh sau:
Set-IRMconfiguration -azureRMSLIcensingEnabled $true
(giữ nguyên cửa sổ Powershell để thực hiện task 3)
Task 2 – Dùng Exchange Admin Center Tạo Mail Flow Encryption Rule
- Tại trình duyệt truy cập trang http://admin.microsoft.com bằng quyền têncủabạn@customdomain
- Tại màn hình Microsoft 365 admin center, menu trái chọn Users, và chọn Active Users, taọ thêm user5@customdomain và user6@customdomain.
- Màn hình Microsoft 365 admin center, menu trái chọn Show all, và chọn Exchange.
- Màn hình Exchange admin center, menu trái chọn mail flow, chọn Rules,
- Cửa sổ Rules, ấn Add a rule và chọn Create a new rule
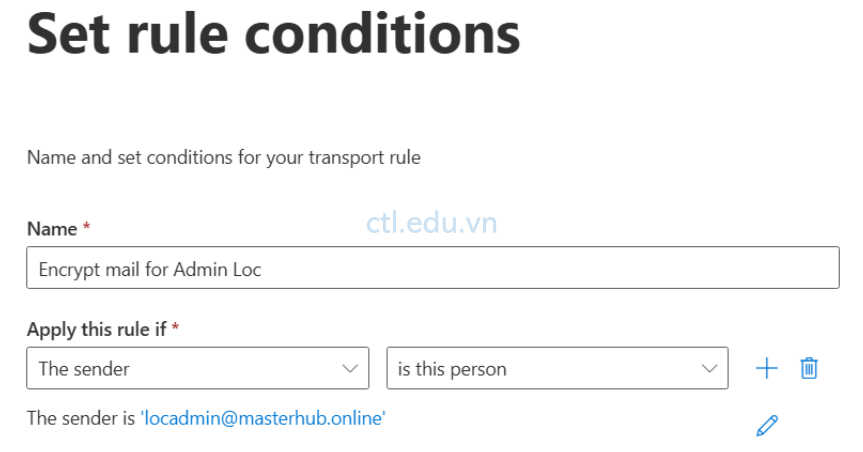
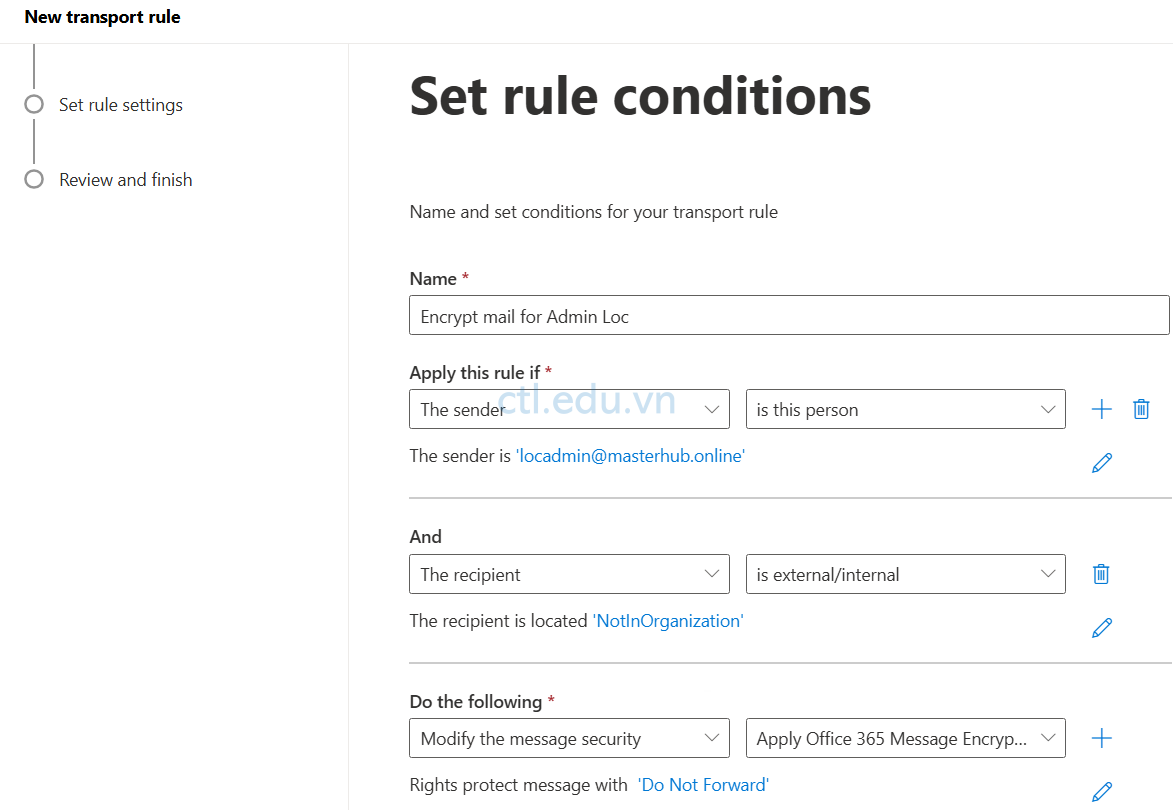
- Cửa sổ Set rule conditions, nhập các thông tin sau:
- Name: nhập vào Encrypt mail for user5@customdomain.
- Trong phần Apply this rule if chọn the Sender, chọn Is this person và chọn user5@customdomain.
- Cũng trong phần Apply this rule if ấn dấu + để thêm điều kiện.
- Trong ô điều kiện thứ 2 chọn The recipient và chọn is external/internal, và chọn Inside the organization
- Trong phần Do the following… chọn Modify the message security… và chọn Apply Office 365 Message Encryption and rights protection,
- Xuất hiện cửa sổ select RMS template chọn Do Not Forward, ấn Save, ấn Next.
- Cửa sổ Set rule settings, Chọn Option Enforce, Severity chọn Medium, ấn Next, ấn Finish
Task 3 – Dùng Windows PowerShell Tạo Mail Flow Encryption Rule
Ở task này bạn sẽ dùng lệnh New-TransportRule để tạo mail flow rule, bạn sẽ set tham số mã hóa ApplyOME thành $true. Rule này sẽ mã hóa tất cả các email từ domain của bạn gửi đến user6@customdomain.
- Nếu bạn đã đóng Powershell, bạn phải thực hiện lại từ bước 2 đến bước 4 của Task 1.
- Tại Powershell thực hiện lệnh sau:
New-TransportRule -Name “Encrypt rule for User6” -SentTo “user6@customdomain” -SentToScope “NotinOrganization” -ApplyOME $true
(Nếu bị lỗi bạn thực hiện lệnh sau:
Update-Module -Name ExchangeOnlineManagement
Get-RMSTemplate
và dùng lệnh sau để tạo lại Transportrule:
New-TransportRule -Name “Encrypt rule for User6” -SentTo “user6@customdomain” -SentToScope “NotinOrganization” -ApplyRightsProtectionTemplate “Do Not Forward”
(chờ vài phút để hoàn thành)
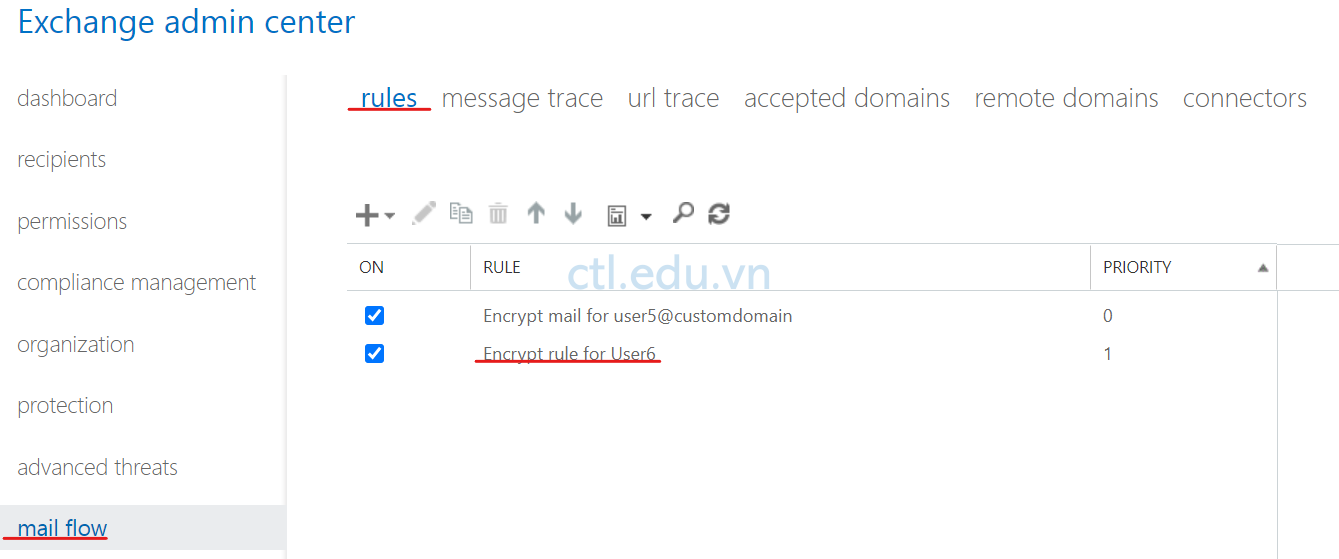
3. Trở lại Màn hình Exchange admin center, menu trái chọn mail flow, và chọn Rules đã có rule Encrypt rule for User6
Kiểm Tra Information Rights Management
Task 1 – Kiểm Tra Information Rights Management for Exchange Online
- Mở trình duyệt truy cập trang https://outlook.office365.com bằng user user5@customdomain
- Gốc trên bên trái ấn +New message, tạo email mới gửi cho têncủabạn@customdomain với nội dung tùy ý.
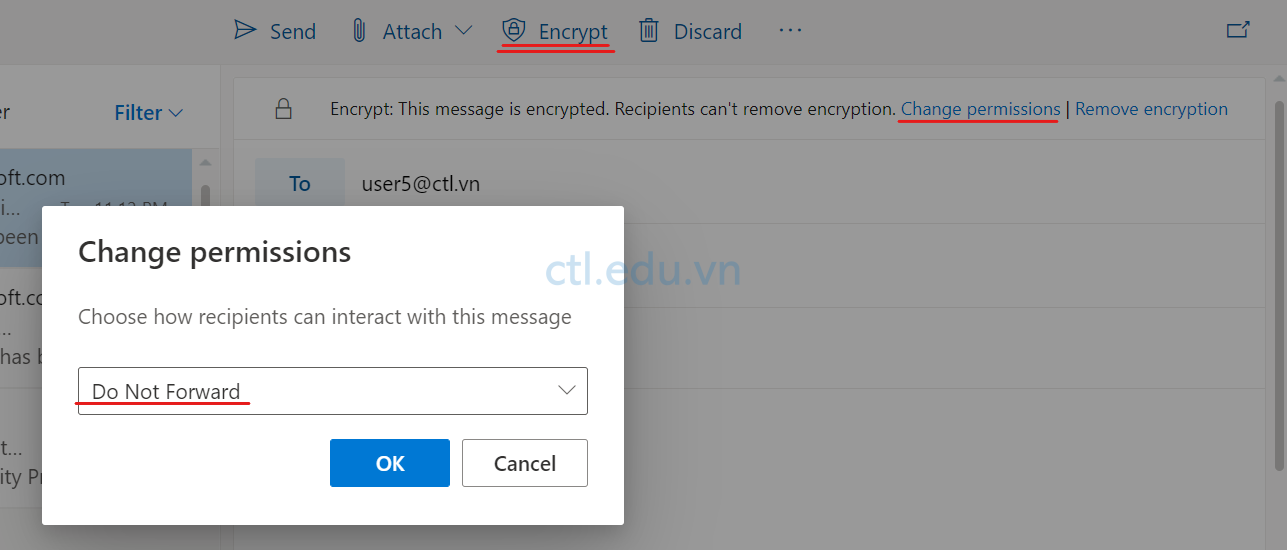
- (Trên thanh menu bar chọn Encrypt, xuất hiện dòng thông báo chọn Change permissions và chọn Do not forward, ấn OK, ấn Send)
- Mở trình duyệt khác, https://outlook.office365.com bằng user têncủabạn@customdomain, kiểm tra nhận được email mới và mail này không thể forward.
Task 2 – Kiểm Tra Information Rights Management For SharePoint Online
- Tại trình duyệt truy cập trang http://admin.microsoft.com bằng quyền têncủabạn@customdomain
- Tại màn hình Microsoft 365 admin center, menu trái chọn Show All và chọn SharePoint.
- Tại màn hình SharePoint admin center menu trái chọn Sites, chọn Active Sites.
- Màn hình Active Sites chọn + Create

5. Cửa sổ Create a site chọn Team site
6. Cửa sổ Get a team site connected to Microsoft 365 Groups nhập các thông tin sau:
- Site name: Marketing
- Group owner: têncủabạn@customdomain
- Select a language: English
- Ấn Next
- Trong phần Add members: nhập và chọn User5 và User6
- Ấn Finish
7. Mở tab khác truy cập trang https://domaincủabạn.sharepoint.com/sites/marketing (site vừa tạo)
8. Tại site Marketing menu trái chọn Documents
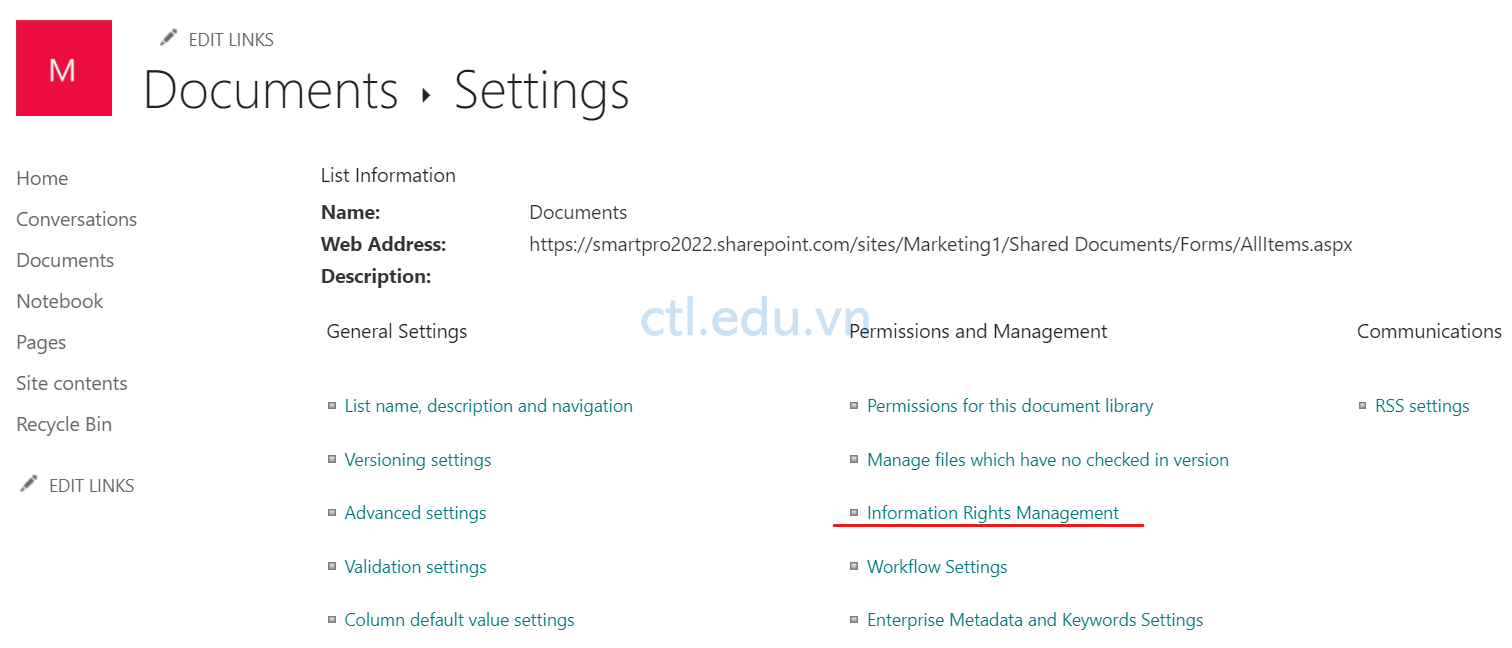
9. Màn hình Documents, ở gốc trên bên phải chọn Settings (icon hình bánh răng) và chọn Library settings và chọn More Library settings.
10. Màn hình Settings, trong phần Permissions and Management chọn Information Rights Management.
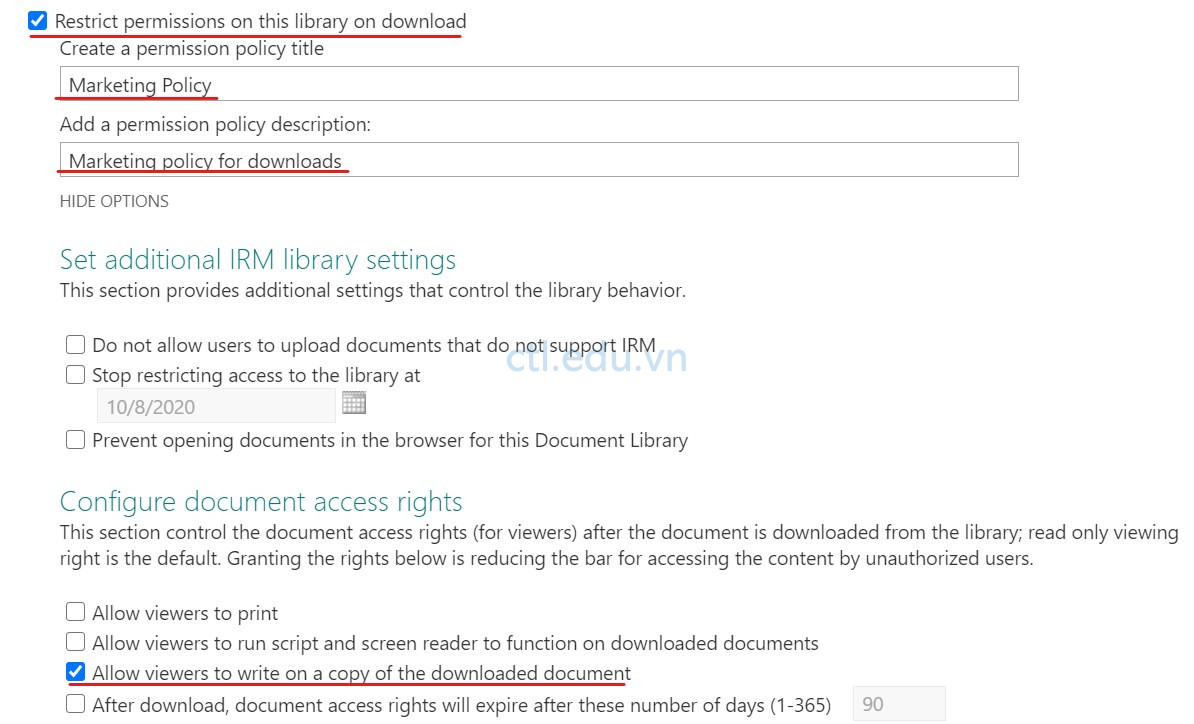
11. Màn hình Information Rights Management Settings, nhập các thông tin sau:
- Check vào checkbox Restrict permissions on this library on download.
- Create a permission policy: nhập Marketing Policy
- Add a permission policy description: nhập vào Marketing policy for downloads.
- Ấn SHOW OPTIONS.
- Trong phần Configure document access rights, check chọn Allow viewers to write on a copy of the downloaded document ấn OK.
12. Trở lại site Marketing menu trái chọn Documents, chọn upload, thực hiện upload file Word có nội dung lên site Marketing.
13. Mở trình duyệt khác truy cập trang https://domaincủabạn.sharepoint.com/sites/marketing bằng quyền của user5@customdomain
14. Tại site Marketing menu trái chọn Documents, click vào file word để mở file, ở gốc trên bên trái file xuất hiện Marketing policy for downloads, bạn không thể chỉnh sửa file này online, nhưng bạn có thể donwload về máy local của bạn.
Cấu Hình Retention Tags and Policies
Task 1 – Activate In-Place Archiving
- Tại màn hình Microsoft 365 admin center, menu trái chọn Exchange.
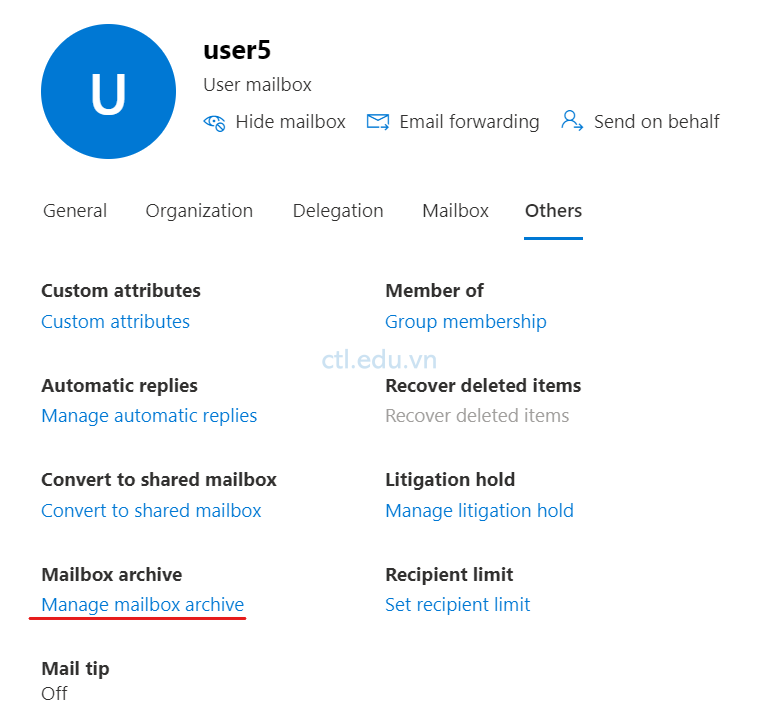
- Cửa sổ Exchange admin center, menu trái chọn Mailboxes, chọn User têncủabạn@customdomain
- Chọn tab others và chọn Manage mailbox archive trong phần Mailbox archive chọn Enabled, làm tương tư cho user5 và user6
Task 2 – Create an email retention policy for test users
- Màn hình Microsoft 365 admin center, menu trái chọn Compliance.
- Màn hình Microsoft Purview menu trái chọn Data lifecycle management và chọn Microsoft 365
( New Microsoft Purview Portal: Home\data lifecycle management)
3. Màn hình Data lifecycle management, chọn tab Retention policies.
( New Microsoft Purview Portal:Policies\Retention policies)
4. Tại tab Retention policies, chọn + New retention policy.
5. Cửa sổ Name your retention policy, trong phần Name nhập: Test user email retention, ấn next
6. Cửa sổ Choose the type of retention policy to create, chọn option Static, ấn Next
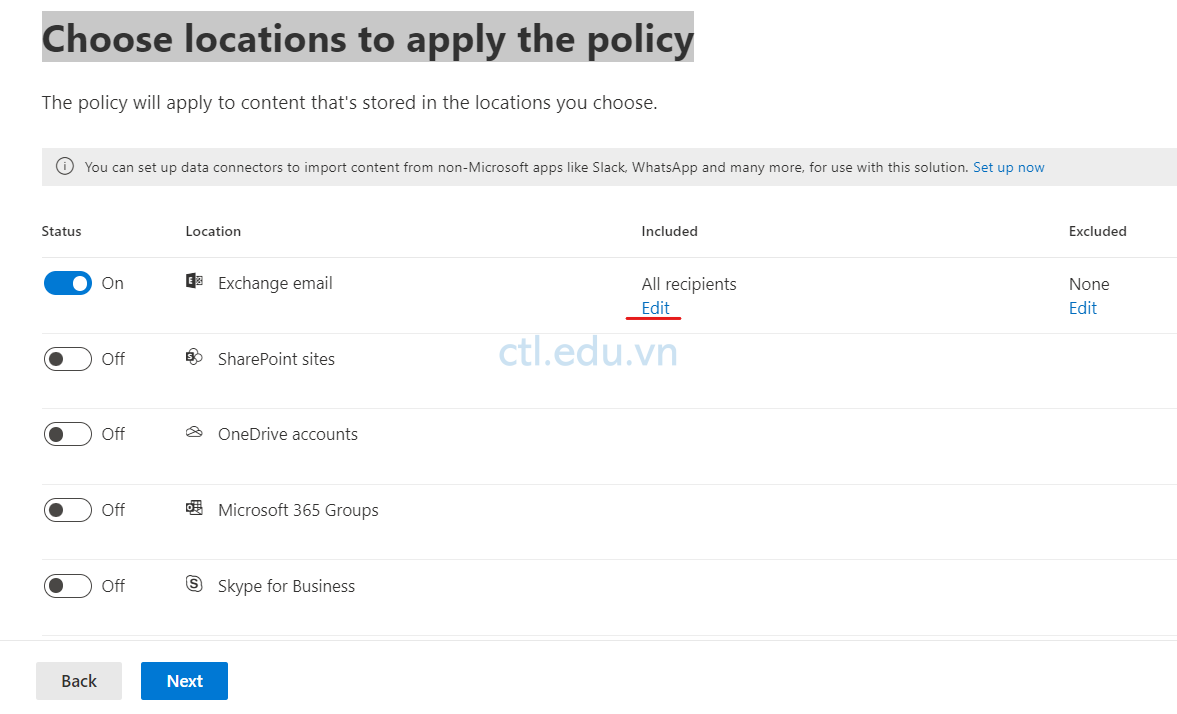
7. Cửa sổ Choose locations to apply the policy, trong phần Exchange ấn Edit
8. Check chọn user têncủabạn@customdomain, User5 và user6, ấn Done
9. Các location con lại chọn Off, ấn next
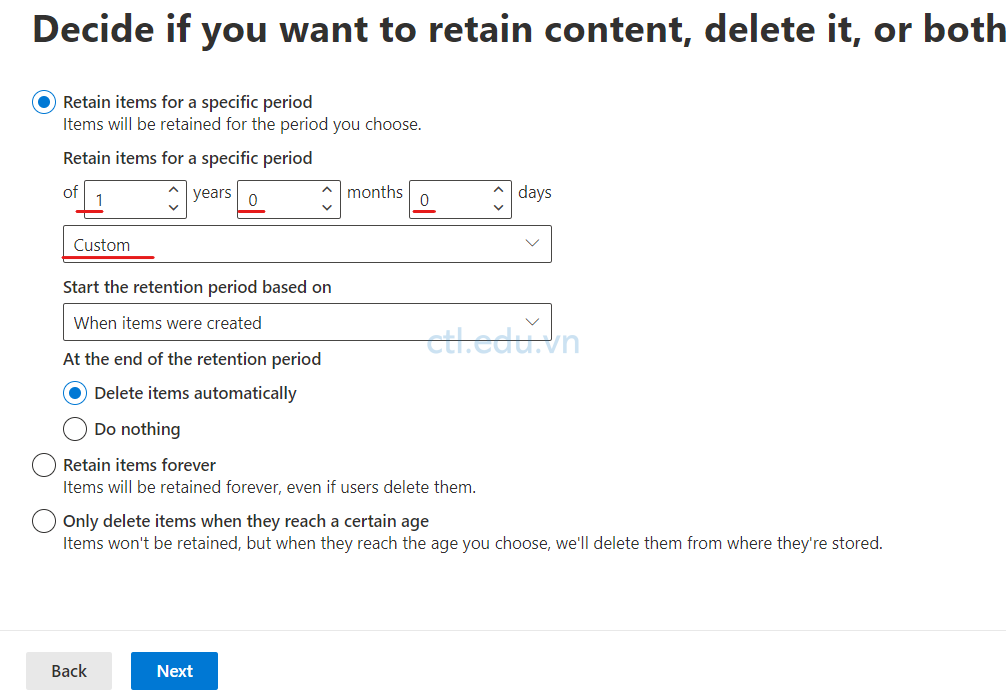
10. Cửa sổ Decide if you want to retain content, delete it, or both, chọn các thông tin sau
- chọn opton Retain items for a specific period, chọn Custom, và chọn Years – 1, Months – 0, Days – 0
- Start the retention period based on chọn When items were created
- At the end of the retention period chọn Delete items automatically
- Ấn Next, và Submit
Task 3 – Kiểm Tra Messaging records management (MRM) Policy to Arhive Email Messages
- Tại trình duyệt mở tab khác truy cập vào trang https://outlook.office365.com bằng user têncủabạn@customdomain
- Tại Outlook, chọn +New message, tạo email mới gửi cho user5@customdomain có nội dung tùy ý.
- Mở trình duyệt khác truy cập vào trang https://outlook.office365.com bằng user user5@customdomain
- User5 nhật được email mới, tại màn hình outlook, ở gốc trên bên phải chọn Settings (icon hình bánh răng) chọn View all Outlook settings.
- Cửa sổ Settings, chọn Retention policies, ấn +Add new policy, check chọn Test user email retention ấn Save
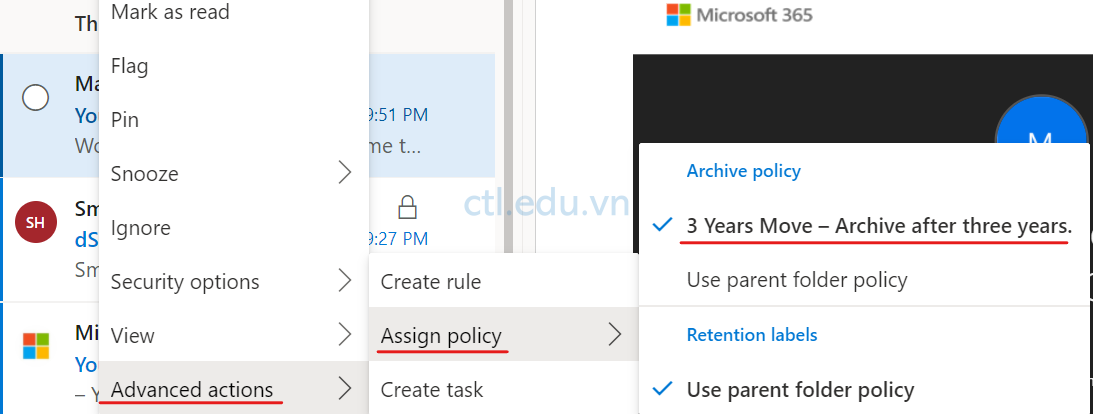
- Trở lại outlook, phải chuột vào email vừa nhận chọn Advanced Actions, chọn Assign Policy và chọn Test user email retention.
Hoàn tất bài Lab