Windows Server 2025 cung cấp SMB over QUIC ở tất cả các phiên bản (Standard, Datacenter, Azure), hỗ trợ client truy cập file từ xa an toàn bằng UDP 443 port với mã hóa TLS 1.3 mà , không cần kết nối VPN, đồng thời giới thiệu tính năng Client Access Control dựa trên certificate, đơn giản hóa việc truy cập an toàn vào file server từ computer client dùng Windows 11 trở lên.
Ở Module 2 bạn đã cấu hình SMB Over Quic With Active Directory Certificate Services, Bài lab này Tôi dùng Certificates do Trust Third Party Certificate cấp để cấu hình SMB Over Quic.
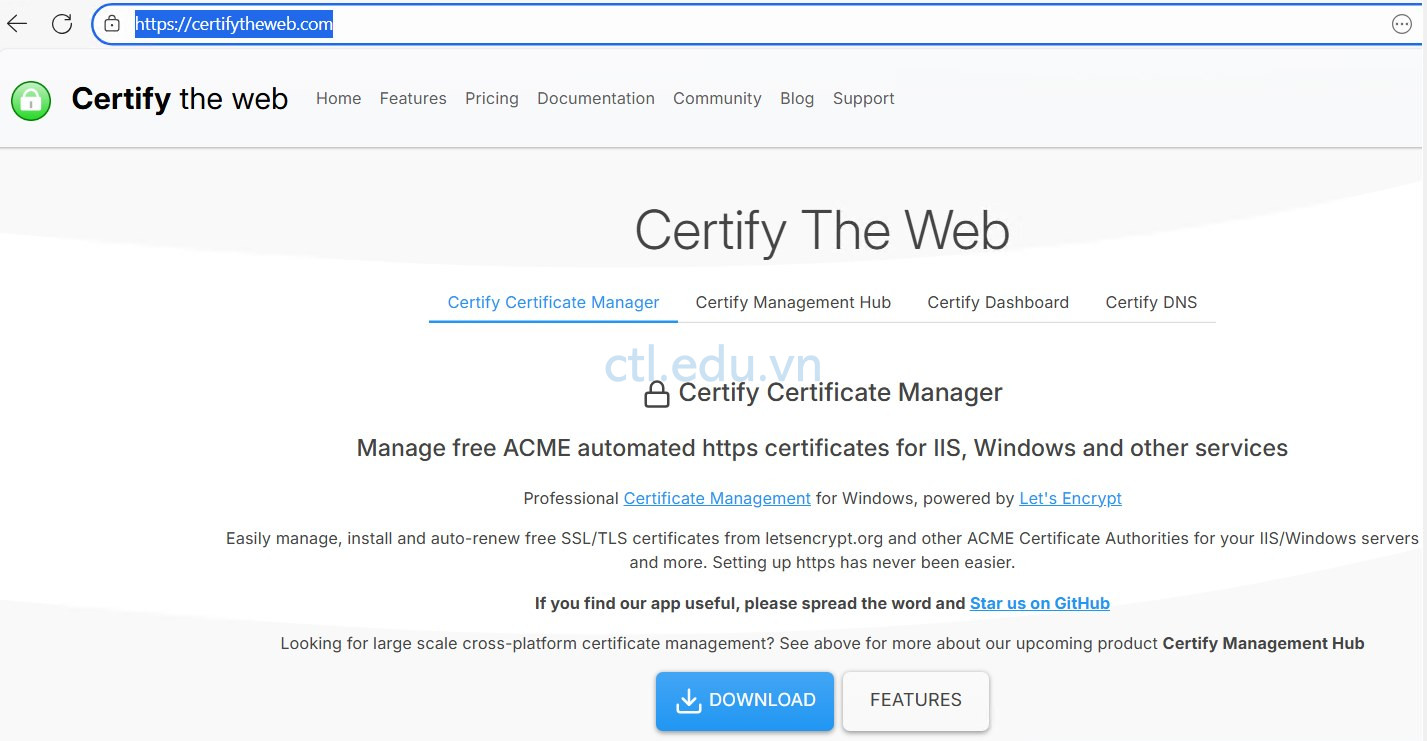
Bài Lab Tôi dùng Certify The Web yêu cầu SSL/TLS certificates miễn phí từ letsencrypt.org và các ACME Certificate Authorities khác cho IIS/Windows server. Certify The Web cung cấp một cách đơn giản để sử dụng Let’s Encrypt và các CA ACME khác, với giao diện người dùng dễ sử dụng.
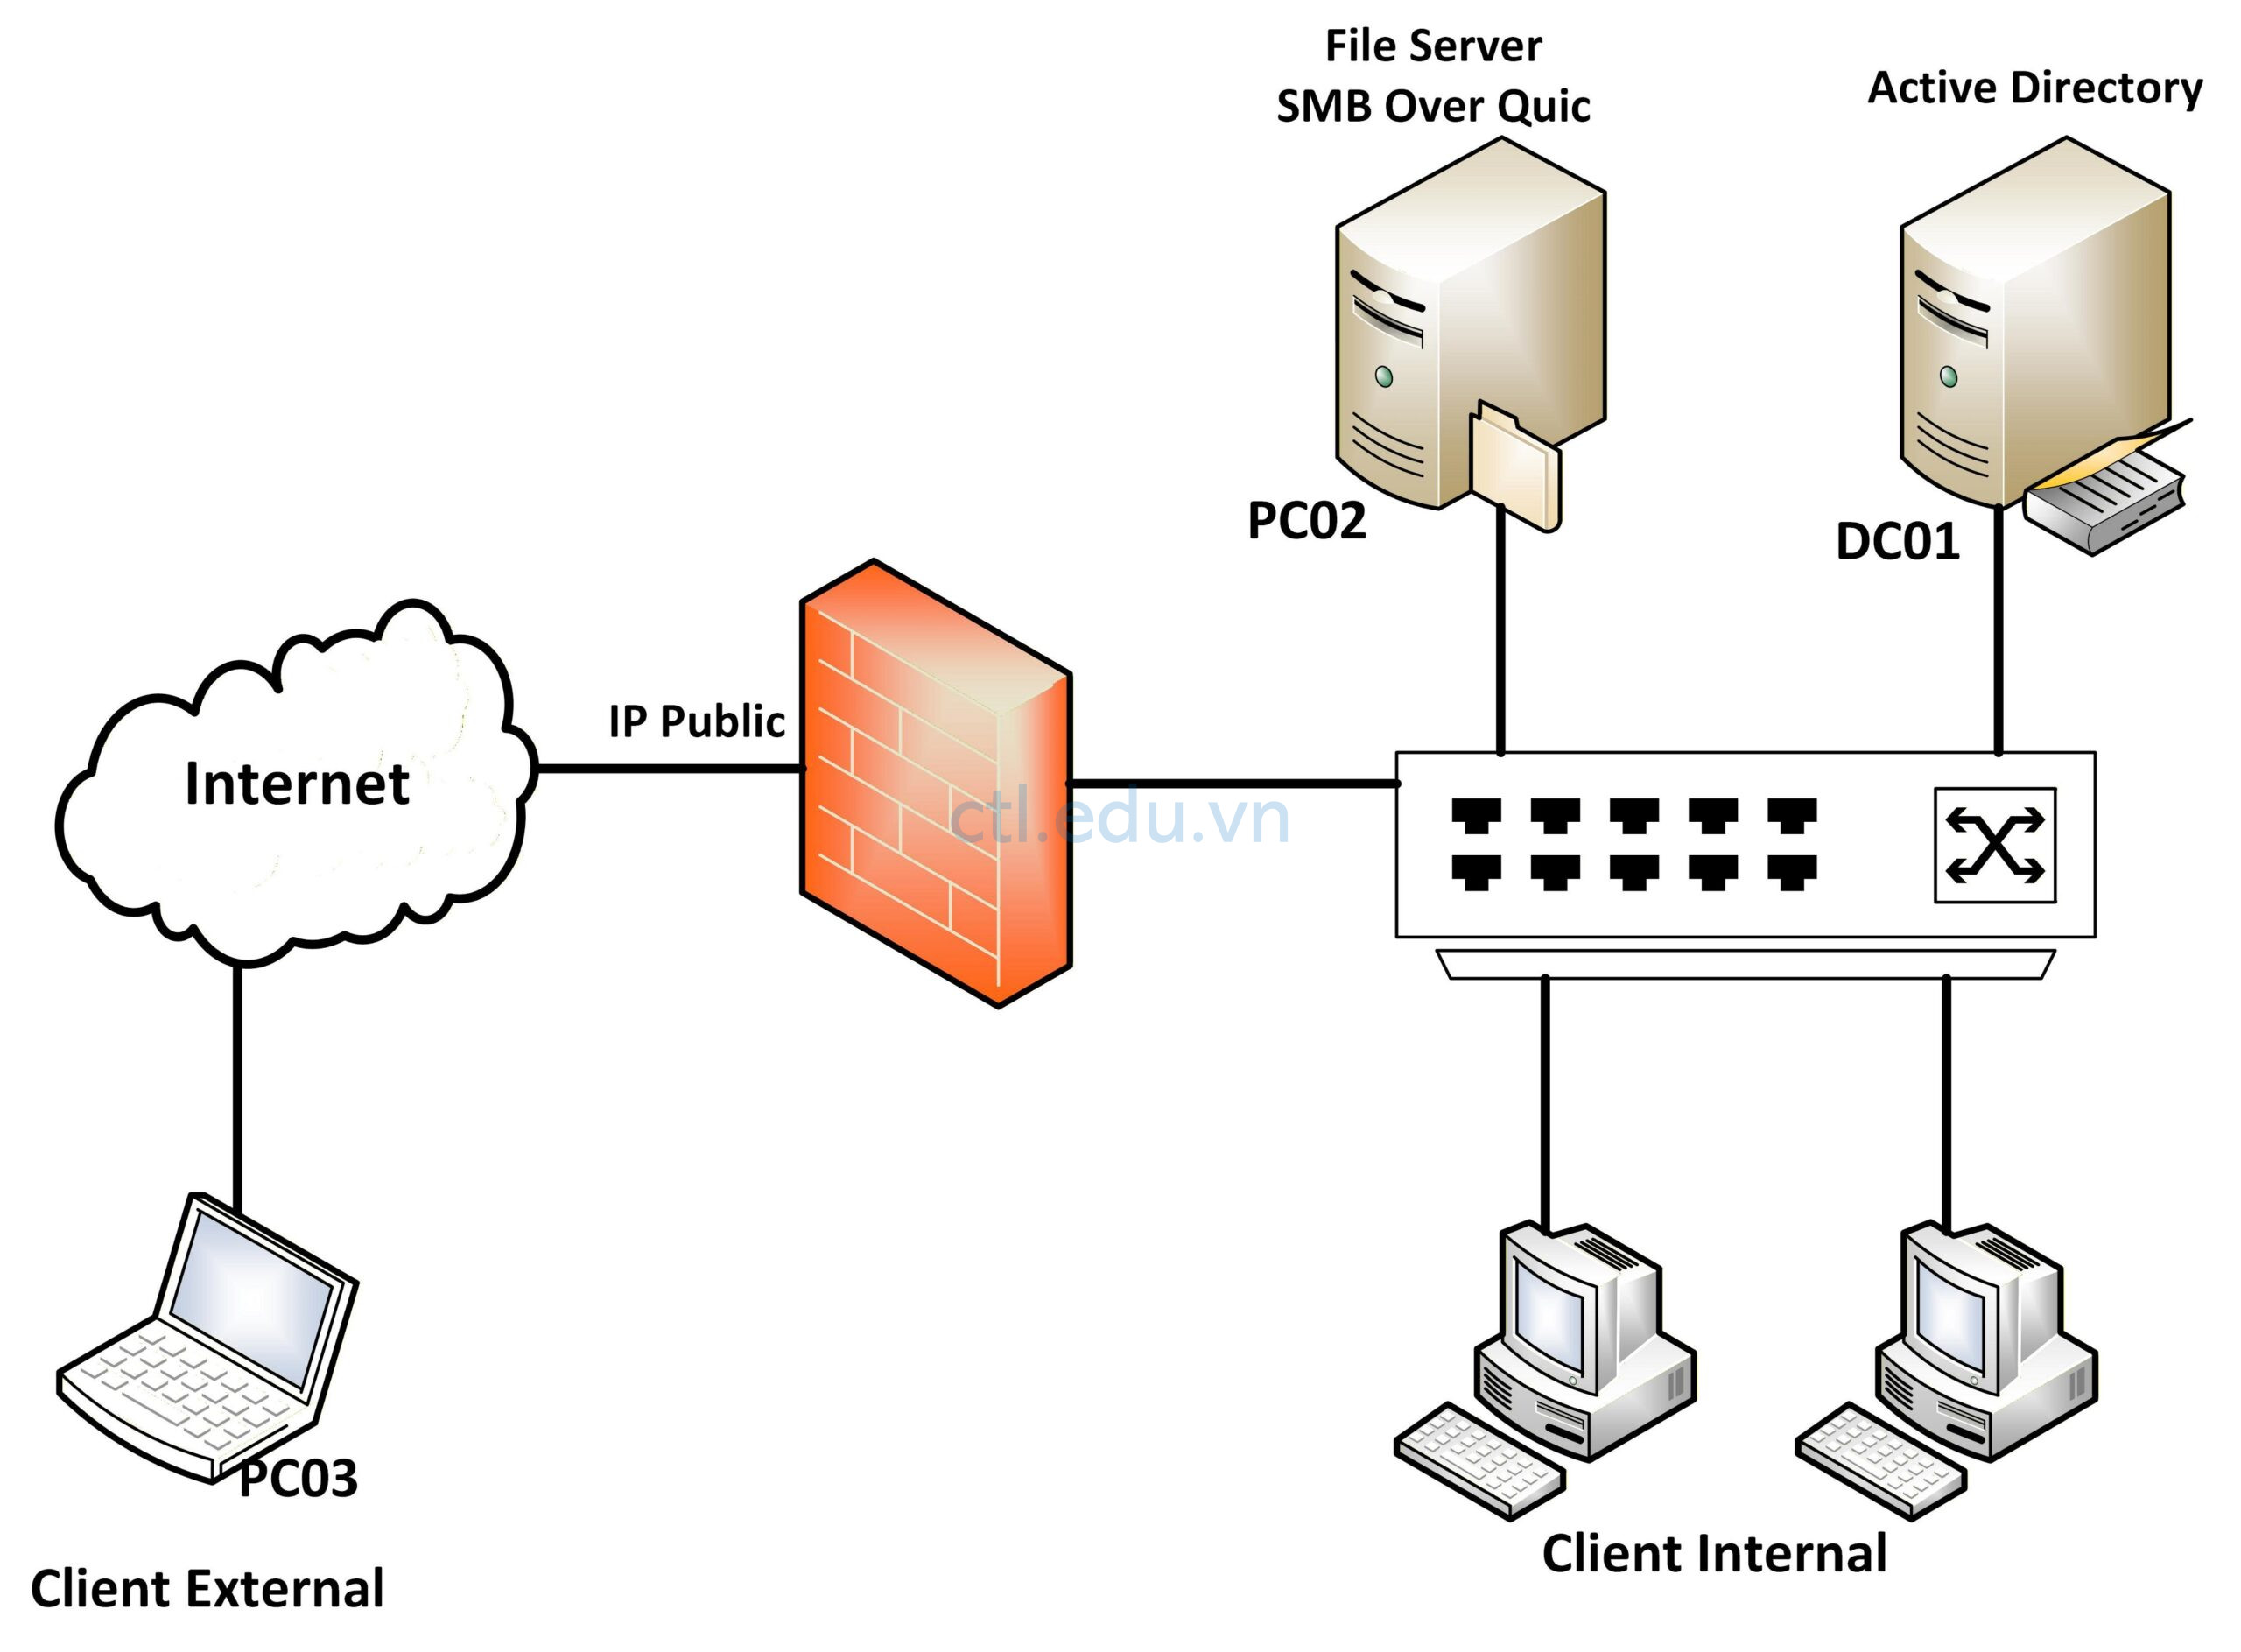
Mô hình lab gồm SMB Over Quic With Trust Third Party Certificate:
- DC01 : Domain Controller (Windows Server 2025)
- PC02: File Server (Member server Windows Server 2025), tạo và share Folder Data.
- PC03: External Client (Windows 11 24H2)
- Đăng ký Public domain (trong bài lab Tôi sử dụng domain ctloc.click)
Ghi chú: Tên domain public và domain local có thể khác nhau.
Cấu hình SMB Over Quic With Trust Third Party Certificate gồm các nước sau:
Task 1. Request Trust Third Party Certificate
- Tại PC02 đã Join domain, Vào trình duyệt truy cập vào URL https://certifytheweb.com
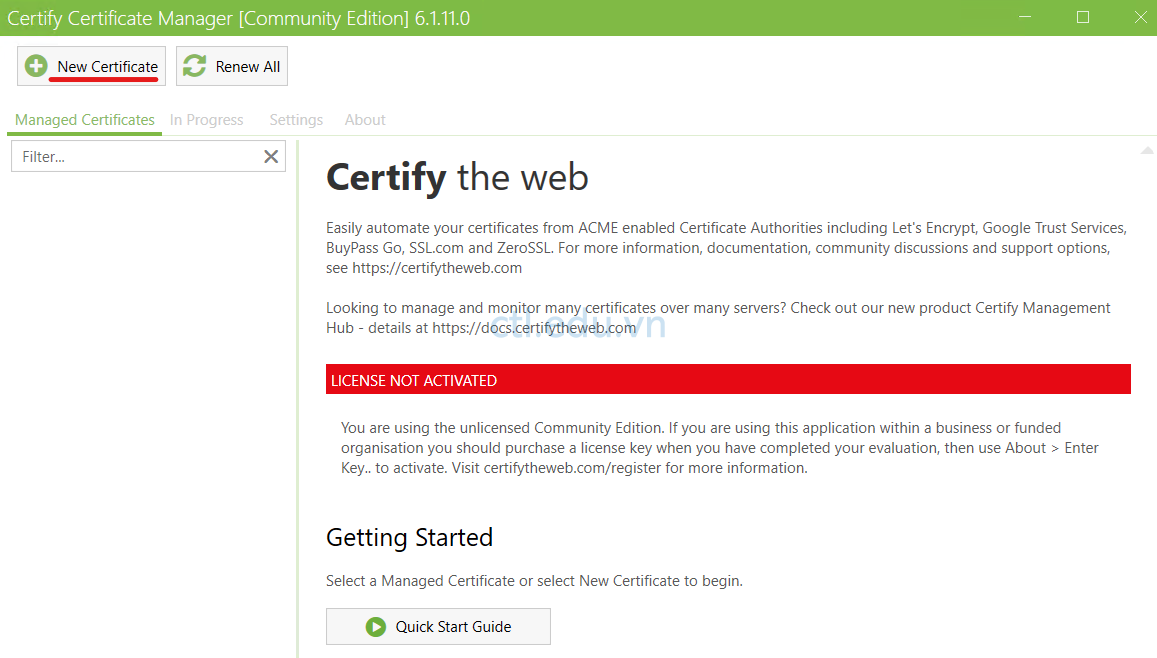
- Download và cài Certify The Web trên PC02.
3. Thực thi Certify The Web, và ấn New Certificate.
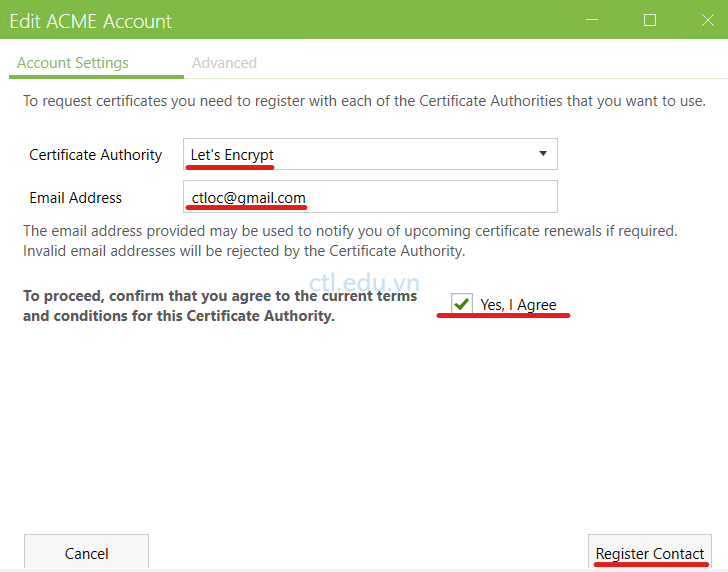
4. Tại tab Account settings chọn các thông số sau:
- Certificate Authority: chọn Let’s Encrypt
- Email Addess: nhập vào Email các nhân của bạn
- chọn checkbox : Yes, I Agree
- Ấn Register Contact
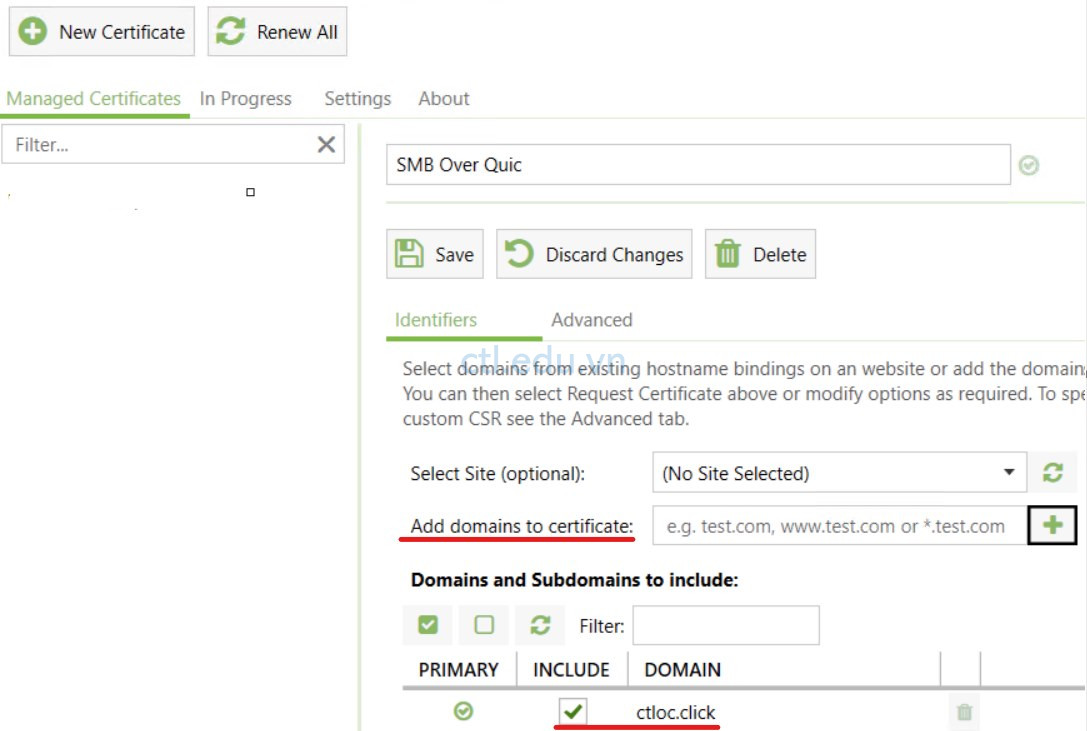
5. Tại tab Managed Certificates, trong phần Add Domain to certificate nhập vào tên domain public của bạn (trong bài lab Tôi dùng domain ctloc.click), và ấn dấu +
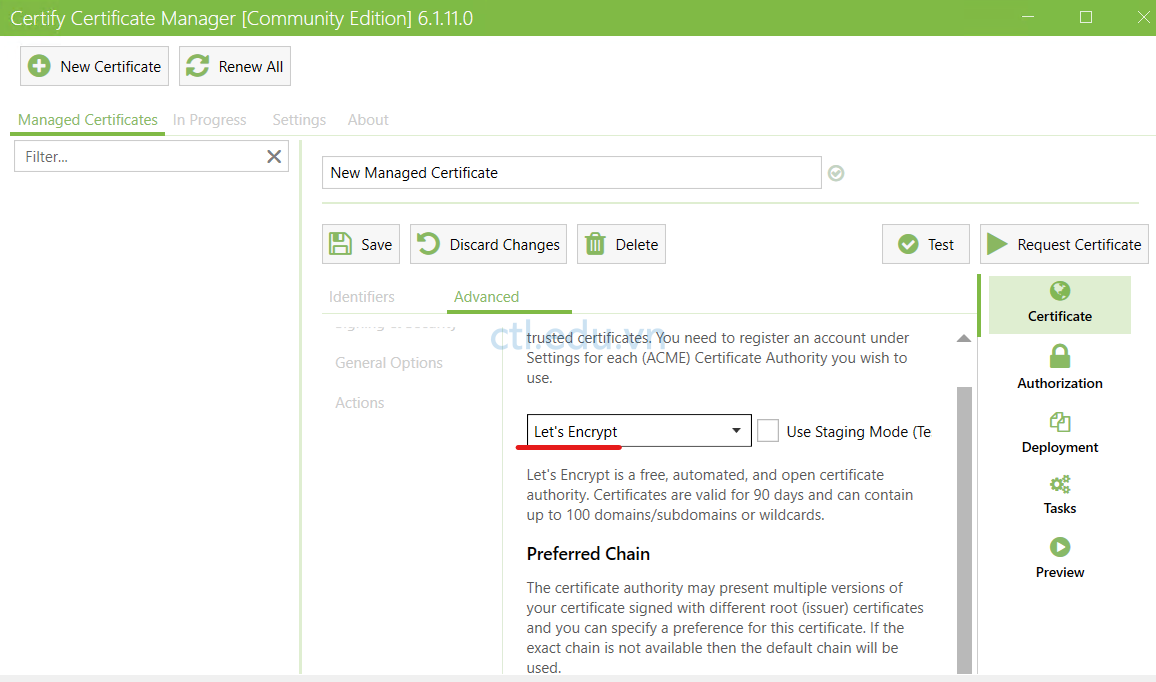
6. Qua tab Advanced, trong phần Certificate Authority: chọn Let’s Encrypt
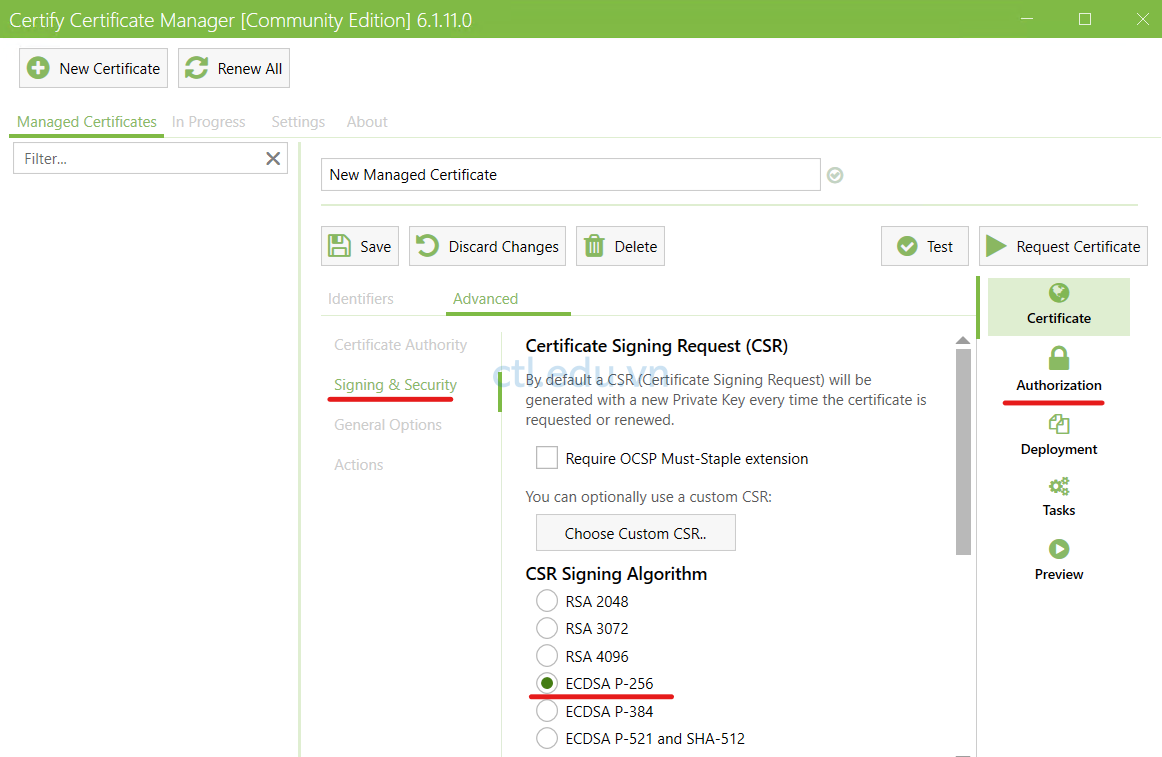
7. Cũng tại tab Advanced, chọn Signing & Security, trong phần CSR Signing Algorithm chọn option ECDSA P-256, và chọn Authorization
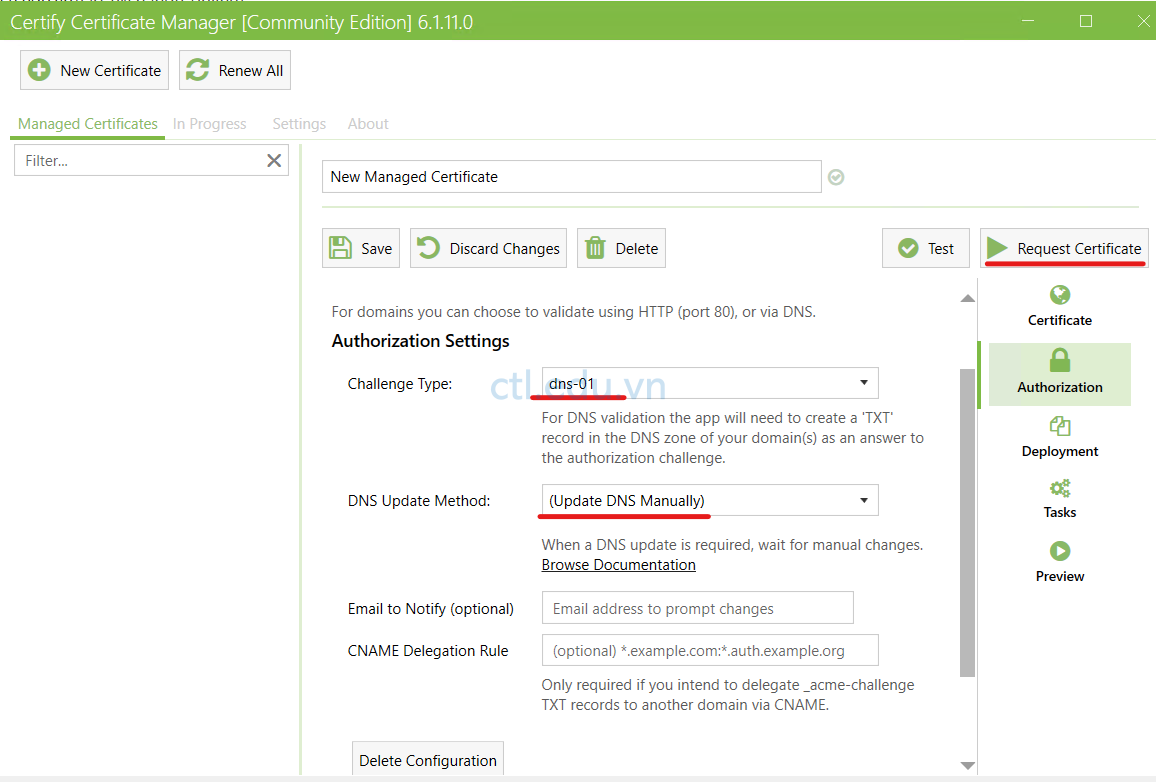
8. Trong phần Authorization Settings chọn các thành phần sau:
- Challenge Type: chọn dns-01
- DNS Update Method: Chọn Update DNS Manually
- Ấn Request Certificate
9. Certify The Web yêu cầu bạn tạo record TXT với các giá trị như trong hình để xác minh domain public là do bạn sở hữu.
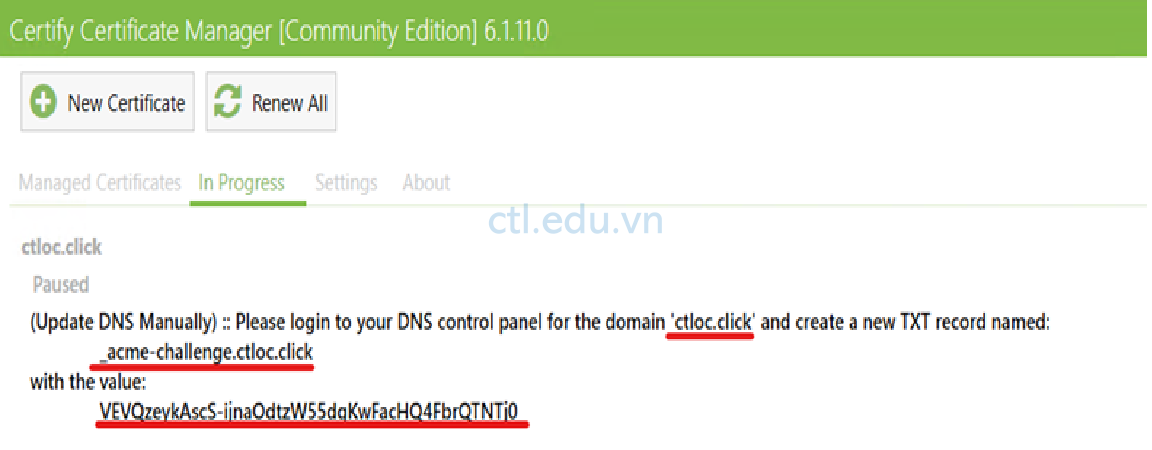
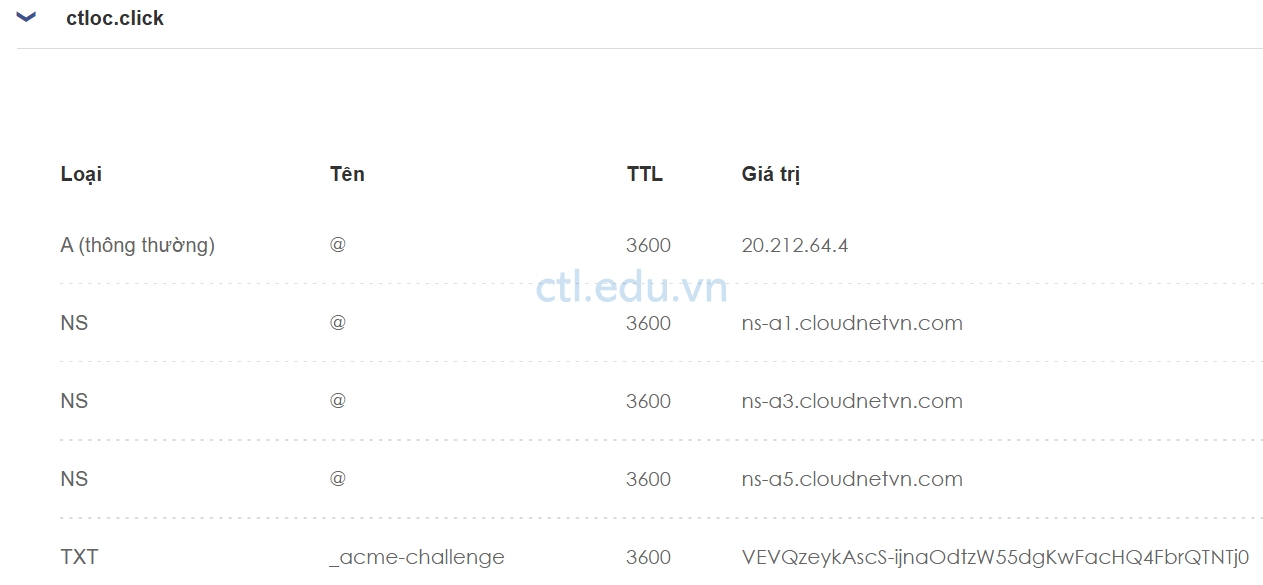
10. Vào DNS của nhà cung cấp (ISP) nơi bạn đăng ký tên miền, tạo TXT Record với các giá trị Certify The Web yêu cầu ở bước 9.
11. Trở lại Certify The Web tại tab Managed Certificates ấn Request Certificate, chờ quá trình request thành công.
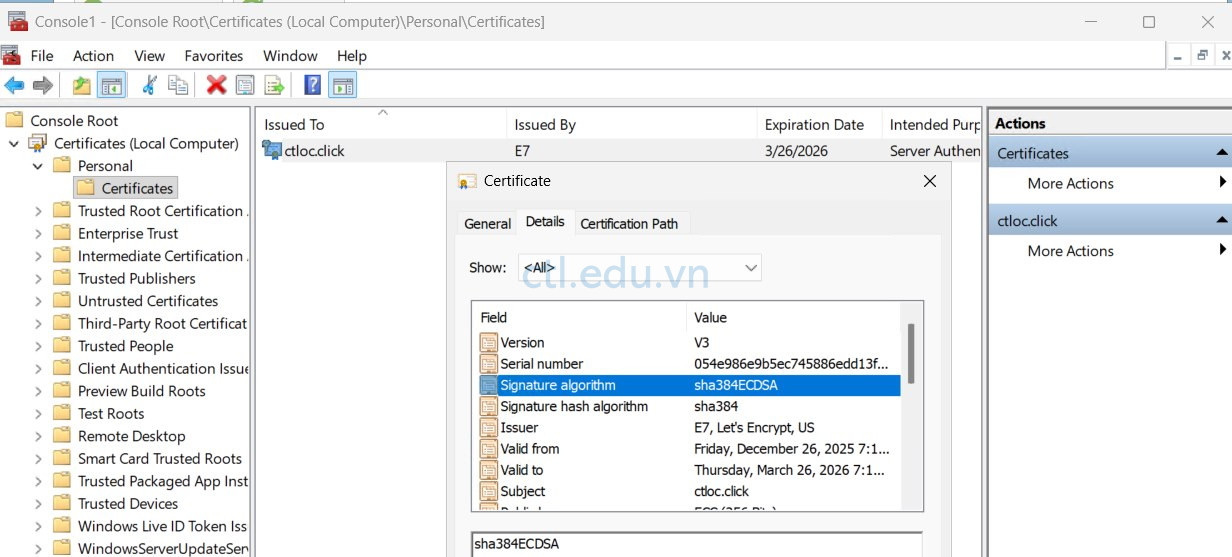
12. Tại PC02 vào Run gõ lệnh MMC
13. Vào menu file chọn Add/remove snap in, tìm và chọn Certificates ấn Add, chọn option Computer Account, ấn Next và Finsh, ấn OK
14. Chọn Certificates (Local Computer) > Personal > Certificates, quan sát thấy có certificate ctloc.click mới vừa request từ Certificate the Web.
Task 2. Cấu Hình SMB Over Quic dùng Windows Admin Center
- Cũng tại máy PC02 vào trình duyệt truy cập URL https://www.microsoft.com/en-us/evalcenter/download-windows-admin-center
- Download và cài Windows Admin Center
- Tại Windows Admin Center, Add và connect vào PC02
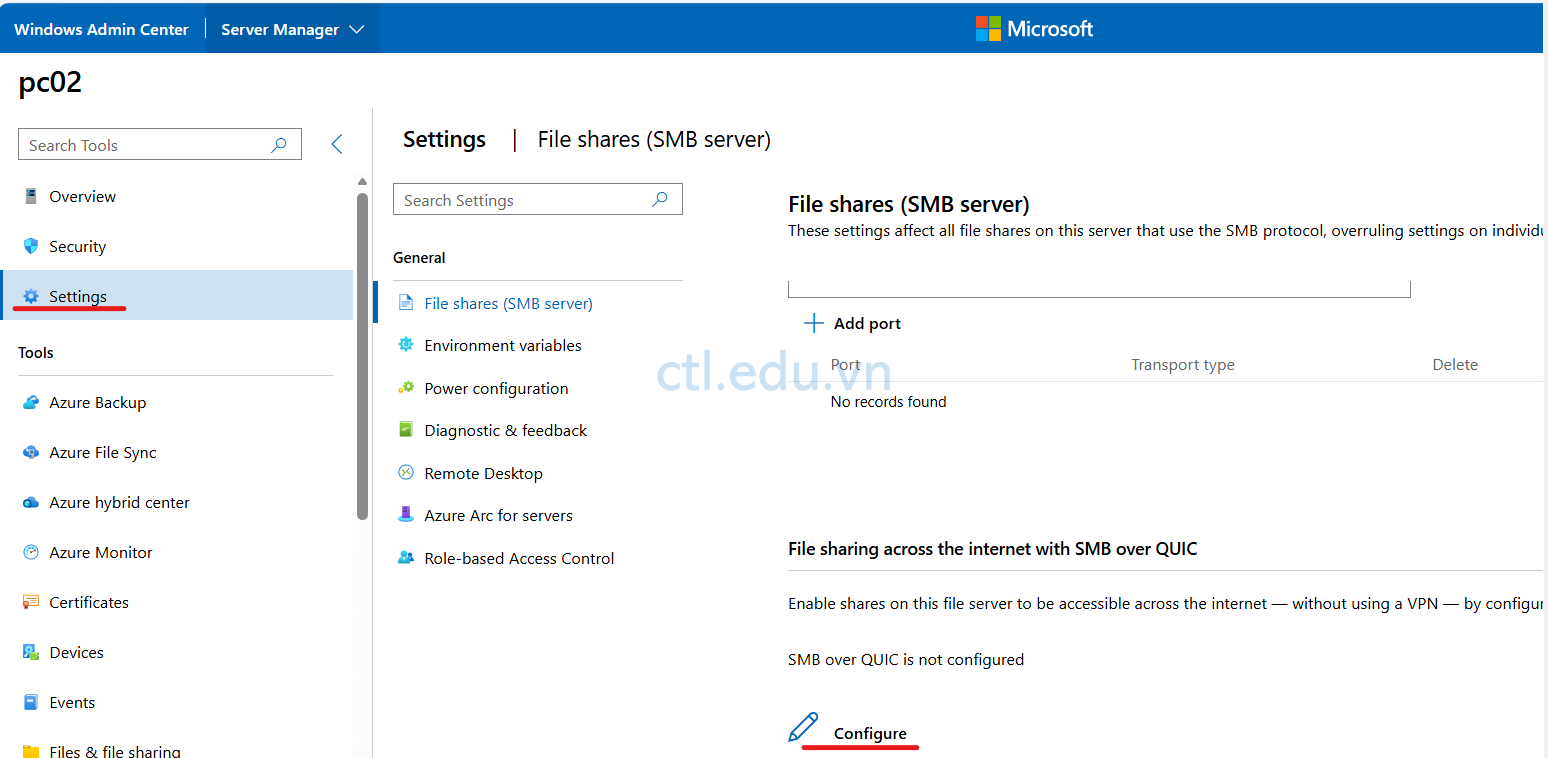
- Menu trái chọn Settings, chọn File shares (SMB server), trong phần File sharing across the internet with SMB over QUIC chọn Configure
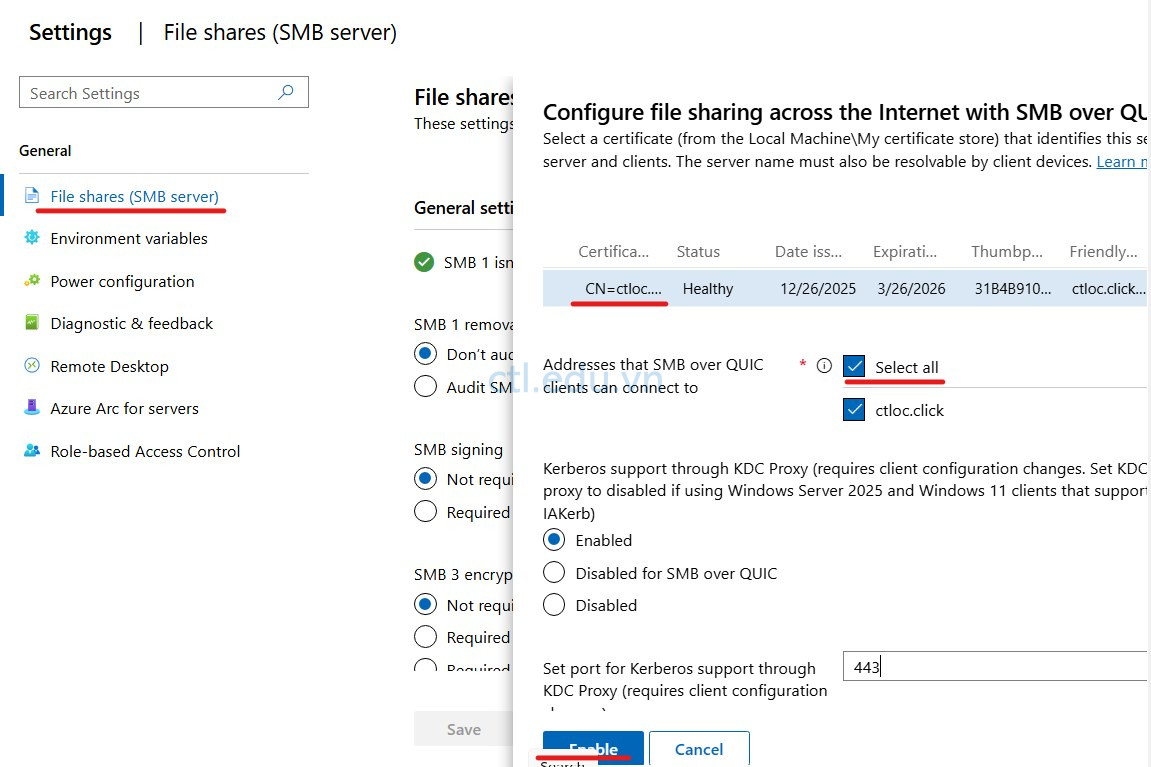
5. Cửa sổ Configure file sharing across the Internet with SMB over QUIC, chọn Certificate bạn đã yêu cầu ở task 1.
6. Trong phần Addresses that SMB over QUIC clients can connect to chọn option Select All và ấn Enable.
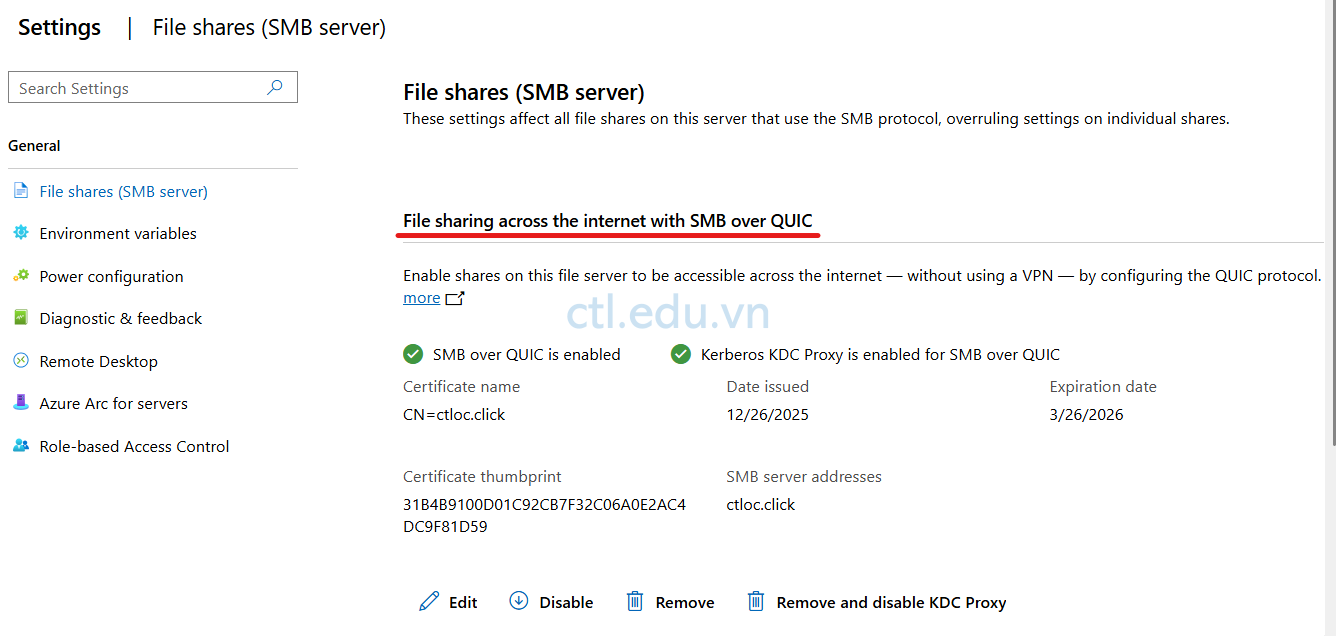
7. Chờ quán trình enable SMB Over Quic thành công
Task 3. Kiểm tra SMB Over Quic
- Tại Firewall, NAT UDP port 443 vào PC02
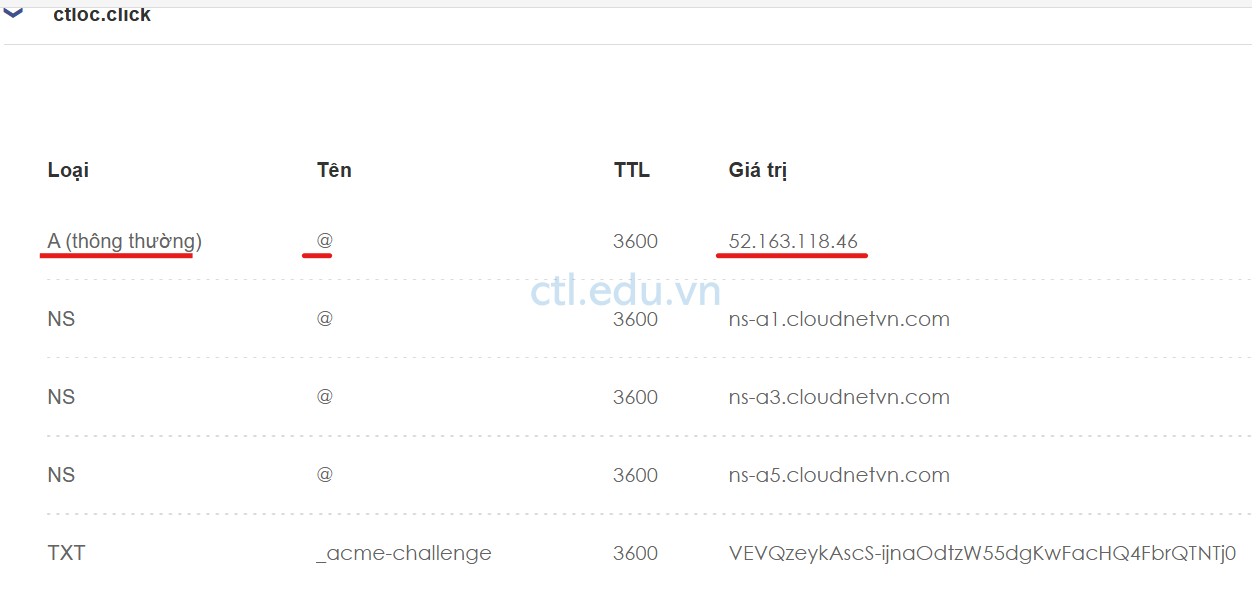
- Vào DNS của nhà cung cấp (ISP) nơi bạn đăng ký tên miền, tạo A Record trỏ vể IP public của Firewall.
3. Tại máy Windows 11 (External Client) vào Run gõ lệnh CMD và thực hiện lệnh sau:
Net Use H: \\ctloc.click\data /transport:Quic
Nhập user name và password trên domain, Kiểm tra kết nối thành công.
External User không cần kết nối VPN vẫn connect vào file server trên PC02 thành công.

4. Client External cũng có thể dùng Powershell để connect đến file server trên PC02 dùng SMB over Quic
New-SmbMapping -LocalPath L: -RemotePath \\ctloc.click\data -TransportType Quic -UserName tanloc\Administrator -Password 1234567890?aA
Hay lệnh:
New-PSDrive -Name “J” -Root “\\ctloc.click\data” -Persist -PSProvider “FileSystem” -scope global -Credential tanloc\administrator